The Happy Pear Podcast
In this episode, we sit down with Dr. Karen Gurney, a consultant clinical psychologist and certified psychosexologist, to dive into a conversation about sexual wellbeing and how it changes throughout the course of life—especially after having children.
Dr. Gurney is a leading expert in sexual health, currently serving as Head of Wellbeing Services at the renowned 56 Dean Street clinic and Director of The Havelock Clinic in London. She is also an author, TED speaker, and regular contributor to major publications like Vogue and Marie Claire. Dr. Gurney’s latest book, How Not to Let Having Kids Ruin Your Sex Life, has opened up conversations about the realities of sex in long-term relationships and marriage, and how to maintain intimacy while navigating the challenges of parenthood.
In this insightful discussion, Dr. Gurney shares her expert advice on how couples can foster healthy sexual relationships after having children, the psychological shifts that often occur in the postpartum phase, and the impact of societal expectations on intimacy. She also offers practical tools to reframe how we think about sex in marriage and long-term partnerships, helping couples reconnect and thrive sexually despite life’s many demands.
Episode 173
Main Topics Covered:
- Sex after kids: How the arrival of children can affect sexual intimacy, and how to rekindle desire while managing the pressures of parenthood.
- Reframing sex in long-term relationships: The importance of shifting your mindset about sex in marriage and understanding that desire changes over time.
- Common challenges faced by parents: The psychological and emotional toll of parenthood on intimacy, and how to navigate the changes as a couple.
- Practical tips for maintaining a healthy sex life: Simple yet effective strategies for improving sexual wellbeing, including communication, redefining intimacy, and managing expectations.
- Dr. Gurney’s new book: How Not to Let Having Kids Ruin Your Sex Life—an essential guide for couples looking to maintain connection and passion after starting a family.
Tune in for a candid, expert-driven conversation that sheds light on the realities of sex after kids, offering practical solutions for couples who want to keep their relationships intimate, vibrant, and fulfilling.
Lots of love,
Dave & Steve
SPONSORS & DISCOUNT CODES:
Namawell Juicers are AMAZING! They have absolutely revolutionised the juicing game. We have an exclusive 10% discount for you!
Enter the code HAPPYPEAR10
LINK: https://namawell.com/collections/juicers/products/nama-j2-cold-press-juicer?ref=thehappypear
VIVOBAREFOOT: Vivobarefoot Footwear have given our listeners an exclusive 20% discount and if you buy now you also get free access to their incredible course showcasing some of the biggest names in the health and wellness space.
Enter the code HAPPYPEAR20
LINK: https://www.vivobarefoot.com/uk/the-happy-pear
THE WHOLE HEALTH TRIBE – Join our community
LINK: https://eu1.hubs.ly/H0bmqxd0
THE HAPPY PEAR RECIPE CLUB – Blending health and happiness through a range of over 500 delicious plant-based recipes.
LINK: https://eu1.hubs.ly/H0bmqss0
Sign up to our Newsletter, for updates on our latest recipes, events, and news.
LINK: https://share-eu1.hsforms.com/1hKXaawjoQOONmJe4EXkCdwf92py
Produced by Sean Cahill & Sara Fawsitt

Healthier Pumpkin Mac & Cheese – Lower Fat
Takes 30 minutes
Serves 6
Ingredients
Macaroni:
- 300 g whole wheat or gluten-free macaroni about 3 cups dry
Pumpkin Cheese Sauce:
- 300 g pumpkin puree about 1¼ cups or freshly cooked pumpkin
- 60 g cashew nuts about ½ cup
- 3 tbsp nutritional yeast
- 240 ml plant-based milk 1 cup
- 1 tbsp lemon juice
- 1 tbsp Dijon mustard
- 1 clove of garlic
- ½ tsp smoked paprika optional, for a smoky flavour
- Salt and pepper to taste
Breadcrumb Topping:
- 40 g bread crumbs about ⅓ cup
- 2 tbsp oil
- Pinch salt
- 2 sprigs of thyme or ½ tbsp dried thyme
- 2 tbsp nutritional yeast
Instructions
- Prepare the pasta: Cook the macaroni according to package instructions. Drain and set aside.
- Make the sauce: In a blender or food processor, combine the pumpkin/ pumpkin puree, cashews, nutritional yeast, almond milk, lemon juice, Dijon mustard, garlic powder, onion powder, smoked paprika, salt, and pepper. Blend until smooth and creamy. Taste and adjust seasoning as needed.
- Heat the sauce: Pour the blended sauce into a saucepan and heat over medium-low heat, stirring frequently until the sauce thickens slightly (about 5-7 minutes). You want it to be warm but not boiling.
- Prepare Bread Crumb Topping: Combine the bread crumbs with oil, salt, and either chopped fresh thyme leaves (ensure to remove leaves from stalk) or dried thyme.
- Combine pasta and sauce: Add the cooked pasta to the sauce and stir until the pasta is fully coated.
- Assemble Dish: Transfer the pasta mixture to a casserole dish (24cm x 16cm x 4cm deep) , level it out, and evenly spread the bread crumb topping over it.
- Bake: Bake for 5 minutes in the oven or until the bread crumbs are golden brown or 3-5 minutes in an airfryer or until the breadcrumbs go golden.
- Serve and enjoy!
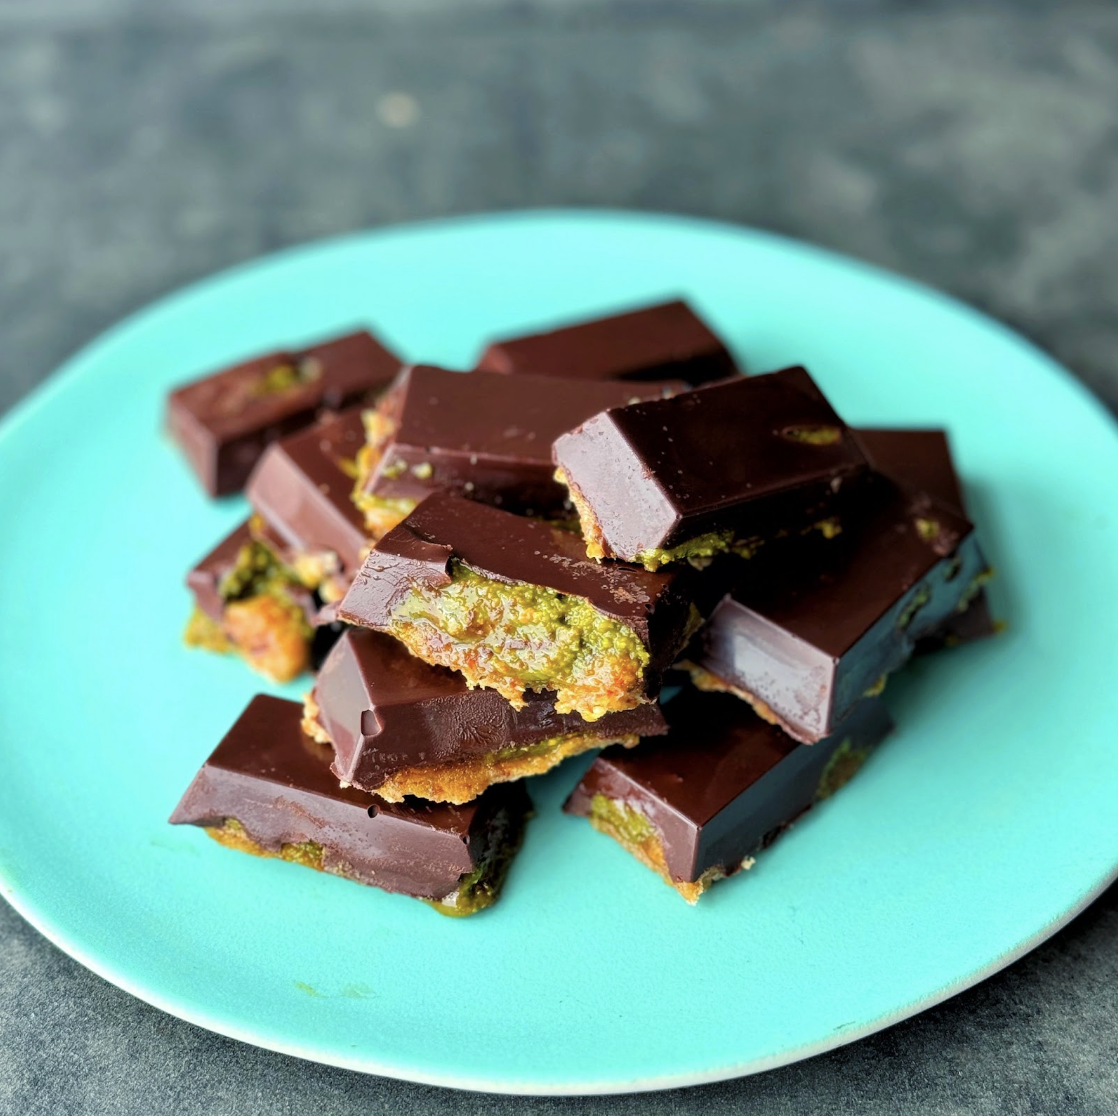
Triple Layer Chocolate Pistachio Bites
Takes 30 minutes
Serves 12
Ingredients
Chocolate Layer
- 200 g Dark chocolate 1¼ cups chopped or chips
Pistachio Cream Layer
- 150 g shelled pistachio nuts 1 cup
- 1 tbsp matcha powder
- 2 tbsp coconut oil
- 3 tbsp maple syrup
- 1 tsp vanilla extract
Date Marzipan Layer
- 100 g almonds ¾ cup
- 150 g pitted dates ¾ cup packed
- 2 tbsp coconut oil
- Pinch salt
Instructions
Melt Chocolate, layer into mould and freeze
- Chop the chocolate into small pieces and melt using a bain marie or microwave.
- Divide between all the squares in the mould. You want to fill each square approx ⅓ full with chocolate and use a small spoon to brush the chocolate up the sides a little so they form little cups.
- Put the chocolate filled moulds into the freezer so the chocolate hardens for 15 mins.
Make pistachio layer and layer on
- Add the shelled pistachio nuts to a food processor along with the coconut oil, maple syrup and vanilla extract and blend till it forms a silky smooth pistachio butter. This will take a few mins and if your food processor is heating up give it a little break.
- Once the chocolate is set, remove from the freezer and spoon a small amount of the pistachio butter onto each square. Again it should fill approx ⅓ of each cup, so now with the chocolate and pistachio butter the cups in the mould should be ⅔ full.
Blend nuts and dates
- Clean the food processor bowl and blend the almonds until they reach a bread crumb like consistency. Add the pitted dates and coconut oil and pinch of salt and blend until they come together into a smooth unified ball. This should take 2-3 mins.
Fill and cool to set
- Carefully divide this mixture between each of the squares, filling each one.
- Put in the fridge to set for 20 mins before removing each square and enjoying!
Notes
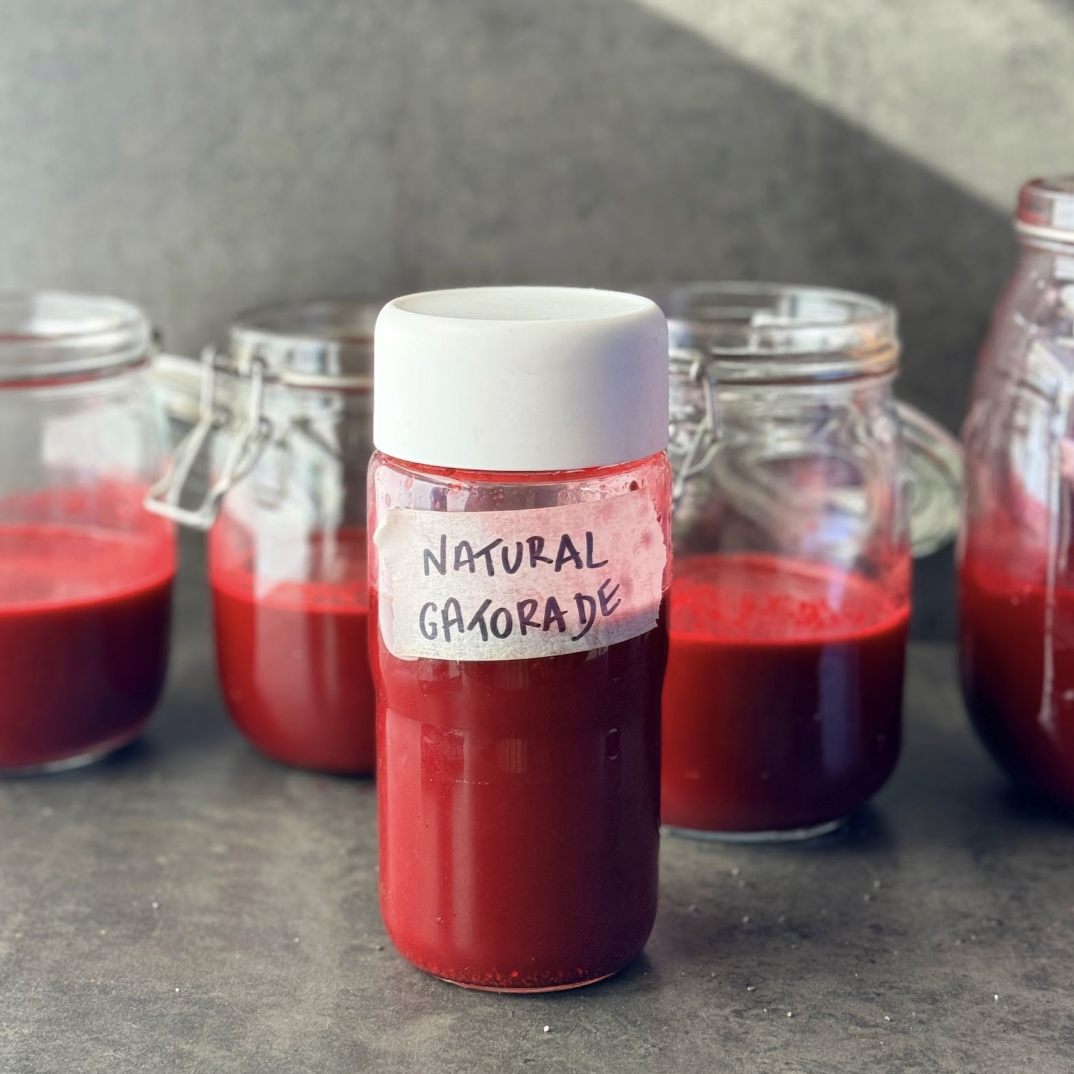
Natural Gatorade
Takes 20 minutes
Serves 10
Ingredients
- 4½ cups beet juice or juice from 6 medium beets
- 100 g spinach or kale 3 cups
- 2 cucumbers
- 2 large oranges
- 4 apples approx 600g
- 2 lemons
- 6- inch piece of fresh ginger
- 6 cm of Fresh turmeric or 1 tsp dried turmeric
- Pinch black pepper
- 1½ tsp sea salt or Himalayan salt
- 6 tbsp apple cider vinegar
- 1 Litre coconut water
- 4 tbsp Chia seeds – Omega-3 fatty acids fibre, calcium, magnesium, and antioxidants. Chia seeds will absorb liquid and form a gel, which adds texture and helps with hydration.
- Tart cherry juice 240ml/ 1 cup – This will provide anti-inflammatory and muscle recovery properties
Instructions
- Make the base juice: Peel the lemons and oranges. Juice the beet, kale, cucumbers, apples, oranges and lemon along with the ginger and turmeric.
- Add the rest of the ingredients: To the juice add the black pepper to help with the absorption of the main antioxidant in the curcuman in the turmeric, the coconut water, apple cider vinegar, chia seeds and the tart cherry juice.
- This drink is the perfect balance between sweet and savoury and it literally looks like blood. That is part of the reason why beetroot juice is so good and helps dilate your blood vessels encouraging optimum oxygen delivery!
The Happy Pear Podcast
In this episode we are joined by the brilliant Patrick Holford, a leading voice in the world of nutrition and alternative health. With over 36 books translated into 29 languages and decades of experience, Patrick is a British author, entrepreneur, and advocate for nutritional therapy. His work has helped shape modern views on the power of food and supplements to transform health, with regular appearances on UK and international television and radio.
In this engaging conversation, Patrick shares his wisdom on how to take control of your health through diet, lifestyle, and nutritional supplements. The episode dives deep into Patrick’s holistic approach to wellbeing, offering practical advice on how to implement small changes that make a big impact. From boosting brain power to supporting your immune system, Patrick’s insights are invaluable for anyone looking to improve their overall health.
Episode 172
Main Topics Covered:
- Patrick’s personal health journey and how he became an advocate for nutritional therapy.
- The connection between food, brain function, and mental health.
- How to enhance your immune system naturally.
- The role of supplements in modern diets—what to take and what to avoid.
- Practical tips on achieving optimal health through simple dietary changes.
- The science behind a low glycemic diet and how it can transform your energy levels.
- How stress impacts your body and what you can do to mitigate its effects.
Whether you’re new to alternative nutrition or a seasoned wellness enthusiast, this episode offers valuable takeaways that can help you live a healthier, more balanced life.
Lots of love,
Dave & Steve
SPONSORS & DISCOUNT CODES:
Namawell Juicers are AMAZING! They have absolutely revolutionised the juicing game. We have an exclusive 10%
Enter the code HAPPYPEAR10
LINK: https://namawell.com/collections/juicers/products/nama-j2-cold-press-juicer?ref=thehappypear
VIVOBAREFOOT: Vivobarefoot Footwear have given our listeners an exclusive 20% discount and if you buy now you also get free access to their incredible course showcasing some of the biggest names in the health and wellness space.
Enter the code HAPPYPEAR20
LINK: https://www.vivobarefoot.com/uk/the-happy-pear
THE WHOLE HEALTH TRIBE – Join our community
LINK: https://eu1.hubs.ly/H0bmqxd0
THE HAPPY PEAR RECIPE CLUB – Blending health and happiness through a range of over 500 delicious plant-based recipes.
LINK: https://eu1.hubs.ly/H0bmqss0
Sign up to our Newsletter, for updates on our latest recipes, events, and news.
LINK: https://share-eu1.hsforms.com/1hKXaawjoQOONmJe4EXkCdwf92py
Produced by Sean Cahill & Sara Fawsitt
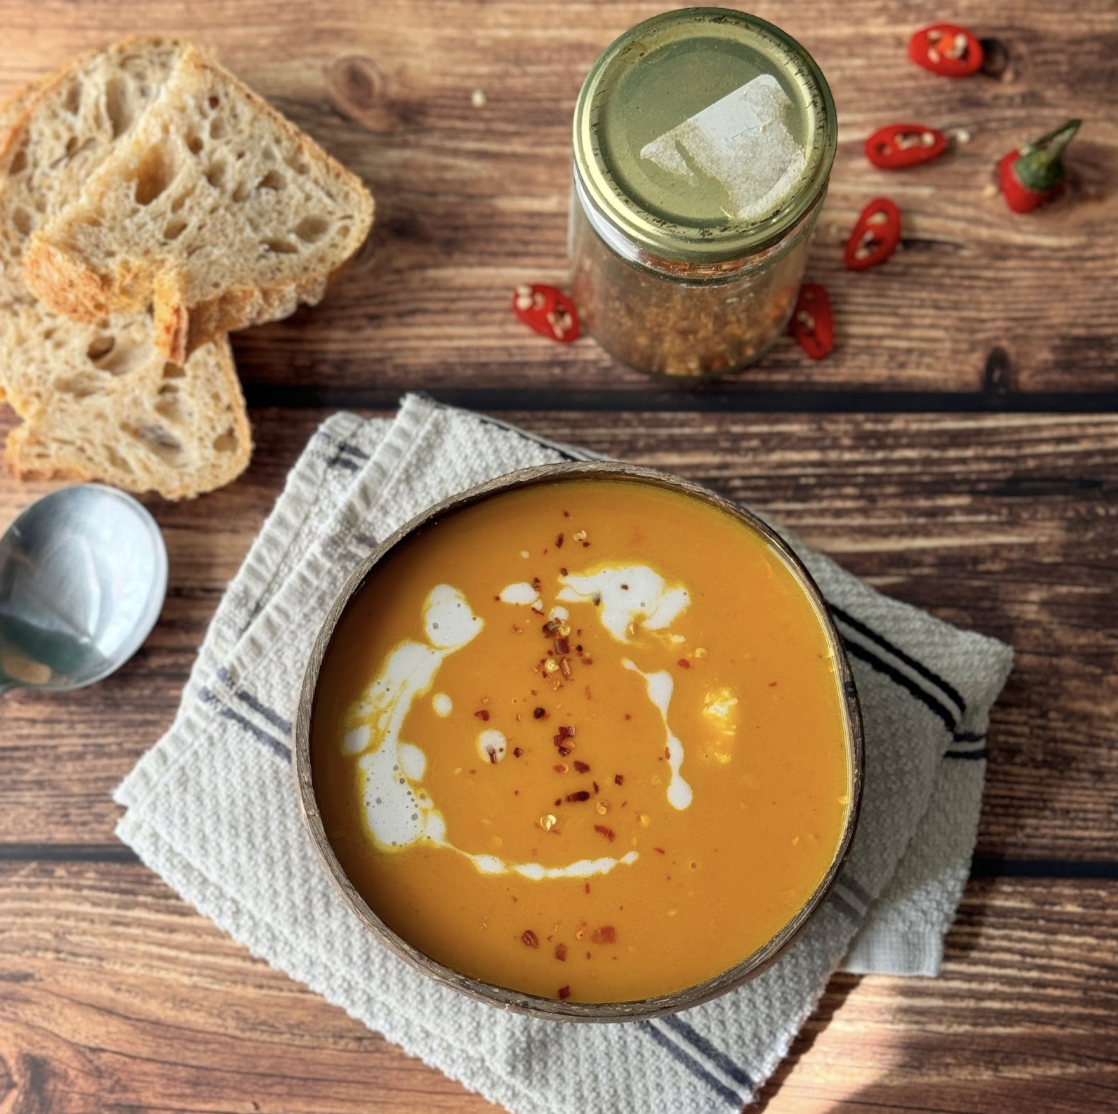
Comforting Pumpkin Soup
Takes 30 minutes
Serves 10
Ingredients
- 2 medium pumpkins approx 2kg
- 4 carrots
- 1 onion
- 10 g fresh ginger
- 3 cloves garlic
- 1 red chilli
- 1 x 400g tin of coconut milk 1.75 cups approx.
- 2 L water approx 8.5 cups
- 2 tbsp salt
- 2 tbsp tamari
- 1 lemon
Instructions
Prep the veg
- Peel and dice the onion, garlic and ginger. Carefully chop the pumpkins, remove the seeds and slice into bite sized pieces leaving the skin on. Finely dice ½ red chilli.
- Slice the carrots into rounds that are approx 1cm thick
Cook your base flavours
- In a large saucepan approx 5L add 1 tbsp of oil and put on high heat. Once hot add in the onion and ginger and cook for 3-4 mins. Add in the garlic and chili and cook for a further 3 mins.
Add in the carrots and pumpkin
- Next add in the sliced carrot and pumpkin followed by a generous pinch of salt and mix well. Add in 3 tbsp of water and mix well, reduce the heat to medium and put the lid on and leave to sweet for 5 mins without stirring.
Add in the rest of ingredients
- Add in the water, coconut milk, tamari and juice of ½ lemon and bring to a boil and leave to boil for 5 mins stirring occasionally.
Blend till smooth
- Using an immersion blender or stick blender blend the soup till super smooth. Taste and adjust the seasoning to your liking by trying to balance out the flavours by adding more salt, black pepper, lemon juice, tamari or chilli.
Serve and enjoy
- Serve with some fresh sourdough and a drizzle of coconut milk and enjoy!
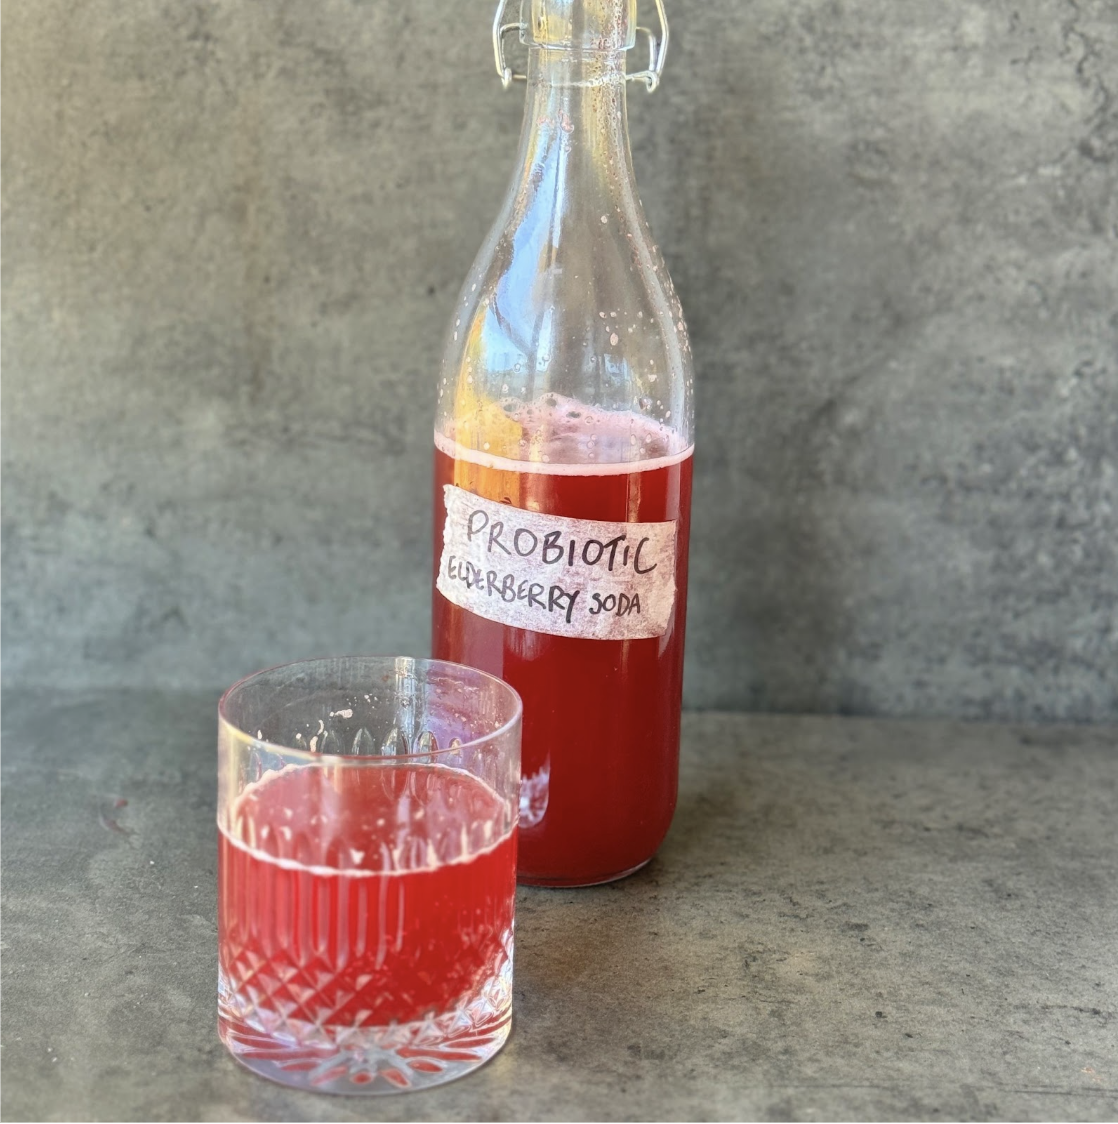
Probiotic Elderberry Soda (Refined Sugar-free)
Takes 6 days 30 minutes
Serves 8
Ingredients
- 200 g Elderberries approx.1.5 cups
- 2 litres Water 8 cups
- 250 g Chicory root syrup 1.25 cups/ maple syrup/ date syrup/ brown rice syrup
- 1 tbsp cinnamon
- 2 apples
- 1 lemon organic
- 1 piece of fresh ginger about 5 cm, unpeeled
Instructions
- Pick and Clean elderberries : pick the elderberries and give them a good wash.
- Boil the elderberries with the syrup: In a large saucepan add 500ml of just boiled water along with the chicory root syrup, 1 tbsp cinnamon and the elderberries and bring to a boil, once boiling reduce to a simmer and leave to cook for 30 mins. Give it the occasional stir to avoid it catching and burning.
- Cool the Water: Add the remaining 1.5 litres (6 cups) of cold water to a fermentation jar or big pot along with the elderberry mixture and leave to cool the mixture down to lukewarm temperature (below 40 degrees celsius)
- Prepare the fruit and leave to bulk ferment: Chop the apple, lemon and ginger. And add to the fermentation jar or elderberry mixture along with the 2 tbsp of white wine vinegar and give them a gentle mix.
Start Fermentation:
- Cover and Ferment: Close the jar or cover the bowl with a clean cloth and let it sit at room temperature for 2-3 days. Stir the mixture once a day. You should start to see some bubbles forming, indicating that fermentation has begun.
Bottle and start secondary Fermentation:
- Strain and Bottle: After 2-3 days, strain the liquid through a fine mesh sieve or cheesecloth into clean, sterilised bottles. Make sure to squeeze the elderberries to draw out all the flavour you can. Seal the bottles tightly.
- Ferment Further: Leave the bottled probiotic elderberry soda at room temperature for another 3-4 days to build up carbonation, ensuring to burp or release excess gas every day. To burp just open the lid for 1-2 seconds and close it.
Serve:
- Final taste – taste and once you are happy with the degrees of fizziness transfer to the fridge to stop the fermentation.
- Serve: Carefully open the bottles to release the built-up carbonation, pour into glasses, and enjoy your naturally fizzy, alcohol-free elderflower champagne!
Notes
- Fermentation Time: The fermentation time may vary depending on the temperature and yeast activity. Monitor the bottles carefully to avoid over-carbonation. If the room is warmer, fermentation time will be quicker and if the room temperature is cooler it will take longer.
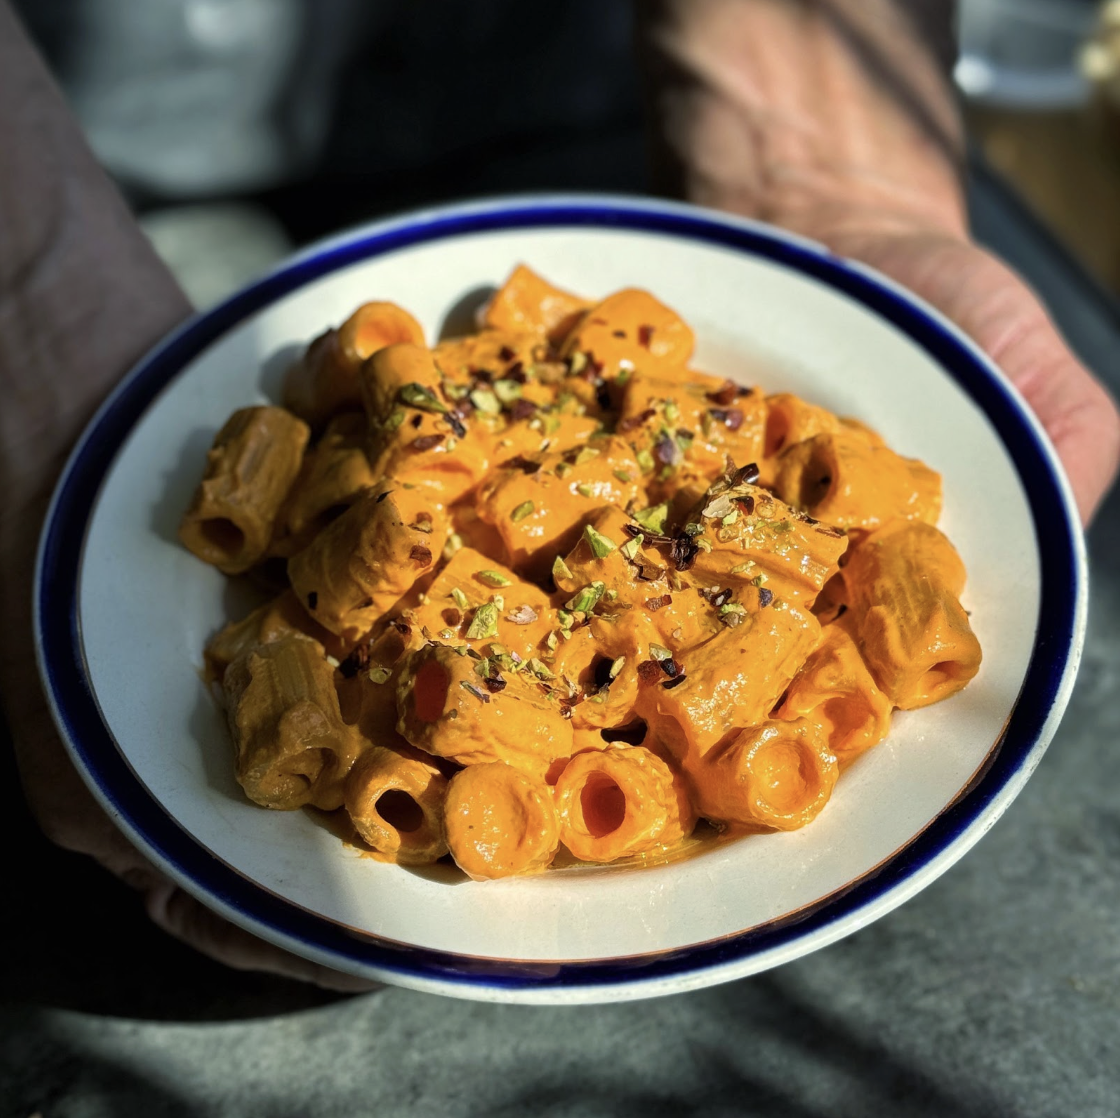
8 Mins High Protein Red Pepper Pasta
Takes 8 minutes
Serves 2
Ingredients
Pasta Sauce:
- 200 g firm Tofu
- 100 g Roasted red pepper
- 50 g Cashew nuts
- 2 tbsp olive oil
- 3 tbsp Pasta water
- 2 tbsp spicy red pepper pesto/ harissa or pesto of choice
- Salt to taste
Pasta:
- 200 g red lentil pasta
Instructions
- Start by filling a large saucepan with water and add 2 tbsp of salt and bring to a boil. Cook the pasta as per the pack instructions.
- To a blender add the roasted red pepper, tofu, cashew nuts, oil, spicy red pepper pesto and 2 tbsp of pasta water and blend till smooth.
- Drain and rinse the pasta and add back to the pan along with the sauce and cook on medium heat until it is hot.
- Taste and adjust the seasoning to your liking.
- Serve with some chilli flakes and a drizzle of olive oil for a delicious meal.
Notes
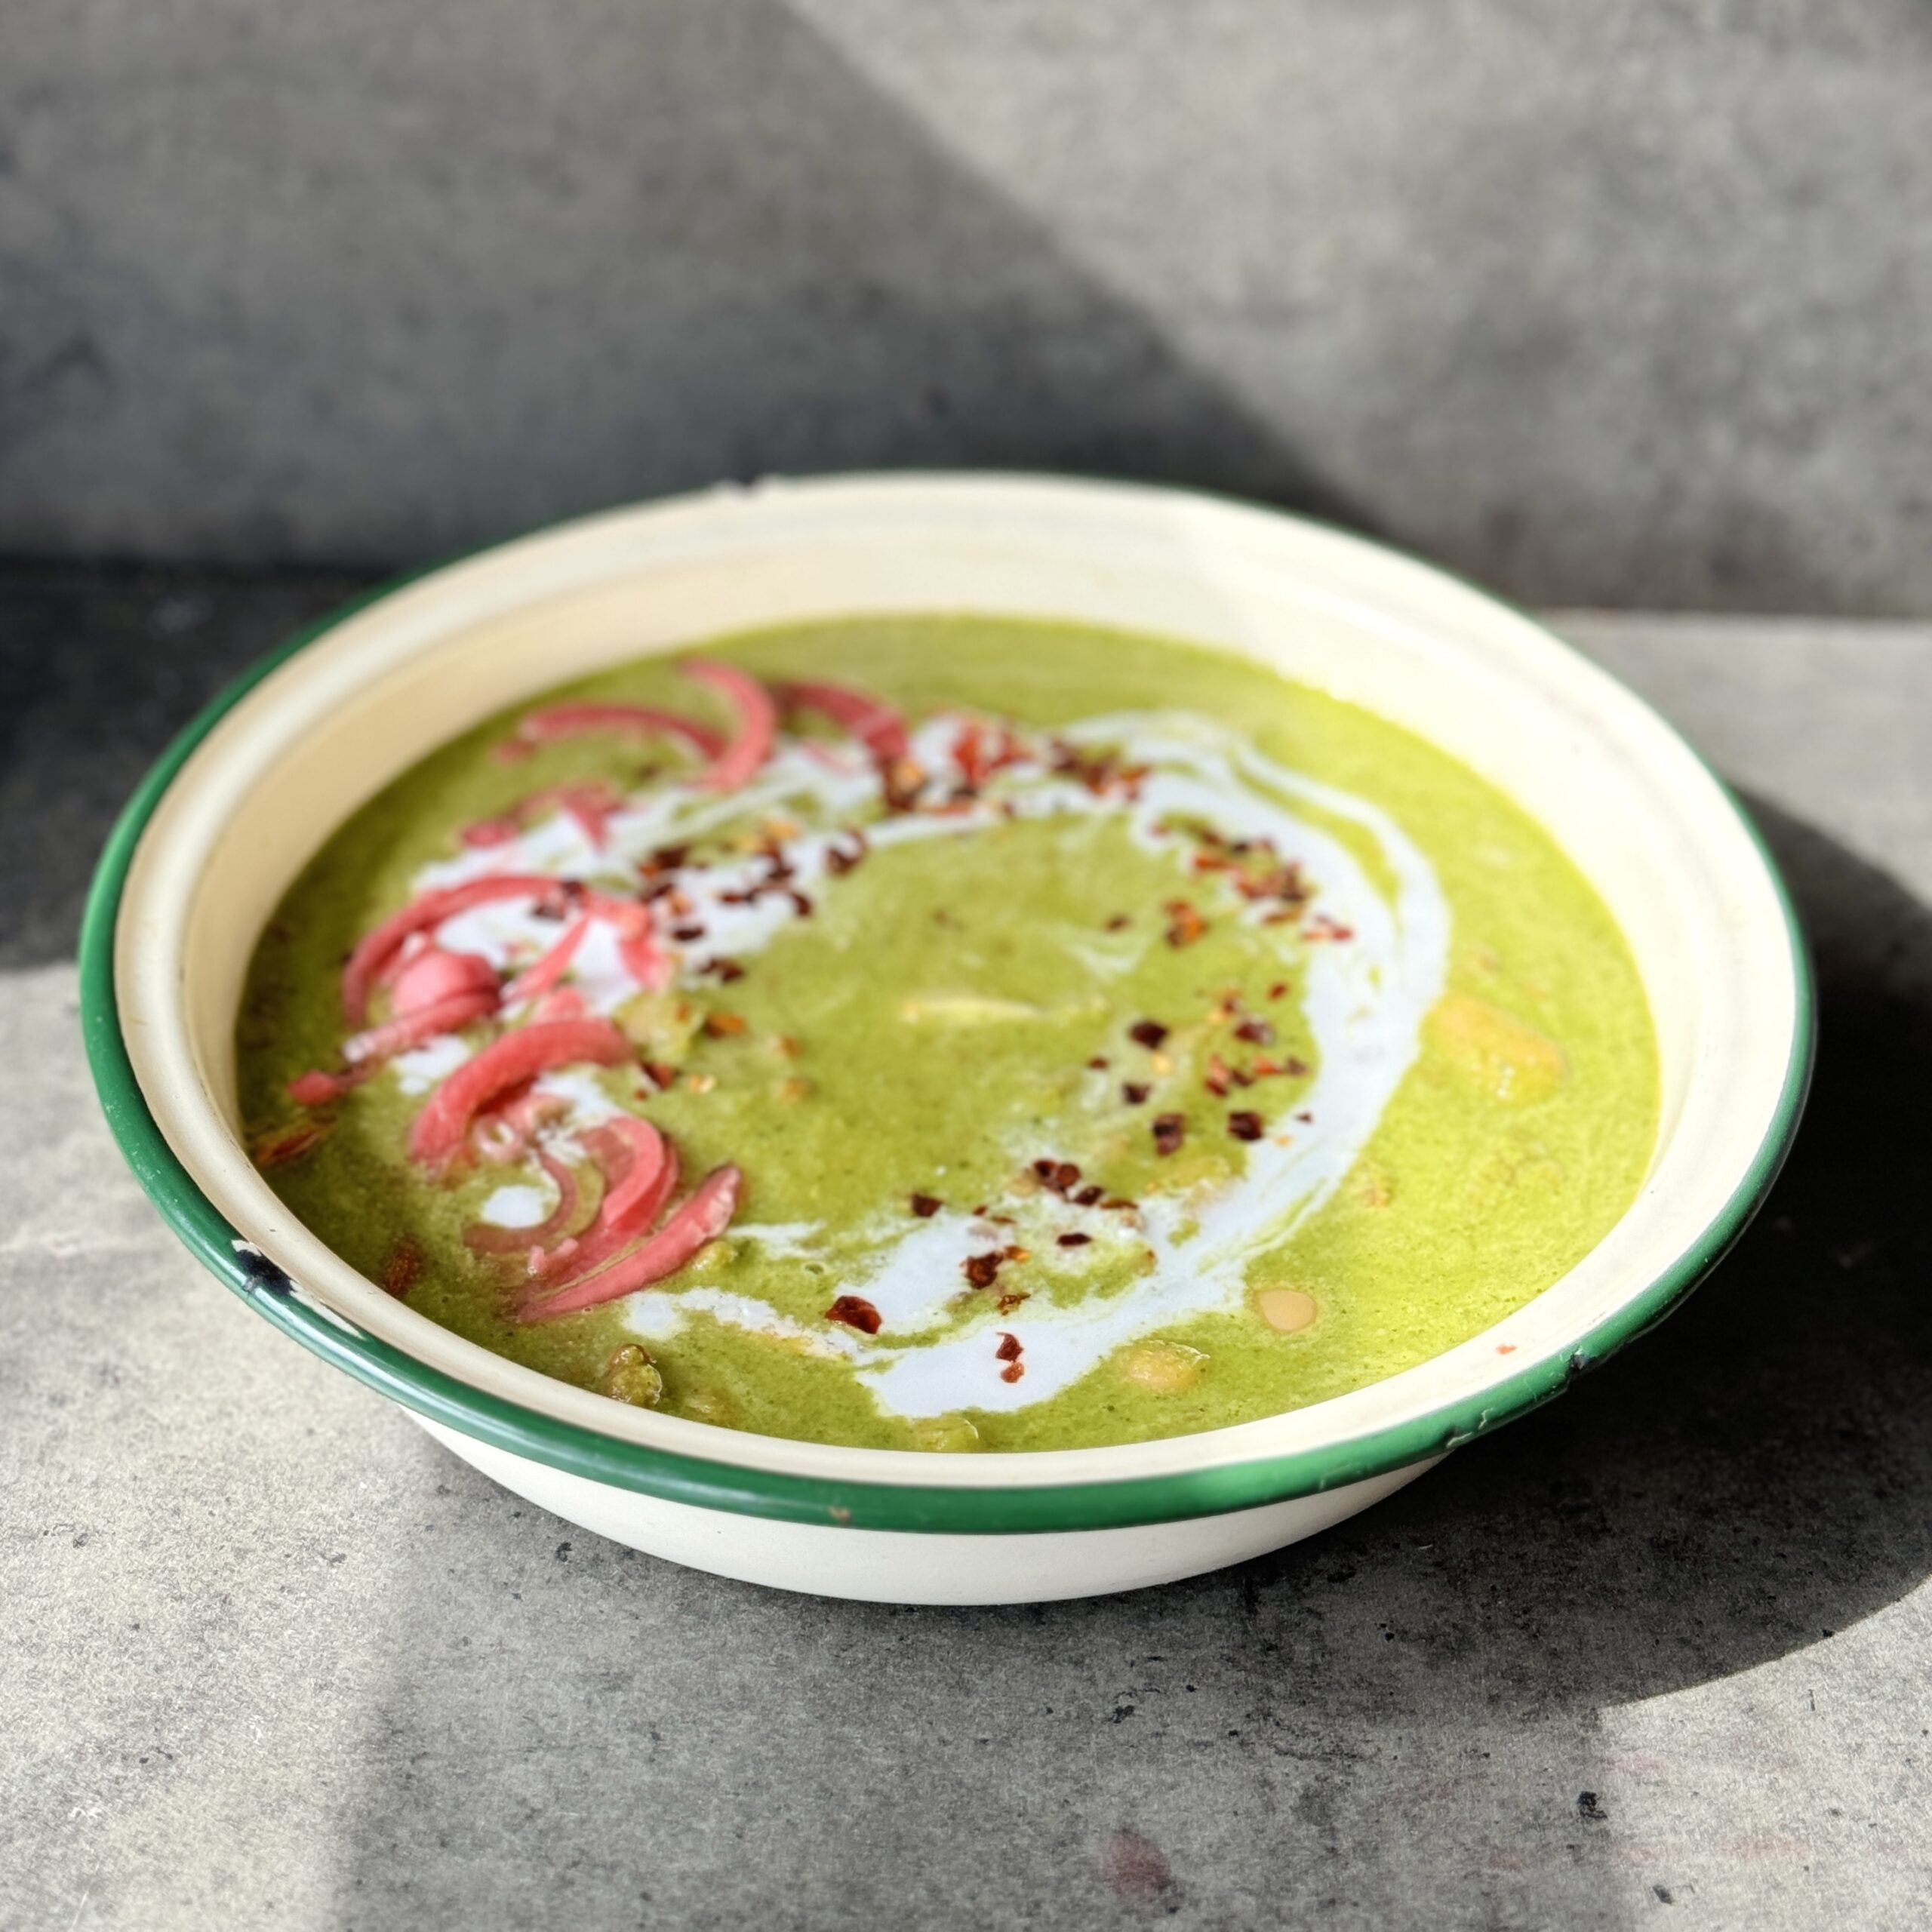
Supergreens Lentil Curry
Takes 10 minutes
Serves 2
Ingredients
Base Sauce:
- 2 cloves of garlic
- A thumb-sized piece of ginger approx. 1 tablespoon minced
- ½ a bunch of scallions green onions (approx. 4)
- ½ green chilli
- 2 tablespoons curry powder
- 2 teaspoons ground cumin
- 1 teaspoon salt
- 2 tablespoons tamari soy sauce
- 1 tablespoon maple syrup or liquid sweetener of choice
- ½ teaspoon black pepper
- 1 x 400g tin of coconut milk keep 3-4 tbsp for garnish
- Juice of ¾ of a lime
Supergreens:
- 100 g baby spinach approx. 4 cups or rocket (arugula) (approx. 4 cups)
- 100 g broccoli approx. 1 cup florets
- 1 small courgette zucchini (approx. 1 cup, chopped)
Beans & Pulses
- 1 x 400g tin of butter beans approx. 1¾ cups
- 1 x 400g tin of cooked lentils approx. 1¾ cups
Optional
- 10-15 cherry tomatoes
To Garnish:
- Chilli flakes
- Pickled red onion
- A small bunch of fresh coriander cilantro or other fresh herbs of choice
Instructions
Prepare the aromatics:
- Peel and finely chop 2 cloves of garlic and a 10g (0.35 oz) piece of ginger. Finely chop 4 scallions (green onions), removing any limp outer leaves, and chop ½ a green chilli.
Drain the beans and lentils:
- Drain and rinse the 400g (14 oz) tin of butter beans and 400g (14 oz) tin of cooked lentils thoroughly.
Prepare the vegetables:
- Chop 10-15 cherry tomatoes in half. Finely dice 100g (3.5 oz) of broccoli and 1 small courgette (zucchini).
Steam the greens:
- Fill and boil the kettle, then pour it over 100g (3.5 oz) of baby spinach (or rocket), the diced broccoli, and the diced courgette. Leave to sit for 5 minutes with a lid on.
Blend the sauce:
- Drain the spinach, broccoli, and courgette, then add them to a blender along with 1 x 400g (14 oz) tin of coconut milk (reserving 3-4 tbsp for garnish), ¾ lime juice, 2 tablespoons of curry powder, 2 teaspoons of ground cumin, 1 teaspoon of salt, 2 tablespoons of tamari/ soy sauce, 1 tablespoon of maple syrup, and ½ teaspoon of black pepper. Blend until smooth.
Cook the sauce:
- Pour the blended sauce into a medium saucepan or frying pan and heat on high heat. Taste and adjust seasoning to your liking.
Add the remaining ingredients:
- Once the sauce is warm, add the drained butter beans, lentils, and halved cherry tomatoes. Stir to combine.
Simmer the curry:
- Bring the curry to a boil, stirring occasionally to ensure it doesn’t stick to the pan. Once boiling, reduce the heat and simmer for 2 minutes.
Garnish and serve:
- Remove the curry from the heat and garnish with chilli flakes, pickled red onions, and freshly chopped coriander (cilantro). Serve hot.
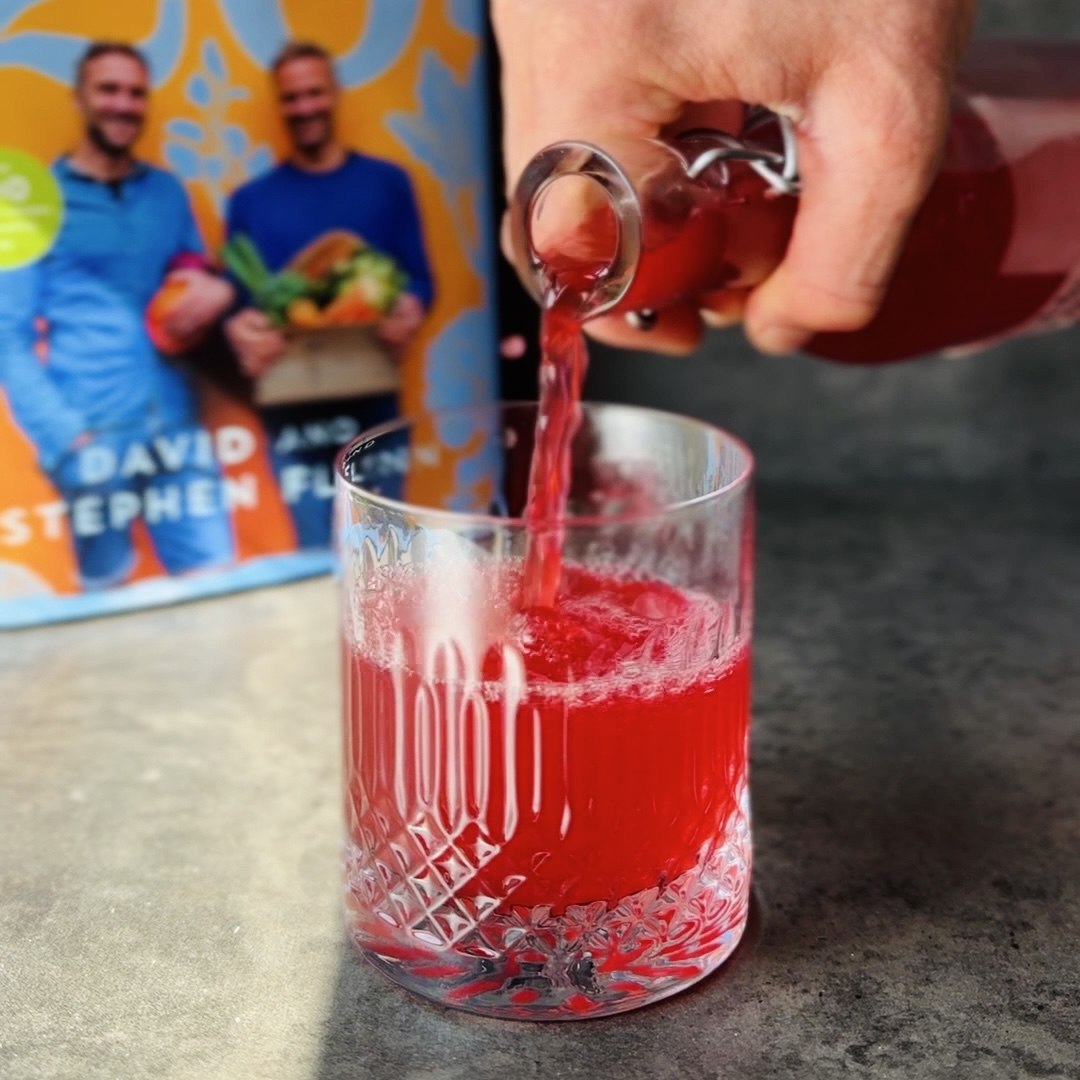
Probiotic Blackberry Soda (alcohol free)
Takes 6 days 30 minutes
Serves 8
Ingredients
- 200 g blackberries
- 2 litres water 8 cups
- 250 g Sugar 1.25 cups
- 2 tbsp White wine vinegar
Instructions
- Pick and Clean blackberries : pick the blackberries but do not rinse as the natural yeasts on them are essential for fermentation.
- Boil the Water and sugar: In a large bowl add 500ml of just boiled water along with the sugar and give it a good stir until all the sugar has dissolved.
- Cool the Water: Add the remaining 1.5 litres (6 cups) of cold water to the bowl to cool the mixture down to lukewarm temperature.
- Add blackberries and vinegar: Add the blackberries, and 2 tbsp of white wine vinegar to the sugar water mixture and give them a gentle mix.
- Transfer to a large jar or bowl
Start Fermentation:
- Cover and Ferment: Close the jar or cover the bowl with a clean cloth and let it sit at room temperature for 2-3 days. Stir the mixture once a day. You should start to see some bubbles forming, indicating that fermentation has begun.
Bottle and start secondary Fermentation:
- Strain and Bottle: After 2-3 days, strain the liquid through a fine mesh sieve or cheesecloth into clean, sterilised bottles. Make sure to squeeze the blackberries to draw out all the flavour you can. Seal the bottles tightly.
- Ferment Further: Leave the bottled blackberry champagne at room temperature for another 3-4 days to build up carbonation, ensuring to burp or release excess gas every day. To burp just open the lid for 1-2 seconds and close it.
Serve:
- Final taste – taste and once you are happy with the degrees of fizziness transfer to the fridge to stop the fermentation.
- Serve: Carefully open the bottles to release the built-up carbonation, pour into glasses, and enjoy your naturally fizzy, alcohol-free elderflower champagne!
Notes
- Fermentation Time: The fermentation time may vary depending on the temperature and yeast activity. Monitor the bottles carefully to avoid over-carbonation. If the room is warmer, fermentation time will be quicker and if the room temperature is cooler it will take longer.
- Safety: Use sturdy bottles designed for carbonation to prevent any risk of explosion.
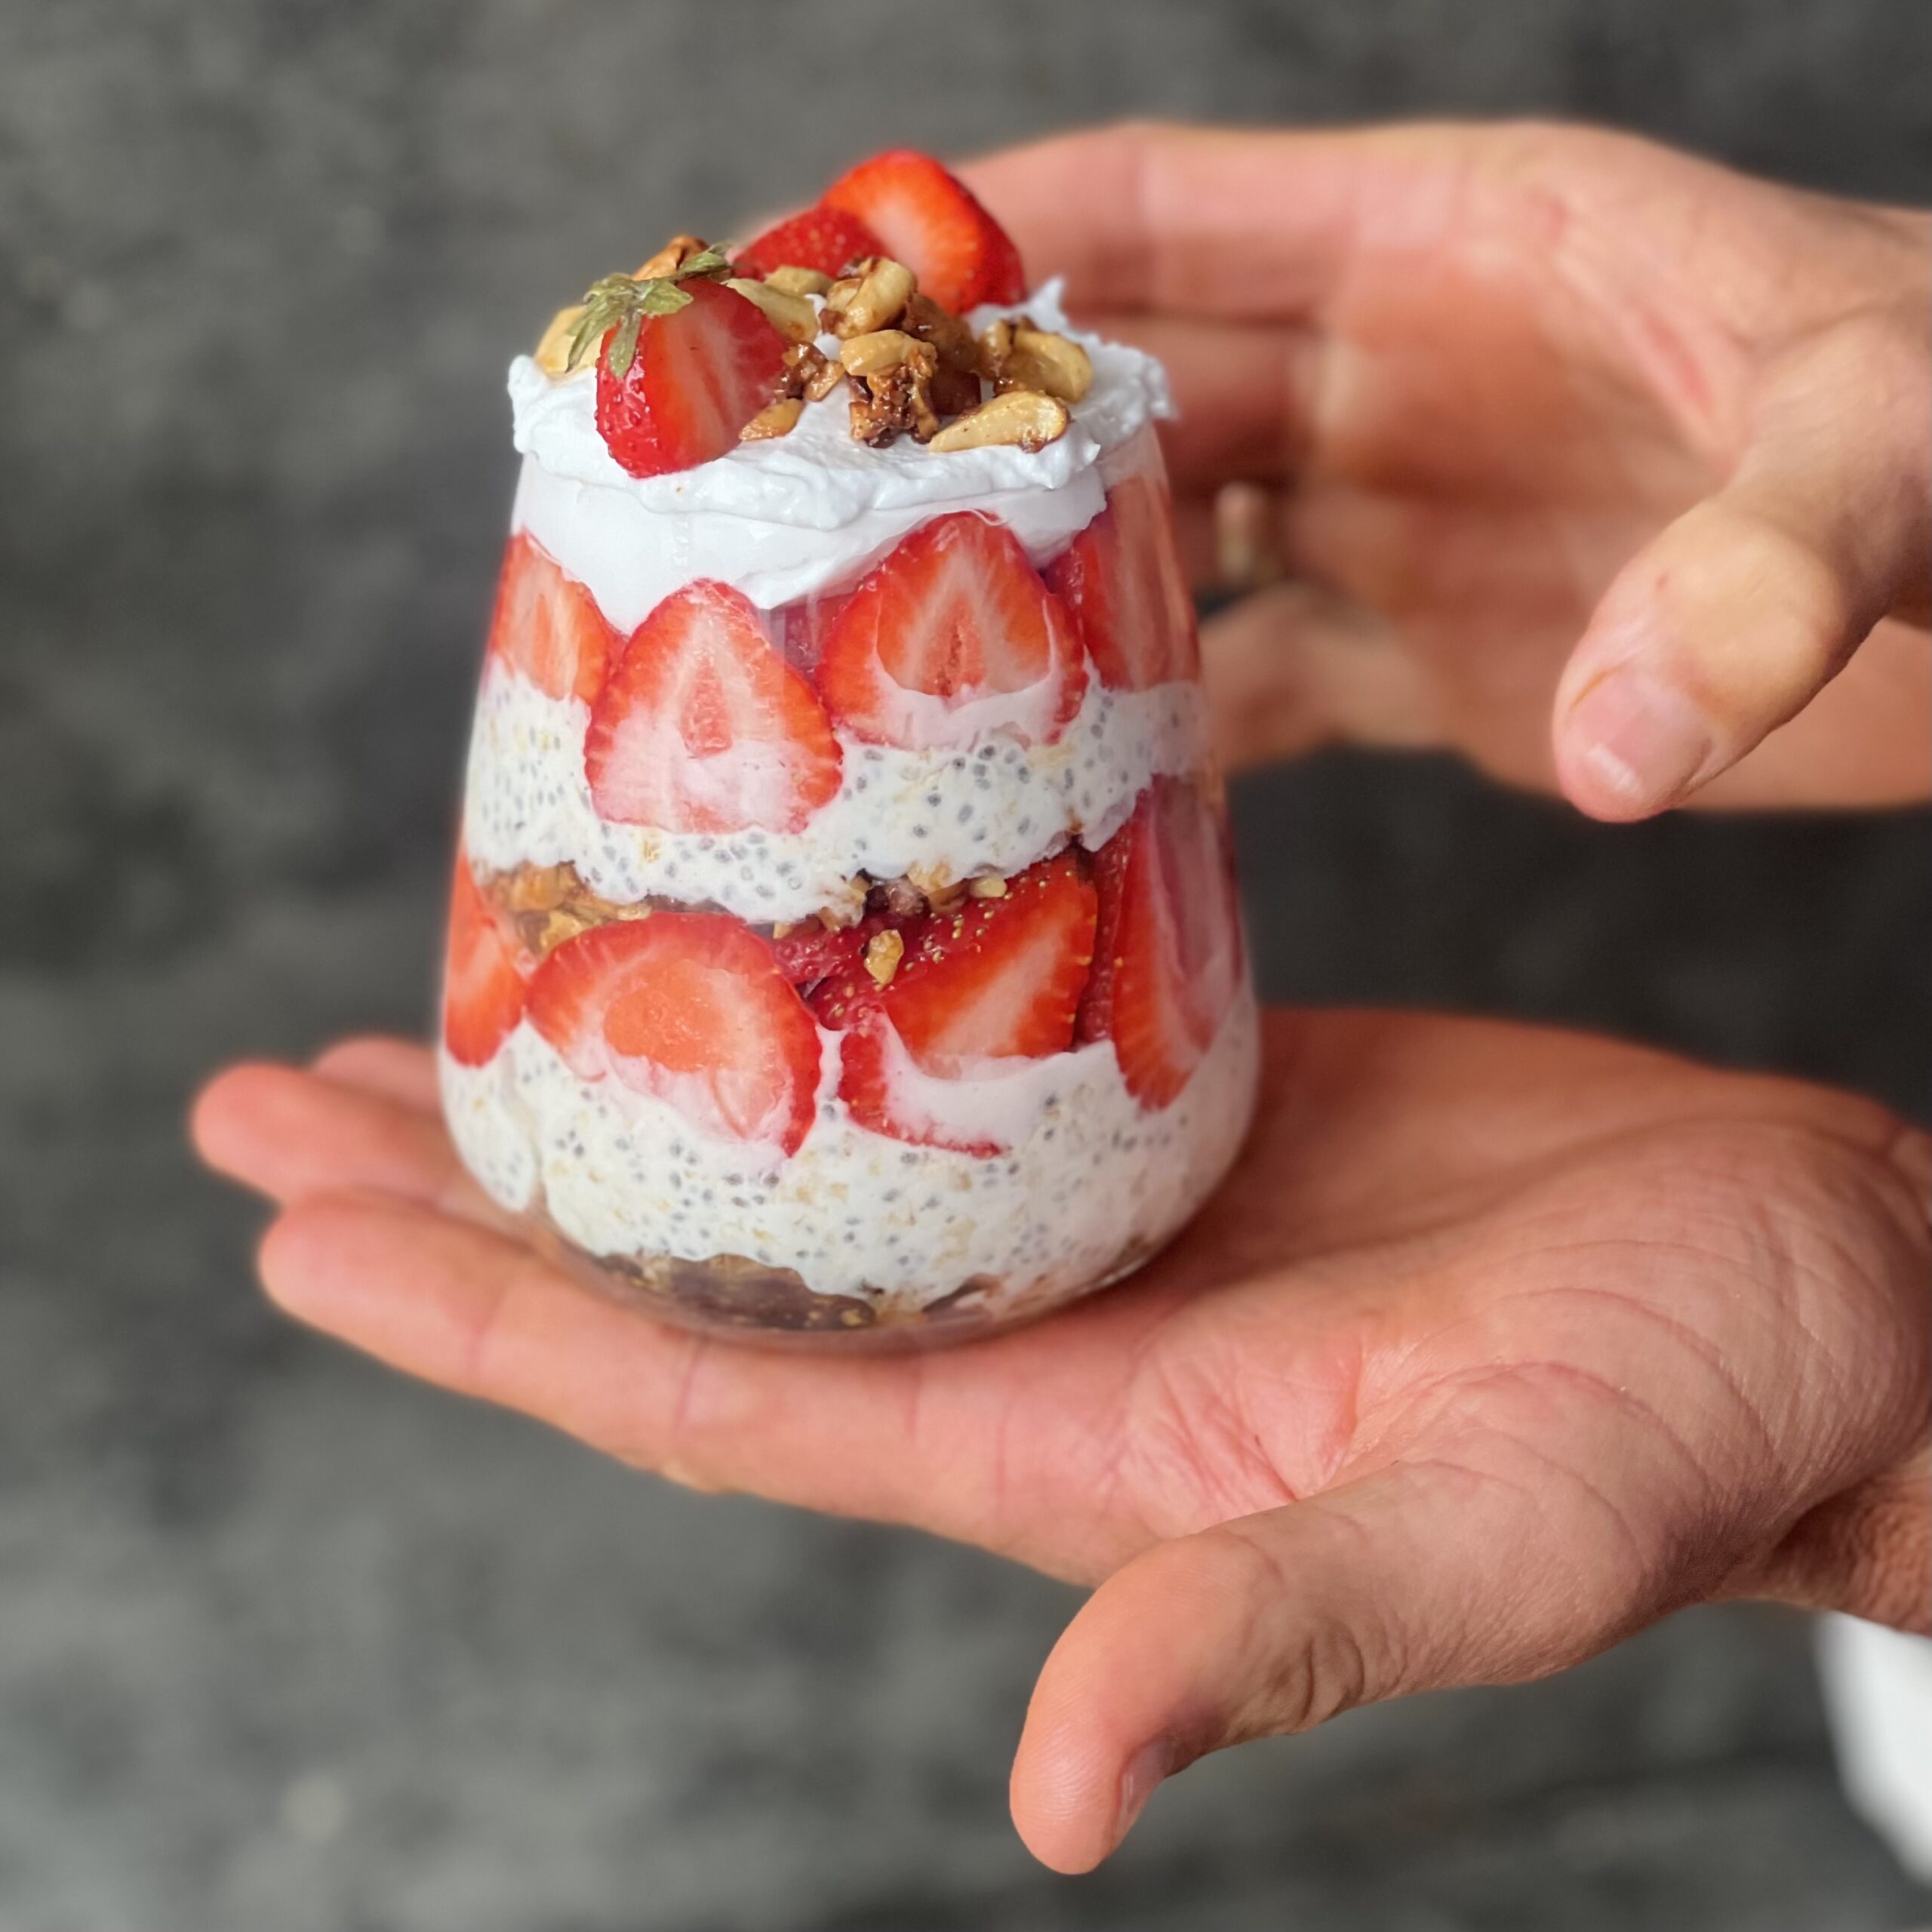
Strawberry Shortcake Overnight Oats
Takes 15 minutes
Serves 2
Ingredients
Creamy Overnight Oat Mix
- 100 g oat flakes 1 cup
- 150 ml oat milk ⅔ cup
- 100 ml yoghurt plant-based (⅓ cup + 1 tbsp)
- 3 tbsp chia seeds
- ½ tsp vanilla extract
- Pinch of salt
Cashew Biscuit Base
- 100 g cashew nuts ¾ cup
- 1 tbsp coconut oil
- 1 tbsp maple syrup
- Pinch of salt
Decoration
- 200 g fresh strawberries 1 ½ cups, sliced
Instructions
Make overnight oat base
- Combine all the ingredients for the overnight oats in a bowl, mix well and leave to sit for 5 mins while you make the rest of the elements
Make cashew biscuit base
- Roughly chop the cashew nuts and heat a non stick pan on medium heat, toast the cashew nuts for 5-8 mins stirring regularly until they start to go golden brown, add the coconut oil and maple syrup and mix to coat each nut, cook for a further minute and remove from the heat and transfer to a plate to cool.
Slice the strawberries
- Slice the strawberries lengthways
Layer up 2 glasses
- To layer up, take 2 x 250ml glasses and the key here is that there will be 6 layers.
- Start with a layer of the cashew biscuit base, next add a small layer of overnight oats, followed by sliced strawberries, make sure to push the sliced strawberries against the glass and follow them all the way around. Fill any gaps with some more strawberries, and begin the next layer once again with the cashew base, next overnight oats, and finish with another layer of sliced strawberries and a nice dollop of coconut yoghurt on top. Decorate with a sprinkle of the cashews and some sliced strawberries on top. Enjoy!
Ireland and UK Tour 2024/2025
Back in 2004, we opened a little veg shop in our home town of Greystones with a dream of starting a plant-powered revolution! For 20 years, The Happy Pear has been all about spreading health, happiness, and seriously delicious food. With over 15 million products sold, 6 bestselling cookbooks, and 15+ online courses under our belts, we’ve learnt so much on our journey!
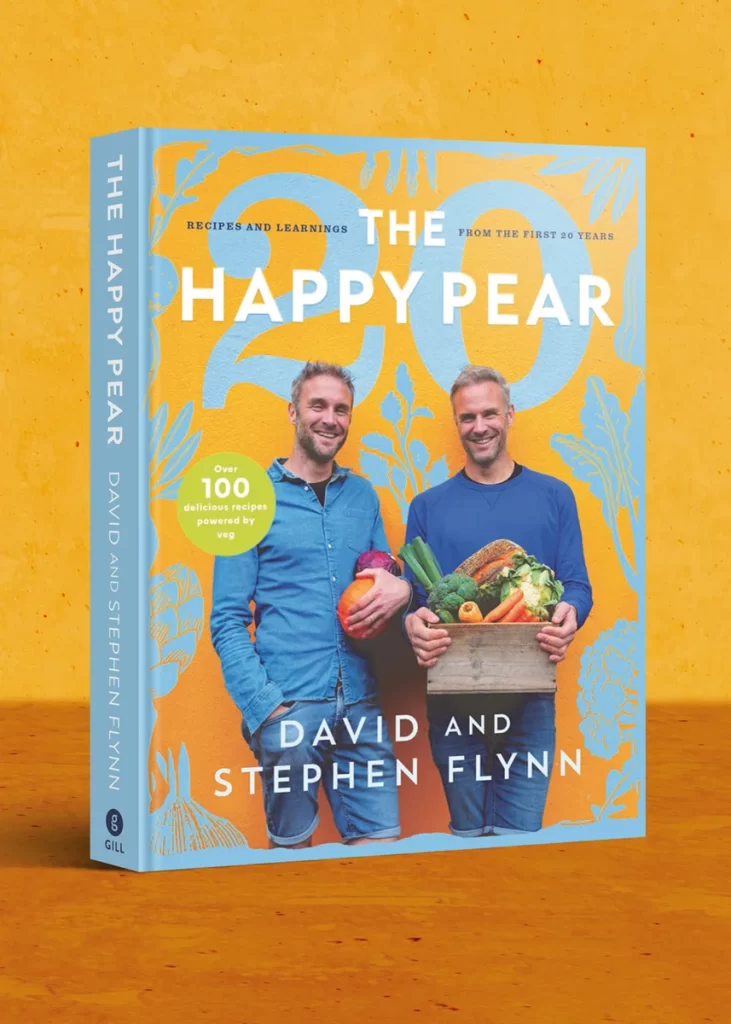
Now, we’re hitting the road with our new book, The Happy Pear 20: Recipes and Learnings From the First 20 Years. Get ready for a fun-filled tour packed with stories from our wild journey, tips for better living, and cooking demos (at select spots!). Come join us as we dish out wisdom, laughs, and plenty of plant-based goodness!
7th November 2024 The Lark Balbriggan IRL Click here to buy tickets
6th December 2024 The Pavilion Dun Laoghaire IRL Click here to buy tickets
22nd January 2025 Dareshack Studio Vintry Building Bristol UK Click here to buy tickets
24th January 2025 London Irish Centre Camden Square UK – Click here to buy tickets
25th January 2025 Irish World Heritage Centre Manchester UK Click here to buy tickets
26th January 2025 Oran Mor Glasgow UK Click here to buy tickets
29th January 2025 Cork Opera House IRL Click here to buy tickets
6th February 2025 National Opera House Wexford Click here to buy tickets
9th February 2025 Town Hall Theatre Galway Click here to buy tickets
26th February 2025 Waterfront Studio Belfast Click here to buy tickets
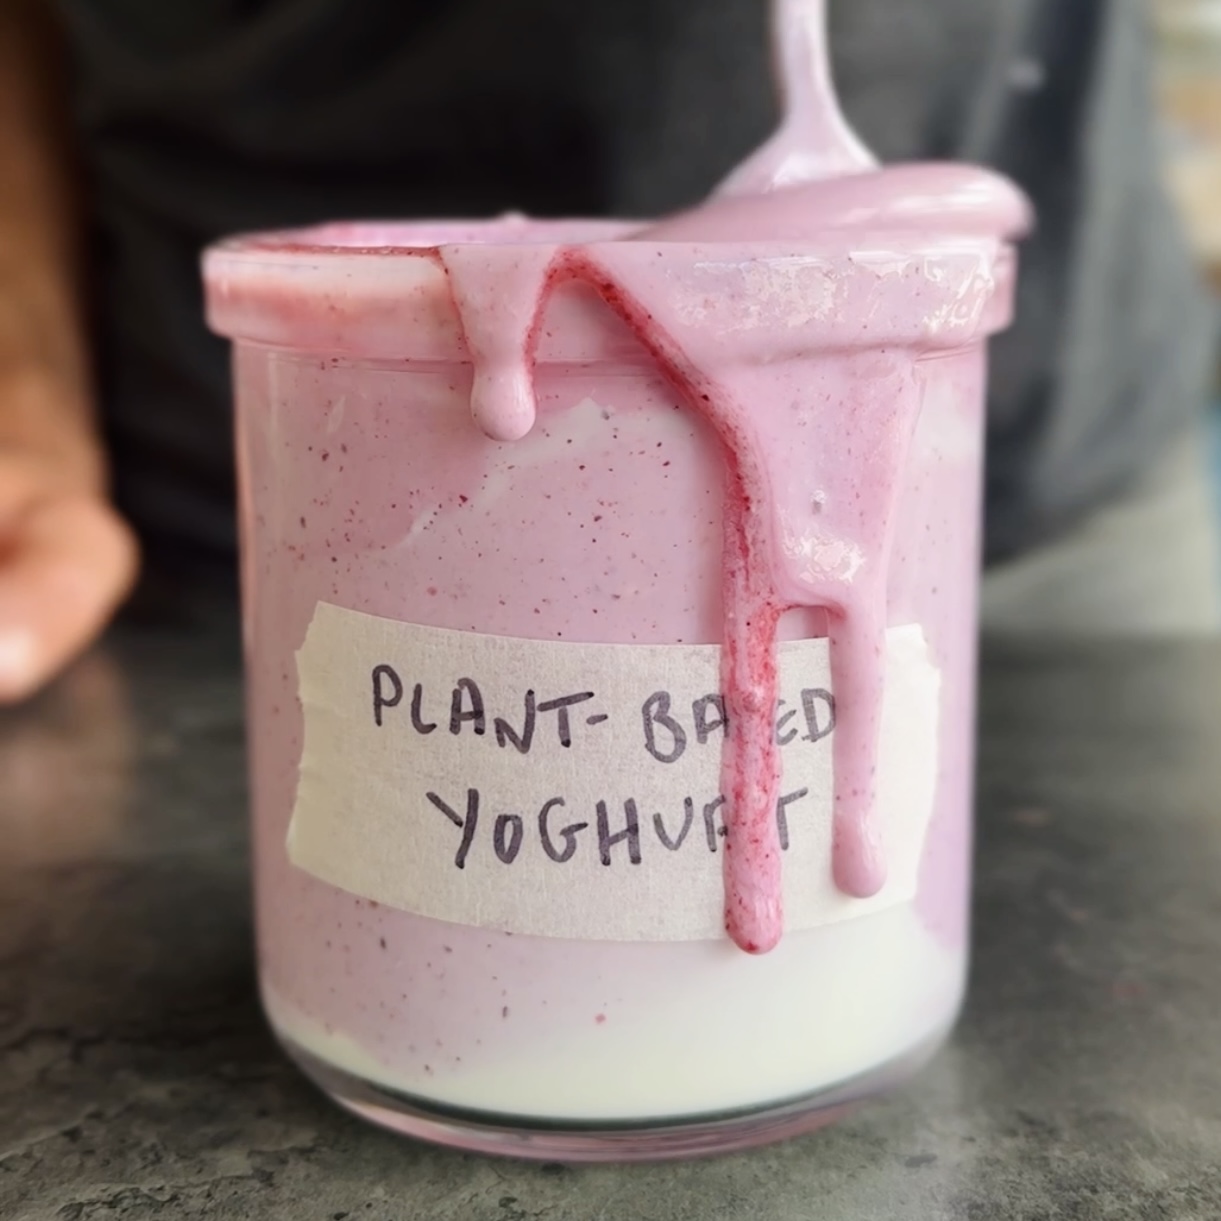
Plant-based Yogurt
Takes 3 days 5 minutes
Serves 8
Ingredients
- 1 litre approx 4 cups of plant-based milk (we used soy)
- 4 tablespoons of plant-based yogurt we used soy
Instructions
- Mix together your plant-based milk and 4 tablespoons of plant-based yogurt in a sterile jar.
- Leave to ferment at room temperature for 3-4 days. The longer you leave it to ferment the more acidic it will become.The milk should have thickened up and be yogurt-like.
- Once you are happy with the texture and degree of acidity, add any sweeteners or flavour agents. Simply mix through and taste and adjust to your taste.
- Store in the fridge for up to a week. The yogurt will continue to ferment just at a slower rate. Taste and adjust any seasoning till you reach a flavour you like.

Homemade Cherry Cola – Naturally Fermented
Takes 7 days 40 minutes
Serves 8
Ingredients
Fruits and Vegetables:
- 1 medium apple organic, unwashed, for wild yeast
- 1 medium orange organic, unwashed
- 1 lemon organic, unwashed
- 1 lime organic, unwashed
- 1 piece of fresh ginger about 5 cm, unpeeled
Flavourings:
- 1 cinnamon stick
- 1 vanilla bean split
- 4 star anise pods
- 2 cloves
- 1 tablespoon coriander seeds
- 1 teaspoon allspice berries or ground allspice
- 350 g approx. 2.5 cups frozen or fresh cherries
Sweetener:
- 250 g 1.25 cups brown sugar (you could also use coconut sugar)
Water:
- 2 litres 8.5 cups filtered water
Instructions
Prepare the Ingredients:
- Roughly chop the apple, orange, lemon, and lime, keeping the peels on as they contain wild yeasts. Remove the stone from the cherries if using fresh cherries
- Slice the ginger thinly.
Make the Base:
- In a large pot, combine the cinnamon stick, vanilla bean, star anise, cloves, coriander seeds, pitted cherries and allspice berries. Next add in the brown sugar
- Add the filtered water and bring to a boil.
- Once boiling, reduce the heat and let it simmer for about 20-30 minutes to extract the flavours.
- Leave to cool to room temperature or below 38 degrees C so that the yeast stays alive.
Add the Fruits for Fermentation:
- Once the base has cooled to room temperature, transfer it to a large, clean glass jar or fermentation vessel.
- Add the chopped apple, orange, lemon, lime, and ginger to the jar. The fruits should be added unwashed to ensure the wild yeast on their skins remains intact.
- Cover the jar with a clean cloth or cheesecloth secured with a rubber band to allow airflow while preventing contaminants.
- Place the jar in a warm, dark place (around 20-25°C / 68-77°F) for 2-4 days, stirring occasionally. You’ll start to see bubbles forming, indicating fermentation.
Strain and Bottle:
- After the fermentation period, strain out the solids using a fine-mesh sieve or cheesecloth.
- Pour the liquid into clean, airtight bottles, leaving some headspace at the top.
- Seal the bottles and let them ferment at room temperature for another 1-3 days, checking daily for carbonation. Be careful with pressure buildup in the bottles to prevent them from exploding.
Refrigerate and Serve:
- Once the desired level of carbonation is achieved, refrigerate the bottles to slow down the fermentation.
- Serve chilled and enjoy your naturally fermented cola!
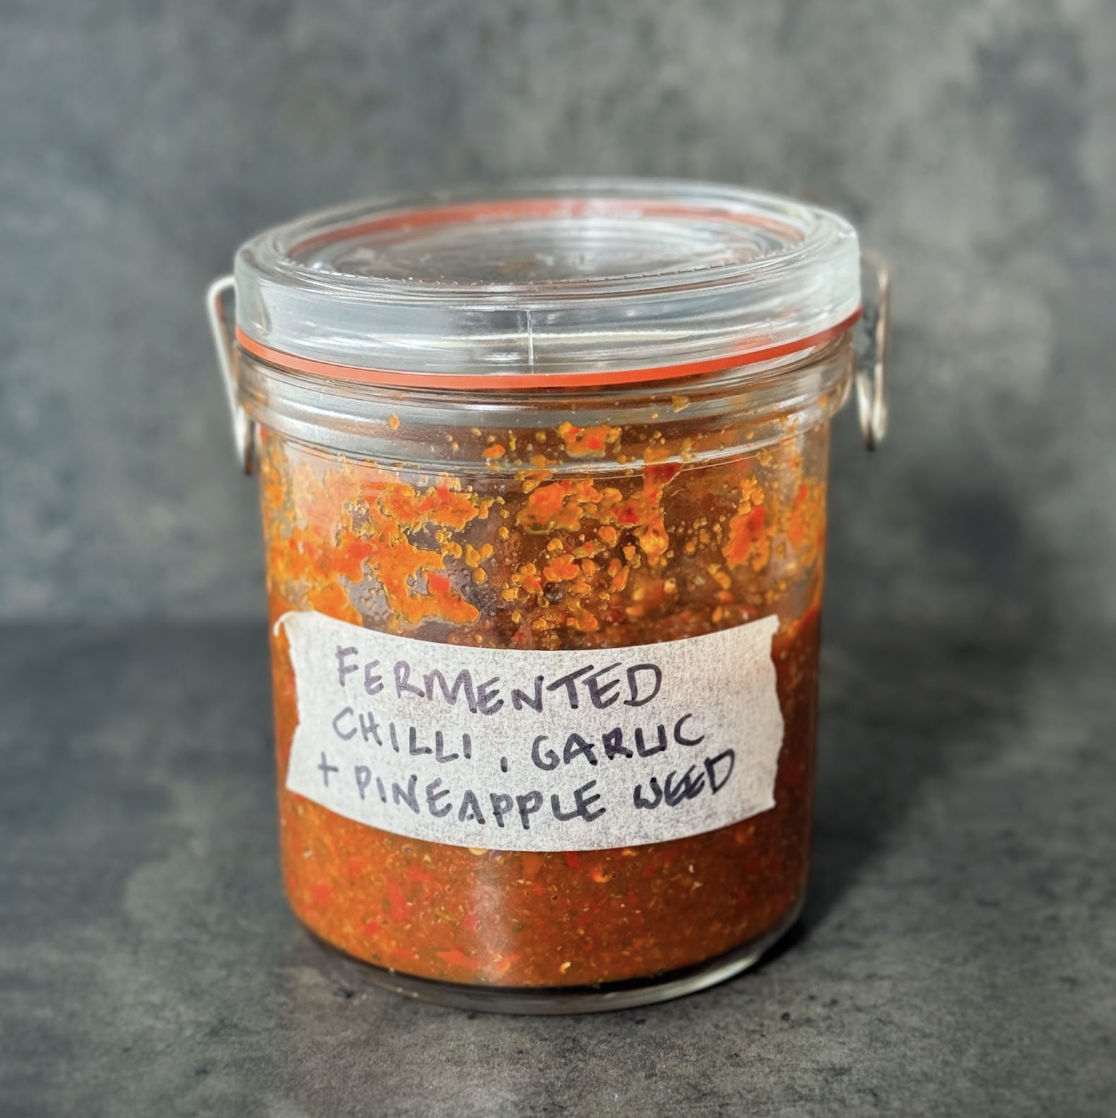
Fermented Chilli & Garlic Paste
Takes 7 days 15 minutes
Serves 10
Ingredients
- 150 g chilli about 1 cup
- 150 g garlic about 1 cup
- 20 g Herbs of choice – we used pineapple weed coriander, parsley, basil, or chive would work great (about ⅓ cup)
- 6 g salt about 1 tsp
To season after fermentation
- 4 tbsp Tamari
- 7 tbsp Maple syrup
- 4 tbsp olive oil
- 6 tbsp vinegar
- 1 tsp salt
Instructions
Make the Sauce
- Peel the garlic and roughly chop the chillies, if you are using any herbs, roughly chop them.
- Add the chilli, garlic, salt and herbs to a food processor or blender and blend till smooth.
- Transfer to a jar with a lid and add in the paste and cover tightly with the lid.
- Leave to ferment for a week.
Season:
- After the week’s fermentation, taste to understand how the fermentation has altered the flavours. The flavours should have mellowed and it should have developed some acidity.
- We seasoned ours by adding all our seasoning ingredients – mix well and enjoy!
- Taste and adjust the seasoning to your liking.
- Store in the fridge and it will keep for 4 weeks.
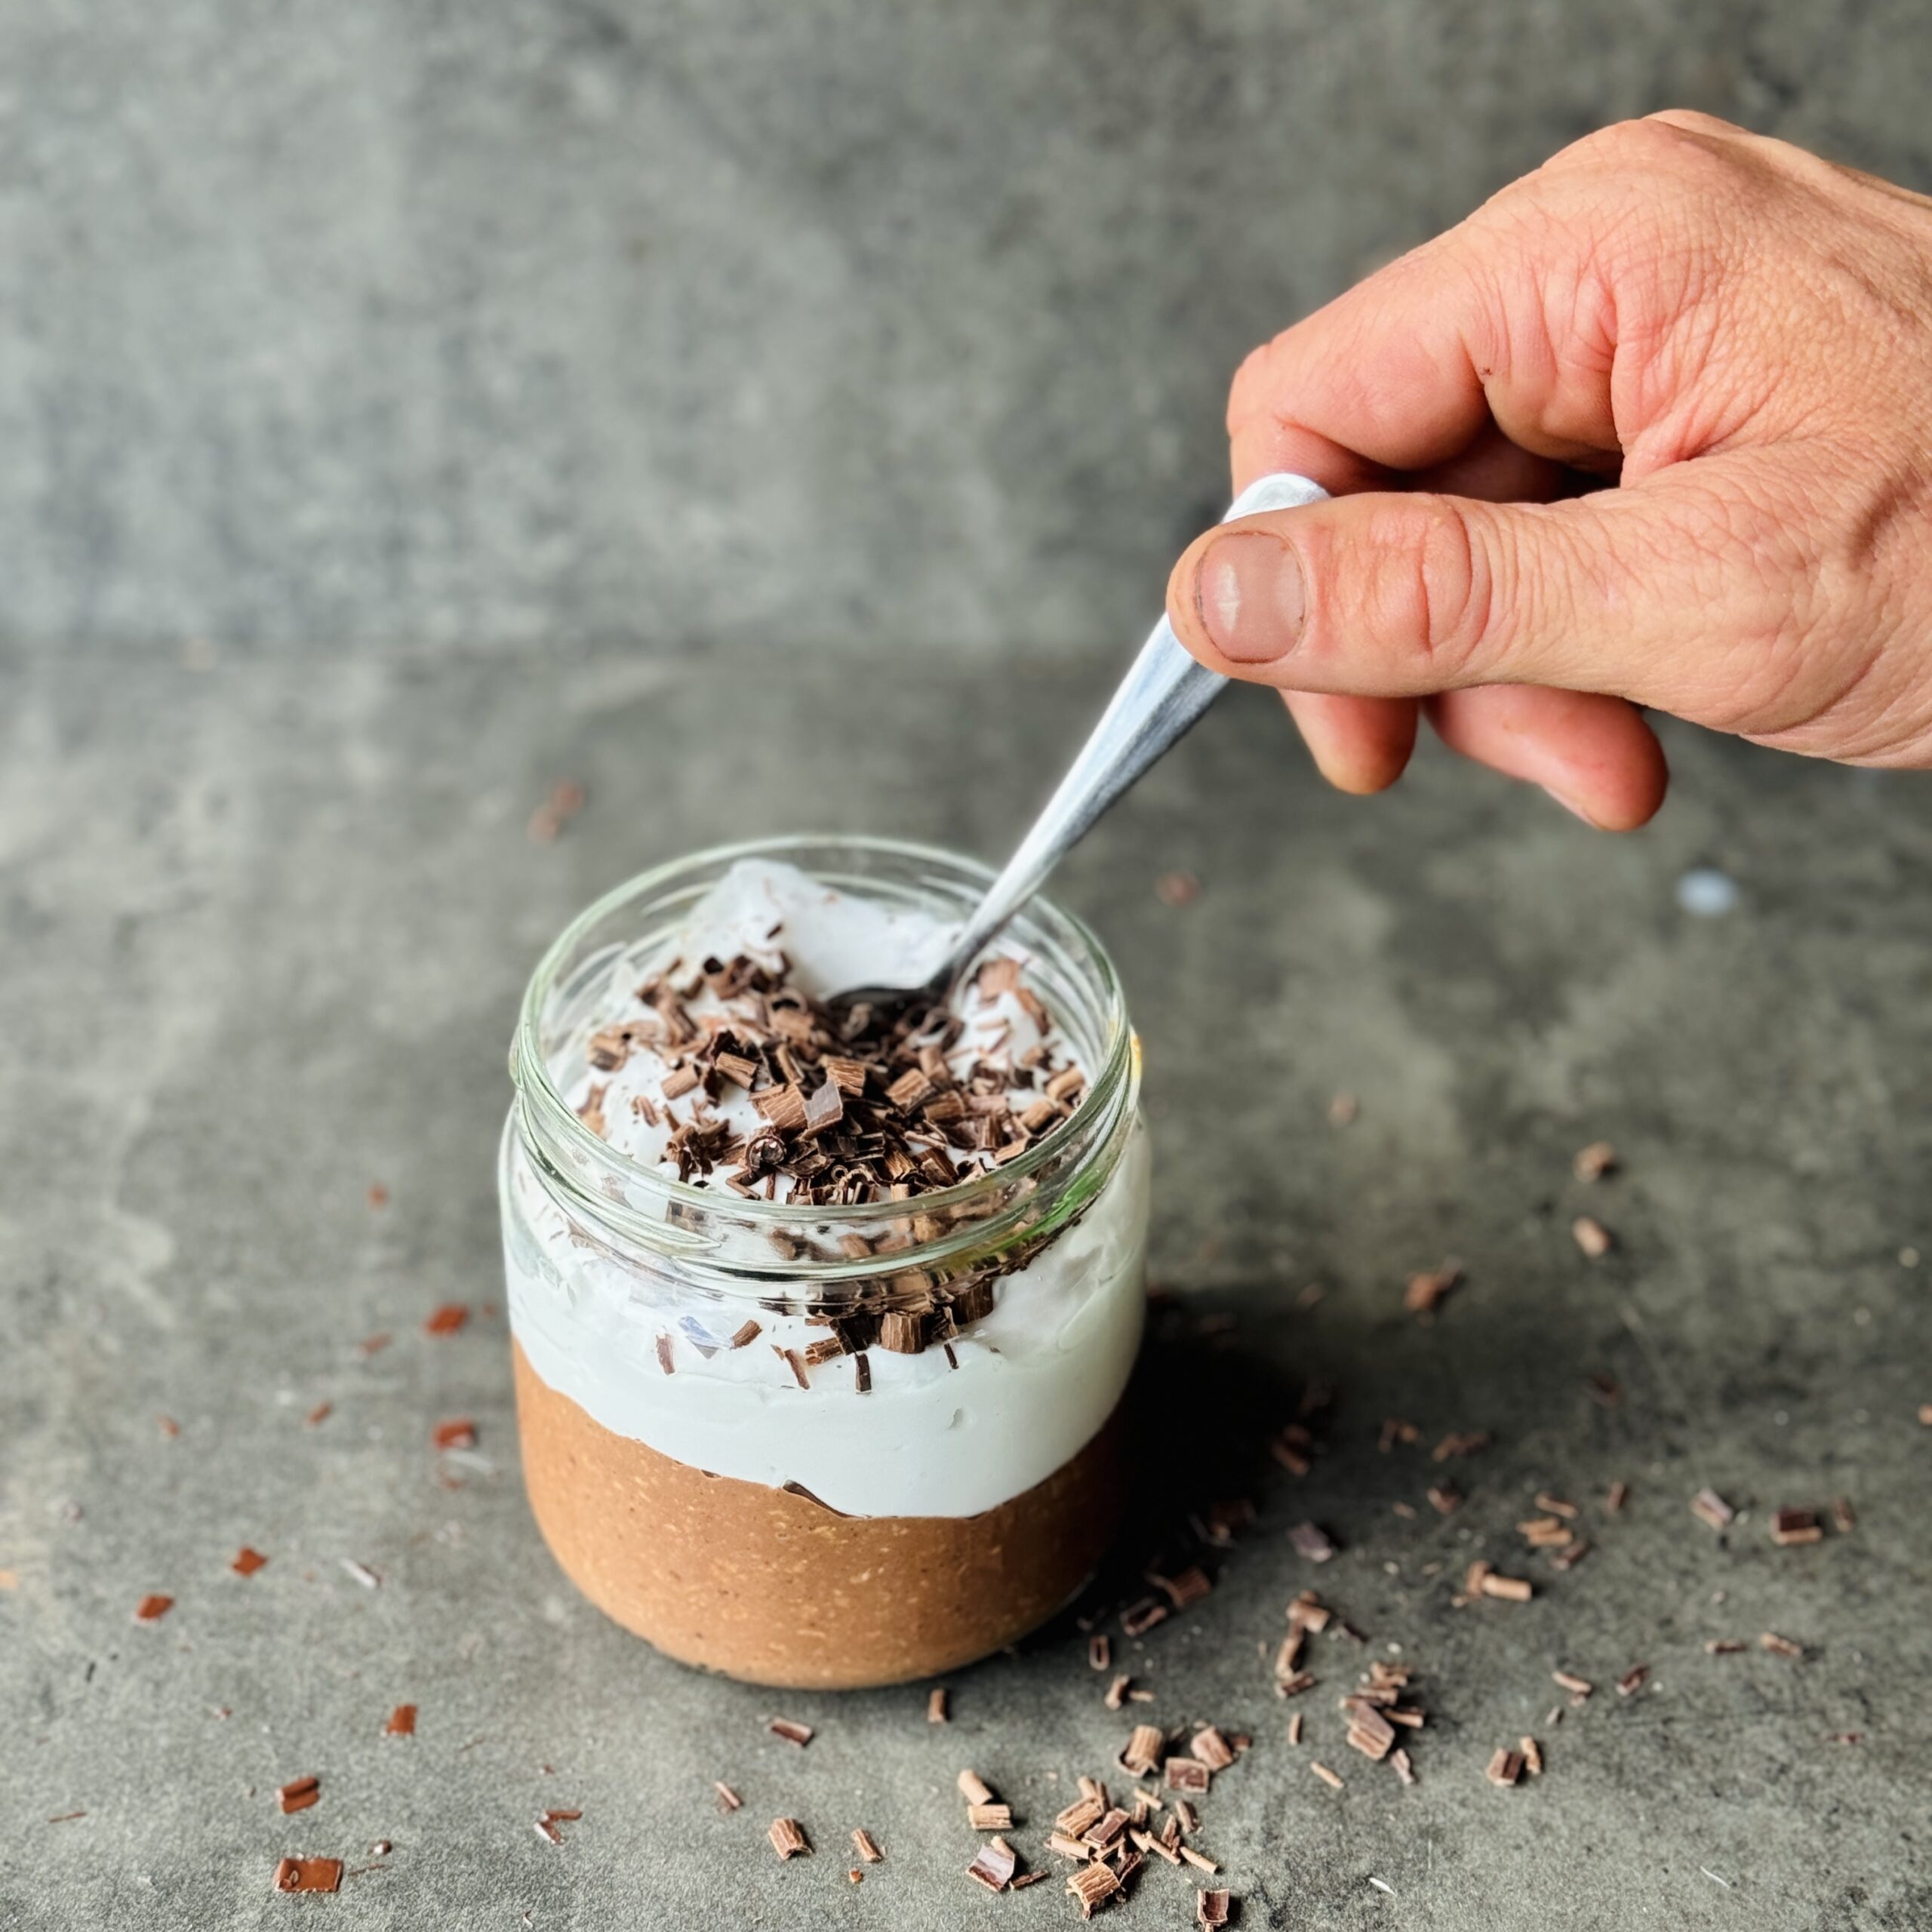
Brownie Overnight Oats
Takes 25 minutes
Serves 2
Ingredients
Overnight Oat Mix:
- 50 g oat flakes ½ cup
- 1.5 tbsp cocoa powder
- 1 tbsp almond butter or nut butter of choice
- 100 ml oat milk ⅓ cup
- 1 tsp vanilla extract
- 1-2 tbsp maple syrup
- Pinch of salt
Garnish:
- To serve: 200g coconut yoghurt or yoghurt of choice ¾ – 1 cup
- To garnish: 2 tbsp chocolate chips or cocoa nibs
Instructions
- Combine all the overnight oat mix together in a bowl and whisk it together with a fork.
- Leave to sit for 20 minutes or overnight in the fridge.
- Divide the mix in 2 between 2 glasses leaving half of them free for the yoghurt.
- Divide the yoghurt between the 2 glasses and smooth it out.
- Top with the choc chips or cocoa nibs.
- Enjoy!
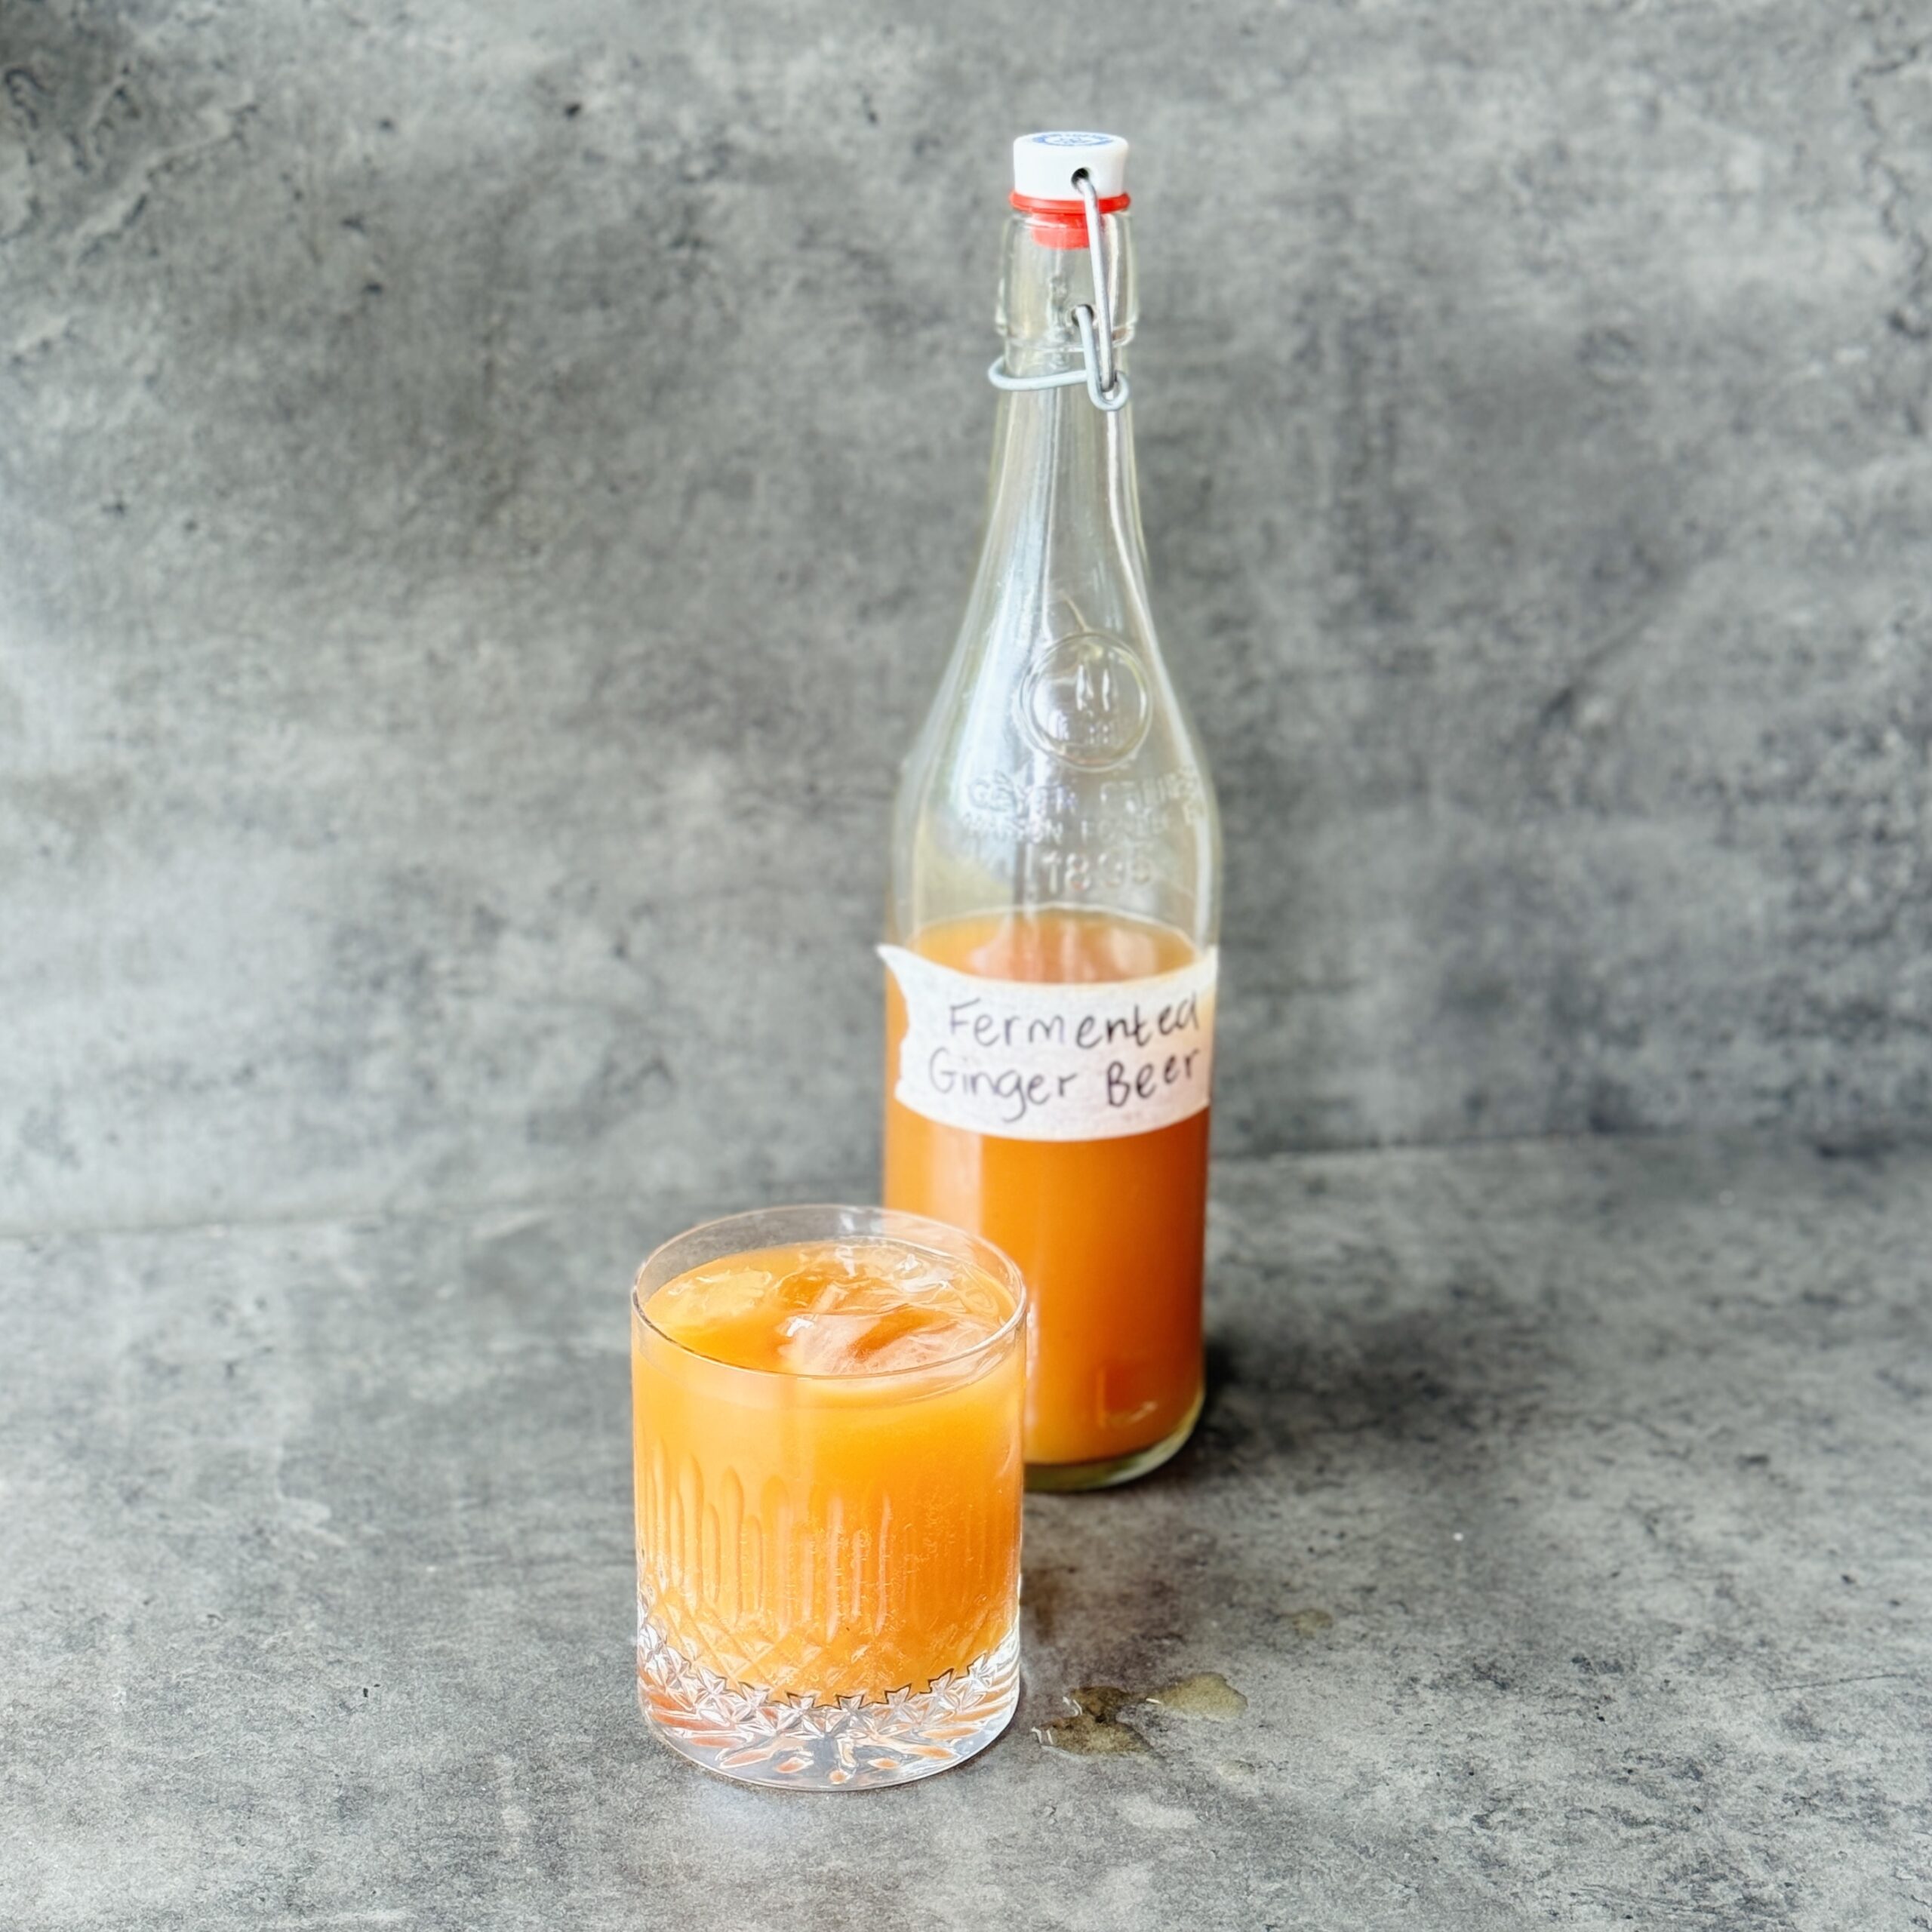
Naturally Fermented Ginger Beer (Non-Alcoholic)
Takes 6 days 20 minutes
Serves 10
Ingredients
For the Ginger Bug:
- 50 g fresh ginger finely grated (about 2 inches),
- 50 g granulated sugar about 1/4 cup
- 500 ml water 2 cups
For the Ginger Beer:
- 100 g fresh ginger finely grated (about 4 inches)
- 150 g brown sugar / coconut sugar 3/4 cup
- Juice of 2 lemons
- 2 litres water 8 cups
- 120 ml or 1/2 cup ginger bug liquid strained
- Additional water for topping up if needed
Instructions
Step 1: Prepare the Ginger Bug
- Day 1: In a clean jar, combine 50g of grated ginger and 50g of sugar with 500ml (2 cups) of water. Stir well to dissolve the sugar. Cover the jar with a cloth or paper towel secured with a rubber band to allow airflow while keeping out dust and insects.
- Days 2-5: Each day, add 1 tablespoon of grated ginger and 1 tablespoon of sugar to the jar, stirring well each time. After 3-5 days, you should notice bubbles forming, indicating that the ginger bug is active and ready to use.
Step 2: Make the Ginger Beer
- Brew a strong sweet ginger tea : In a large pot, combine 100g of grated ginger, 150g of sugar, and 500ml (2 cups) of water. Bring the mixture to a boil, then reduce the heat and let it simmer for about 10 minutes to extract the ginger flavour.
- Cool the Mixture: Remove the pot from heat and add in the remaining 1.5 litres of water to allow the ginger mixture to cool to room temperature.
- Add the Ginger Bug: Add approx about 1/2 cup of your ginger beer, don’t worry if you include osme of the ginger pieces, this will just add to the ginger flavour.
- Ferment the Ginger Beer:
- Pour the cooled ginger tea mixture into a large, clean plastic or glass bottle (leaving some space at the top for expansion).
- Add the juice of 2 lemons and the ginger bug liquid.
- Seal the bottle with a tight lid and let it sit at room temperature for 2 to 3 days.
- 2nd fermentation to increase carbonation:
- Strain and using a funnel pour into smaller bottles, approx 250-500ml bottle with lids, close the lids and leave to ferment at room temperature for 2-3 days ensuring to burp each day to prevent them overflowing due to excess carbonation
- Monitor Fermentation: Check the bottle daily. When it feels firm to the touch (indicating carbonation), carefully open it to release some pressure, then reseal. If it’s very fizzy, move it to the refrigerator to slow down the fermentation.
Step 3: Serve and Enjoy
- Once chilled, your ginger beer is ready to drink! Serve it over ice and enjoy the refreshing, naturally fizzy ginger beer.
Tips:
- Ginger Bug Care: You can keep your ginger bug alive by continuing to feed it with ginger and sugar every few days. Store it in the refrigerator if you’re not using it regularly, and take it out to feed before using it again.
- Customise Flavour: Adjust the amount of ginger and sugar in the ginger beer according to your taste preferences.
The Happy Pear Podcast
In this enlightening episode, we are thrilled to welcome Gaia Ferreira, an internationally renowned speaker, life coach, and author, celebrated for her profound work in personal development, wellness, and mindfulness. With over two decades of experience, Gaia has guided countless individuals on their journey towards a more fulfilled and balanced life. Her approach integrates a deep understanding of human behaviour with practical strategies that empower people to unlock their full potential.
Episode 171
Gaia’s expertise spans a wide range of topics, from mastering mindfulness to cultivating resilience, and her teachings have inspired a global audience to embrace a more conscious and intentional way of living. In this conversation, Gaia shares her invaluable insights and practical advice, making this episode a must-listen for anyone seeking personal growth and a deeper connection with themselves.
Main Topics Covered:
- The Power of Mindfulness: Gaia discusses how mindfulness can transform your everyday life, offering practical tips to incorporate mindfulness into your daily routine.
- Building Resilience: Learn how to develop mental and emotional resilience to navigate life’s challenges more effectively.
- Personal Development Strategies: Gaia shares key strategies for personal growth, including goal-setting, habit formation, and the importance of self-awareness.
- The Mind-Body Connection: Explore the profound connection between mental and physical well-being, and how nurturing this relationship can lead to a more balanced and healthy life.
- Overcoming Limiting Beliefs: Gaia delves into the common limiting beliefs that hold us back and offers guidance on how to overcome them to achieve your full potential.
- The Role of Gratitude: Discover the transformative power of gratitude and how it can shift your mindset to a more positive and abundant state.
- Gaia’s Personal Journey: Get a glimpse into Gaia’s own path of self-discovery and how her experiences have shaped her approach to coaching and teaching.
Join us for an inspiring and transformative conversation that will leave you equipped with the tools and insights to elevate your life. Whether you’re at the beginning of your personal development journey or looking to deepen your practice, this episode with Gaia Ferreira offers wisdom and guidance for all stages of the path.
Lots of love,
Dave & Steve
SPONSORS & DISCOUNT CODES:
Namawell Juicers are AMAZING! They have absolutely revolutionised the juicing game. We have an exclusive 10%
Enter the code HAPPYPEAR10
LINK: https://namawell.com/collections/juicers/products/nama-j2-cold-press-juicer?ref=thehappypear
VIVOBAREFOOT: Vivobarefoot Footwear have given our listeners an exclusive 20% discount and if you buy now you also get free access to their incredible course showcasing some of the biggest names in the health and wellness space.
Enter the code HAPPYPEAR20
LINK: https://www.vivobarefoot.com/uk/the-happy-pear
THE WHOLE HEALTH TRIBE – Join our community
LINK: https://eu1.hubs.ly/H0bmqxd0
THE HAPPY PEAR RECIPE CLUB – Blending health and happiness through a range of over 500 delicious plant-based recipes.
LINK: https://eu1.hubs.ly/H0bmqss0
Sign up to our Newsletter, for updates on our latest recipes, events, and news.
LINK: https://share-eu1.hsforms.com/1hKXaawjoQOONmJe4EXkCdwf92py
Produced by Sean Cahill & Sara Fawsitt

Raspberry Sorbet Magnums
Takes 1 hour 20 minutes
Serves 8
Ingredients
- 1 x 300g packet of frozen raspberries 2.5 cups
- 3 frozen bananas
- Silicone ‘magnum’ ice cream type moulds
- Wooden ice cream sticks
- 200 g dark chocolate 1.25 cups
Instructions
- Make the sorbet: Put the frozen fruit into the hopper of your Nama juicer with the sorbet attachment in place, close the lid to the hopper and turn it on to process. Alternatively you could try blending the fruit using a food processor or blender.
- Fill the sorbet into the moulds: Using a tablespoon spread the raspberry sorbet into the silicone moulds, being sure to spread them out and fill each mould fully.
- Add the ice cream sticks: Insert an ice cream stick into each mould.
- Freeze the raspberry layer: Place the silicone moulds with the raspberry sorbet in the freezer and freeze for 4 hours.
- Melt the chocolate: melt the chocolate using a water bath/bain-marie or by heating in a microwave.
- Dip the Raspberry sorbet ice creams in the melted chocolate: Dip each raspberry sorbet ice creams individually in the melted chocolate making sure to cover all sides.
- Leave to set on some baking parchment: The chocolate should set almost immediately, if not leave to set on the baking parchment. If necessary return to the freezer.
- Enjoy!

Dandelion Root Coffee
Takes 1 hour
Serves 2
Ingredients
- 400 g dandelion roots approx 3 cups
Instructions
Harvest and Clean the Roots
- Harvest the Roots: Dig up dandelion roots from an area free of pesticides and other contaminants. The best time to harvest is in the fall or early spring when the roots are most nutrient-dense.
- Clean the Roots: Thoroughly wash the roots to remove dirt and debris. Use a brush to scrub them clean under running water.
Prepare the Roots
- Chop the Roots: Cut the cleaned roots into small, uniform pieces. The smaller the pieces, the faster and more evenly they will roast.
- Dry the Roots: Spread the chopped roots on a baking sheet and leave them in a dry, well-ventilated area for a few days, or until they are completely dry. This can also be done in a dehydrator at a low temperature.
Roast the Roots
- Preheat the Oven: Preheat your oven to 180°C (350°F).
- Roast the Roots: Spread the dried dandelion root pieces evenly on a baking sheet. Place the sheet in the preheated oven.
- Monitor the Roasting: Roast the roots for about 30-40 minutes, stirring occasionally to ensure even roasting. The roots should turn dark brown and have a coffee-like aroma. Be careful not to burn them.
- Cool the Roots: Once roasted, remove the roots from the oven and let them cool completely.
Grind and Brew
- Grind the Roots: Use a coffee grinder to grind the roasted roots into a fine powder. Store the ground roots in an airtight container.
- Brew the Coffee: To make dandelion root coffee, use about 1-2 tablespoons of the ground root per cup of water. Brew it just like regular coffee using a French press, coffee maker, or by simmering it on the stove for 10-15 minutes and then straining.
Tips
- Adjust the Roast: You can adjust the roasting time depending on your preference for a lighter or darker roast.
- Add Flavour: Consider adding spices like cinnamon or nutmeg during brewing for extra flavour.

‘Happier’ With Dave Flynn
Becoming More Embodied
A couple of ways to become more embodied
Last week I wrote about the idea of becoming more embodied, of moving more from our heads back into our multisensory bodies. This week I wanted to get really practical and give you some ideas of some ways to become more embodied.
5,4,3,2,1 sensory game
A lovely exercise I often do when walking down the street is the 5-4-3-2-1 sensory awareness game. This simple but powerful practice helps shift my attention away from the constant chatter of the mind and back into the rich, multisensory experience of the present moment.
It works like this: First, I take a moment to slowly look around and notice 5 things that I can see. Then I focus on 4 things that I can hear, these might be a car passing by, a bird singing in the distance, a cat meowing, someone speaking across the street. Next is to become aware of 3 things that I can feel via touch, the clothes I am wearing, the feel of my feet in my shoes, are there any subtle pains in my body.
Moving on I tune into 2 things I can smell, it can be a passerby’s perfume, the scent of a flower, a lovely dinner smell wafting out of a neighbours house. Our sense of smell is deeply connected to the limbic system, the emotional control centre of the brain, so engaging it can evoke a sense of grounding and calm. Finally, I try to identify 1 distinct taste in my mouth, even if it’s just the subtle flavour of my own saliva, this is often the hardest!
This simple 5-4-3-2-1 practice is a lovely way to interrupt the constant flow of our thoughts and tune into the immediacy of our physical experience. By systematically engaging each of our senses, we can cultivate a greater sense of presence, connection, and embodied awareness in our daily lives.
Breath
I remember Steve & I went interrailing across Europe one summer when we were in College. We were sitting in a train carriage travelling across the Czech Republic and quite a mystical guy entered our carriage. He had a vibe going on, he was really present and there was something very alluring about him. I remember he was Swiss and he told us about a 10 day silent meditation retreat he had been on called Vipassana that had transformed his life for the better..

At the time, Steve and I were the quintessential searchers, searching for more meaning so naturally we both felt drawn toward this! A year later we were volunteering in one of these Vipassana meditation centres in Massachusetts for a number of months and we had both sat one of these 10 day silent meditation retreats. The crux of the practice from my understanding was that the breath is the most immediate access point that we have to becoming present and aware of the vast world of sensations that you feel on your body at any moment. While you are reading this, right now, become more aware of your breath, are you breathing shallow or deep? Are your breaths long or short? As you tune into your breath, very often you can become aware of the subtle flow of energy around your body.
I believe the breath provides the easiest way to get ‘out of your head’ and ‘back in your body’. I wrote a previous happier Column on Breath and the opportunity tuning into our breath more can have. This primal life force flowing through us becomes a gateway, reminding us that we are not just disembodied minds, but fully embodied, sensing creatures. Meditation and mindfulness are two practices that typically use the breath as a touchstone to becoming very aware of all the sensations that are happening in your body here and now. That is why meditation, mindfulness and any form of breathwork can be incredible tools at reconnecting you and bringing you back into your body.
Dance
My daughters have regularly referred to my dance skills as deeply embarrassing! Both Steve and me in our heads are fantastic dancers but in reality we are usually perceived as wild lunatics! Our brother Mark is a DJ, back when we were in our 20’s Mark used to DJ in nightclubs in Dublin and we used to love to go support him. We would take our veg van and head in for the night, sleep in the van after and then go straight to Dublin fruit market at 5am! I remember so distinctly, Steve and I were such enthusiastic dancers that we would get a tap on the shoulder consistently and a young guy would say to us ‘mate, do you have any pills’?!! We didn’t drink or take any pills, we just loved the feeling of letting loose on the dance floor and literally losing ourselves to the music.

Dancing is one of the most ancient and universal forms of human expression, with a rich history that stretches back thousands of years across cultures. From ritual dances performed to honour the divine, to joyful celebrations marking rites of passage, to communal festivities that bring people together – dance has long been inextricably woven into the fabric of the human experience. Psychologically, the act of moving our bodies in sync with music has been shown to stimulate the release of endorphins, foster a sense of connection, and induce altered states of consciousness – all of which can contribute to a profound experience of embodied freedom and transcendence.
As a 44-year-old man who grew up primarily focused on sports, dancing did not come as naturally to me. However, after giving up alcohol at age 21, I found myself turning to dance as a way to stay energised and engaged at parties, rather than simply sitting on the sidelines. Over the years, I’ve come to deeply appreciate dance as one of the greatest joys that exist. When you lose yourself to the rhythm and flow of the music, the sense of freedom and unity that arises is truly second to none. Whereas many adults only dance a few times a year, such as at weddings after copious amounts of alcohol, I believe dance is an essential human experience that can help us fully engage our bodies and spirits, lifting us up in a deeply embodied way.
Growing some of your food
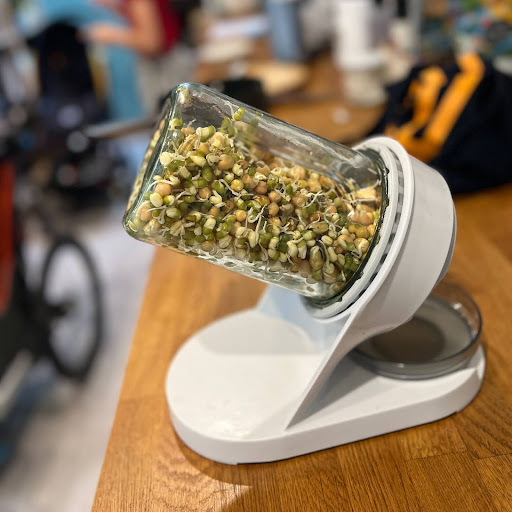
Last week I started sprouting again. I am growing some of the most nutritious food possible in a large jar on my kitchen counter! A friend, Doug Evans, who wrote the book ‘how to grow sprouts’ visited us last week to be a guest on our podcast. He inspired me to get back sprouting. There is something deeply connecting about growing our own food, we appreciate it more, do not waste it, and get to pour our love and energy into it over a period of time. I believe growing food gives us a wonderful opportunity to become more embodied.
These activities all have the power to reconnect us with the incredible sensory experience of being fully present in our physical bodies.There are literally millions of things you can do to become more embodied from walking, running, cycling, yoga, going to the gym etc that all bring you back in more awareness of the incredible multi sensory body that you inhabit.
When we live more embodied, we cultivate a deeper sense of presence, aliveness, and connection. We become less caught up in the incessant chatter of the mind and more attuned to the rich tapestry of sights, sounds, textures, and sensations that are always available to us. This embodied awareness can help reduce stress, enhance our appreciation for the world around us, and infuse our lives with a greater sense of wonder and vitality.
My main point here is that when you are ‘living more in your body’ you are more likely to be present, aware in the here and now and less likely to be caught up with anxieties etc. What do you think? What do you do to become more embodied? Are there specific things you do to bring you back in your body?
As always, thanks again for taking the time to read this. If you enjoyed it you can find my other Happier Articles here.
Have a lovely week, Dave x
More ‘Happier’ Articles
More ‘Happier’ Articles
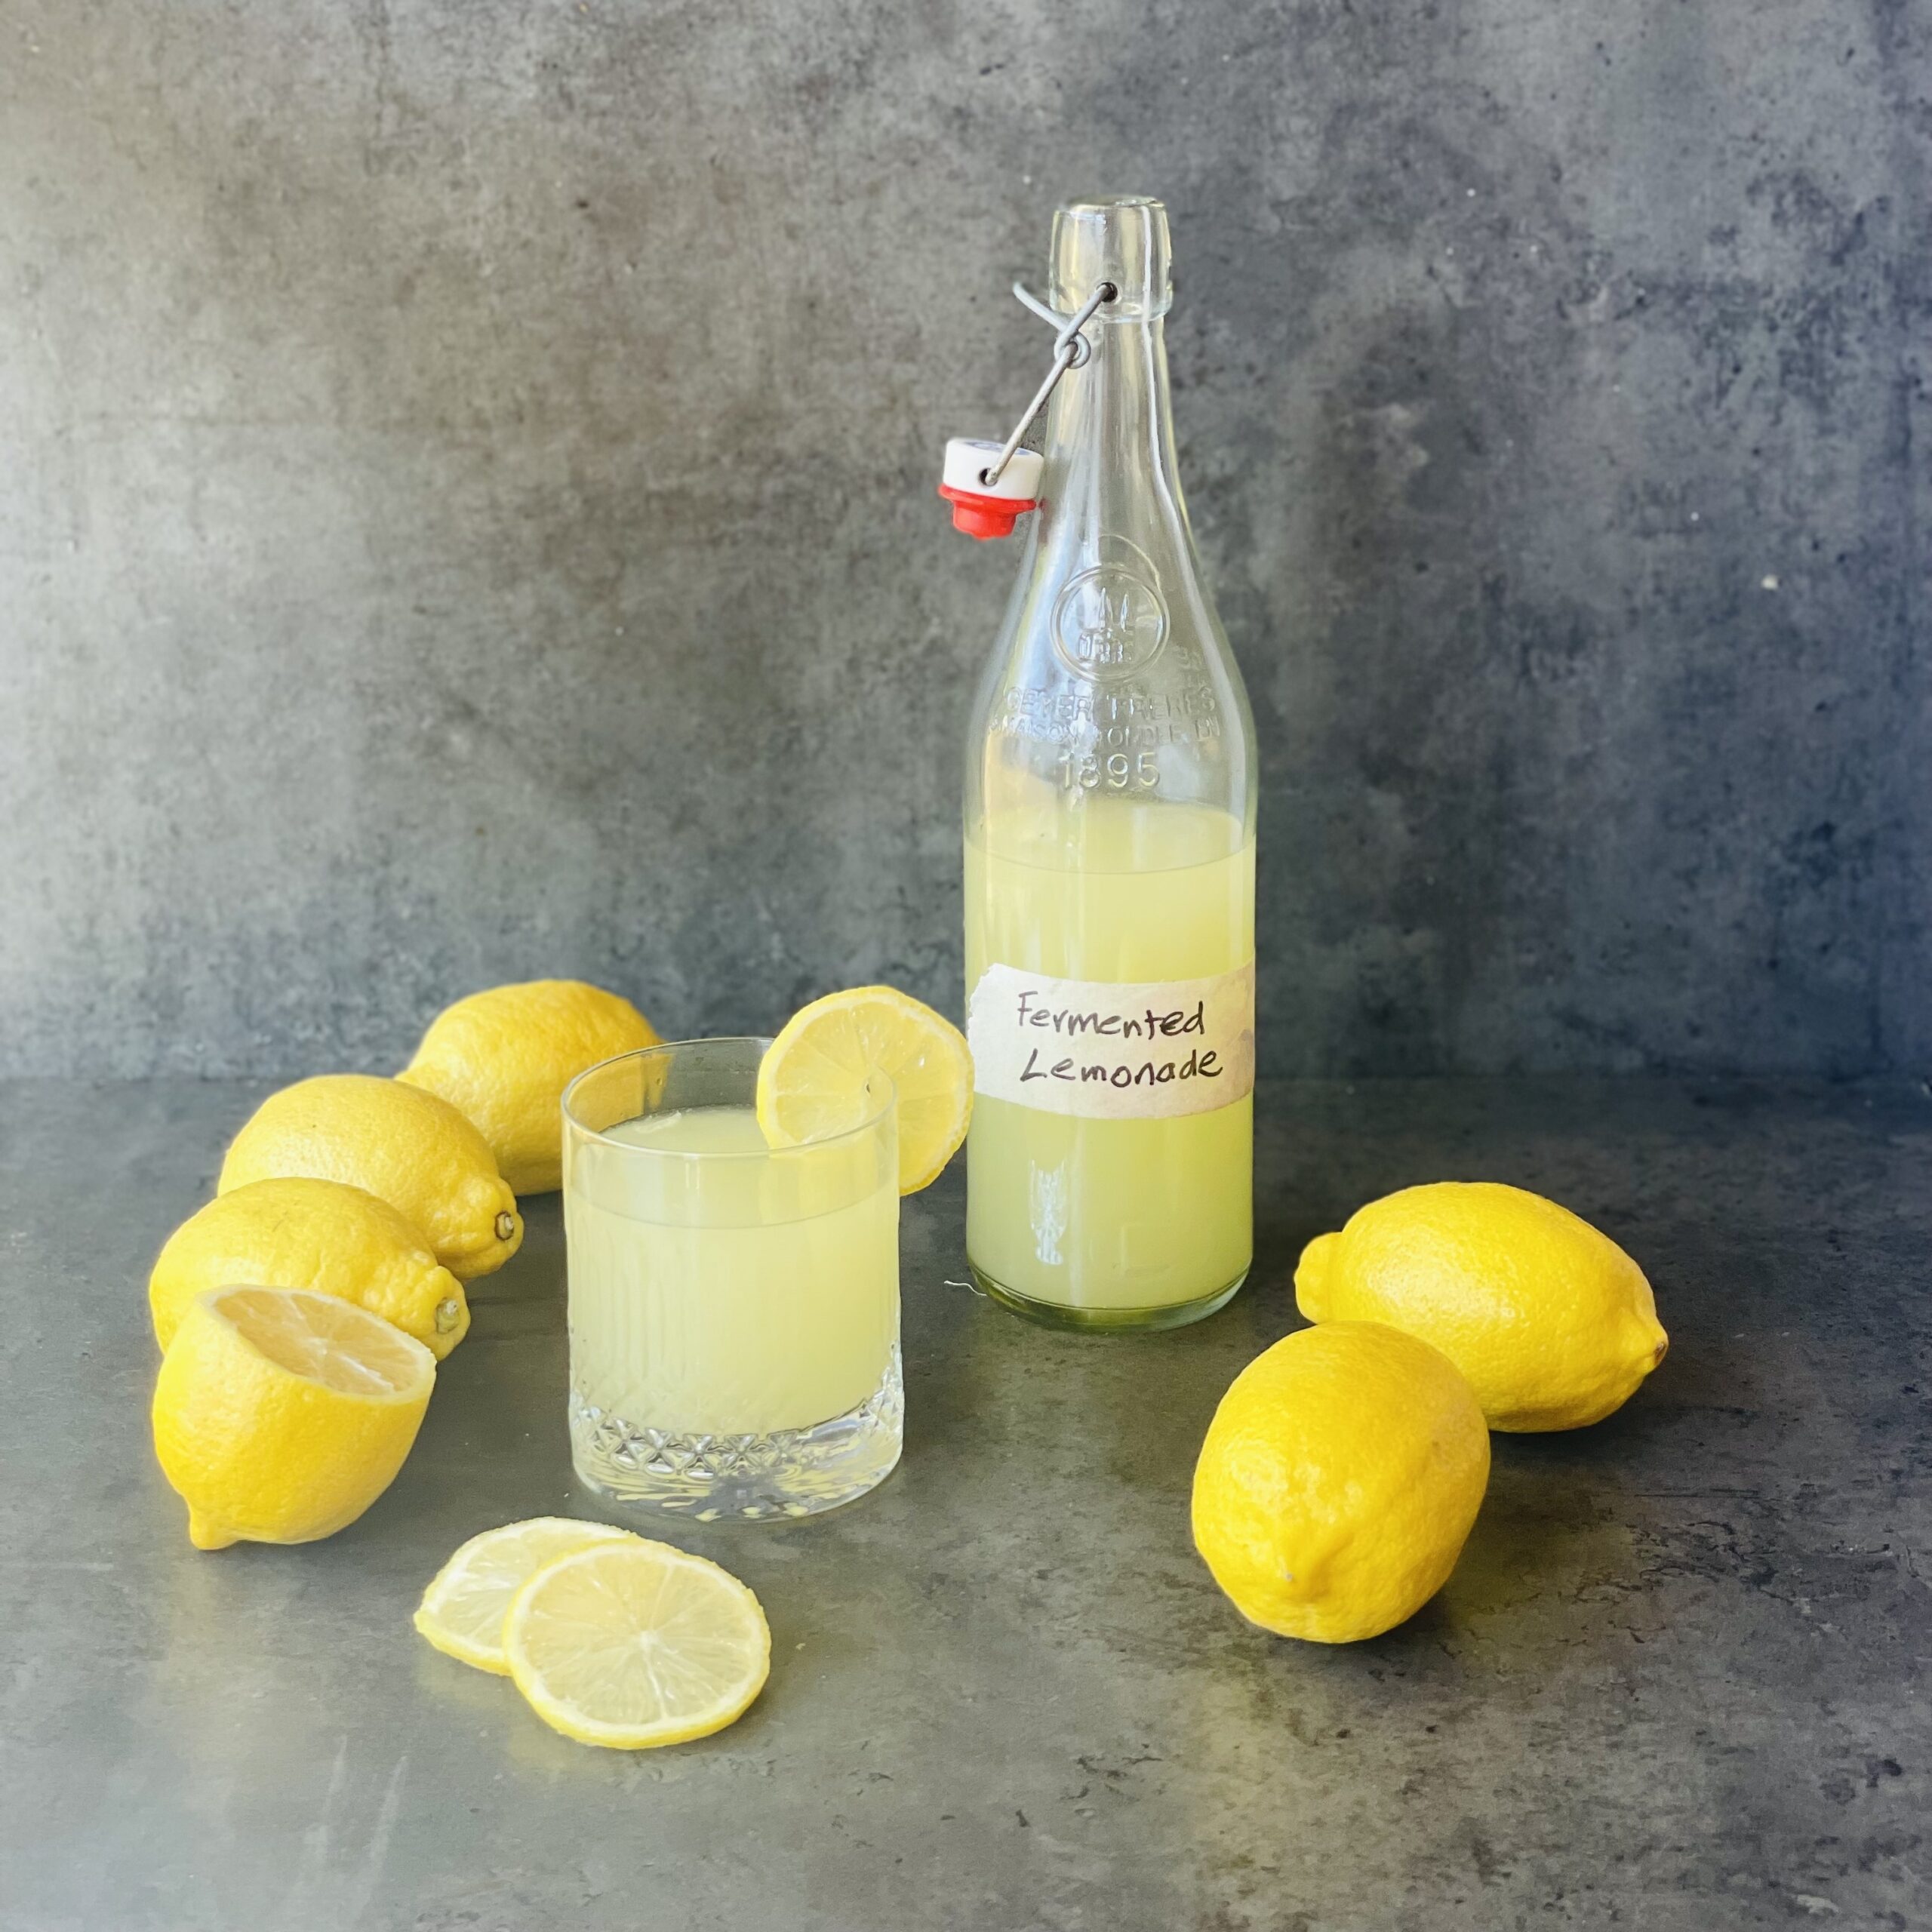
Homemade Fizzy Fermented Lemonade
Takes 7 days
Serves 1.2
Ingredients
- 6-8 lemons unwaxed and ideally organic lemons
- 60-120 grams of sugar adjust to your taste preference
- 1 litre of water
Instructions
- Combine the ingredients: In a large jar or pitcher, squeeze in the juice of all the lemons and add this juice, the sugar, and water. Stir until the sugar is fully dissolved.
- Add the lemon peels: Add the juiced lemon peels to the mixture. The natural yeast on the lemon skins will help kickstart the fermentation process.
- Close the lid or cover the jar: Close the lid on the jar or cover the jar loosely with a cheesecloth, paper towel, or coffee filter. This allows air to circulate while keeping out dust and debris.
- Ferment at room temperature: Let the mixture ferment at room temperature (around 21-24°C) for 3 days, stirring occasionally. You’ll start to see small bubbles forming, indicating the fermentation is taking place.
- Sieve to remove the peels: Sieve the lemons and pips and strain the liquid. Use a funnel to transfer the lemonade to 2 x 500ml bottles or small jars with lis and close the lid and leave to ferment for 3 days at room temperature. This will help to build up for carbonation.
- Burp the lemonade each day: natural carbonation will start to build up so you will have to open the lid to release the pressure and just close. Repeat this each day for the 3 days.
- Refrigerate to stop fermentation: Once the lemonade is nice and fizzy transfer to the fridge to stop fermentation
- Enjoy your fermented lemonade: Enjoy your homemade fermented lemonade! It will keep in the fridge for 1-2 weeks.
- Tips:
- Make sure to use organic, unwaxed lemons so you get the full benefit of the natural yeast on the skins.
- The longer you ferment, the more sour and carbonated it will become.
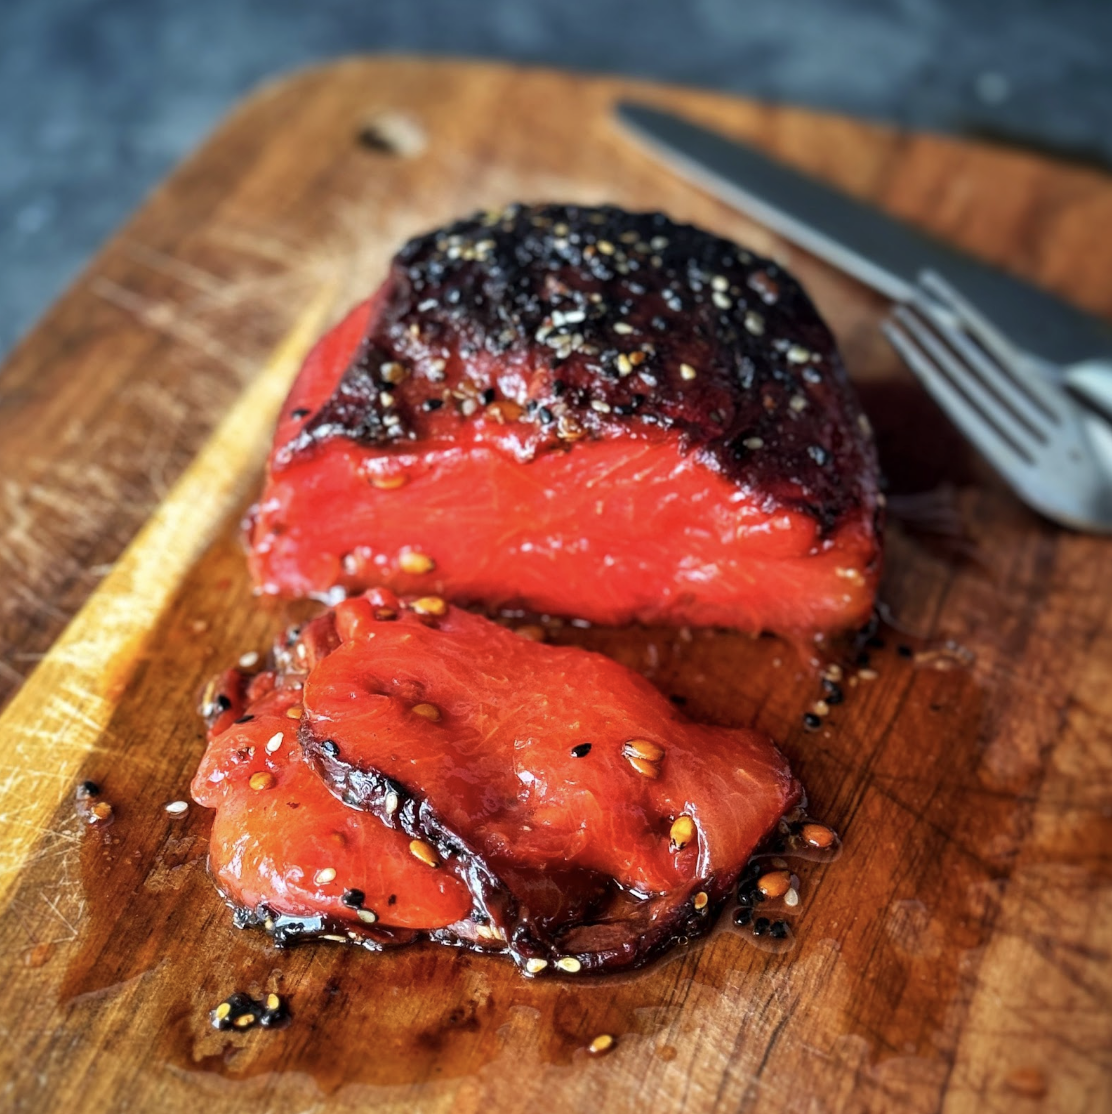
Plant-based Tuna Steak
Takes 2 hours 40 minutes
Serves 500
Ingredients
- 1 baby watermelon
Dressing:
- 1 tbsp sesame oil
- 1 clove garlic
- 3 cm cube piece of ginger approx 8g
- 2 tbsp tamari/ soy sauce
- 1 tbsp maple syrup
- 1 tsp mirin or vinegar of choice
- 1 tbsp black sesame seeds
- 1 tbsp white sesame seeds
Instructions
- Preheat the oven to 190 degrees C
- Using a small knife carefully remove the skin of the baby watermelon.
- Add to a baking tray and bake for 2 hours turning the melon every 30 mins so that it cooked evenly.
- After 2 hours it will have developed a light skin and started to lightly brown around the edges, time to make your dressing.
- Peel and finely grate the ginger and garlic, add in the rest of the ingredient for the dressing and mix well.
- Remove the baked watermelon from the oven and using a pastry brush, brush all the exposed watermelon in a generous coating and baking for 10 mins. Remove and turn the watermelon and brush with the dressing and bake again for 10 mins. Finally remove again and brush with the last layer of the dressing again with a generous layer and bake for a final 10 mins

‘Happier’ With Dave Flynn
The Comfort Trap Part 2
Becoming More Embodied
As I sit on the padded floor of my 11-month-old daughter Fia’s room, I marvel at her embodied state of being. She is fully engaged with her primitive, mammal mode of exploring movement and discovering what her body can do. Fundamentally embodied, Fia is sensing, feeling, and interacting with her environment through the innate wisdom of her physical form. She is fully engaged and present in her body, marveling and curious.

This column is building on last weeks’ ‘Happier’ Column titled The Comfort Trap where I laid out the idea that our excess of modern comforts could likely be contributing to less fulfilment, joy and happiness. With the massive rise of humans sitting for a prolonged amount of time, and most work nowadays being office based, I sometimes think that – as a society – we are starting to see our bodies as simply a vehicle to transport our brains around. Today’s column is about the idea of becoming more physically embodied as a way to feel a little happier. In essence, to move more from our heads to our hearts and bodies, to become more ‘embodied’ and maybe a little bit more whole.
Dis-embodied?
The other day, I was walking down the street and counted 10 people who I walked past who had their head buried in their phone nearly walking into me or a lamp post! I have definitely been guilty of doing that too, so I am definitely not judging. It just made me even more aware of how modern life with all its alluring screens and fancy technologies is drawing us away from our physical form and the wonder of the world around us.

I can’t help but believe that reclaiming this sense of physical embodiment could be a key to greater happiness and fulfilment. I believe that when we are fully present in our senses, attuned to the rhythms and needs of the body, we are more likely to experience the richness of the here and now. All great sages say the same thing: that life happens here and now, and I believe that fully inhabiting our body and engaging with our senses is key to this.
A few years ago, Steve and I went to an event in London. It was in an industrial estate in North London in a private show kitchen and it blew us away. It was a sensorial dinner. The first course we were given nose pegs and invited to put them on. The chef explained that our sense of smell (olfactory glands) is directly linked to our taste. This is why wine tasters slurp their wine, to get more air passing across the surface of the wine so they can ‘taste’ the wine via their nose!
But back to the story: the first course we put on these nose pegs and were given a black jelly and asked to guess what we could taste. Neither of us could taste a thing. When we removed the nose peg and tasted again, our taste receptors were flooded with an explosive taste of red berries, the black colour was simply to mislead us. The evening progressed with another course where we had to wear headphones with certain music that influenced the taste and we had to rub our hand on a rough surface while eating our dessert to show how touching a rough surface makes us experience more of a crunch like taste

The sensorial dinner experience really emphasised the power of fully engaging our senses to be present in our bodies and delight in the richness of the moment. It made us acutely aware that modern life, for all its wonders, often pulls us away from this embodied state of awareness, keeping us trapped in the distracted, busy hum of daily routines. By reconnecting to the wisdom of our physical form, we can cultivate a greater sense of aliveness, presence, and connection – key ingredients for a happier human experience.
Is the body just a means to transport our brain around?
At the moment, a part of me is slightly worried that much of modern life relegates the body to a mere vehicle for the brain. Yet the body and brain are inextricably linked, connected by the same nervous system. By becoming more embodied, life has the potential to become richer in the true sense of the word – not just materially, but in our ability to connect more deeply, feel more intensely, and harmonise with ourselves, one another, and the natural world. Moving beyond seeing the body as secondary to the mind opens up profound possibilities for self-awareness, belonging, and joy.
Wrapping it up
I invite you to reflect on your own relationship to your body. What practices or experiences help you to feel more grounded, alive, and present in your physical form? Whether it’s mindful breathing, dancing, hiking in nature, or simply making a concerted effort to unplug from screens, I believe that by doing so we are nurturing an essential aspect of the human experience.
For in doing so, we just may unlock the keys to a richer, more joyful existence. I’m curious to hear your thoughts – what helps you to feel more embodied?
Next week I plan to write about my favourite ways to become more embodied! Thank you so much as always for reading, I greatly appreciate it.
Have a lovely weekend.
Dave x
More ‘Happier’ Articles
More ‘Happier’ Articles
The Happy Pear Podcast
This week we are joined by the incredible Kirsty Gallagher, a renowned astrologer and author of the Sunday Times bestseller, The Goddess Path. With over 20 years of experience in astrology, meditation, and spirituality, Kirsty has empowered countless individuals to reconnect with their inner selves and navigate life’s challenges with grace and wisdom. Her unique approach combines ancient wisdom with modern insights, making her a beloved guide in the world of self-discovery and personal growth.
Episode 170
Main Topics Covered:
- Kirsty’s Journey: Discover Kirsty’s path to becoming an astrologer and spiritual guide. She shares her early influences, the transformative experiences that led her to embrace astrology, and how she has built a successful career helping others find their true paths.
- Astrology 101: Kirsty breaks down the basics of astrology for beginners, explaining the significance of zodiac signs, birth charts, and planetary alignments. She offers practical advice on how to start incorporating astrology into your daily life.
- The Goddess Path: Dive into the themes of Kirsty’s bestselling book, The Goddess Path. Learn about the ancient goddess archetypes and how they can inspire and empower you in modern times. Kirsty discusses the importance of reconnecting with the divine feminine and embracing your inner goddess.
- Moon Magic: Explore the powerful influence of the moon on our emotions, behaviors, and spiritual practices. Kirsty shares insights on moon phases, rituals, and how to harness lunar energy for personal growth and manifestation.
- Practical Tips for Everyday Life: Kirsty provides actionable tips on how to integrate astrology and spirituality into your daily routine. From setting intentions to mindful living, discover simple practices that can bring more clarity, balance, and joy into your life.
Join us for a captivating conversation with Kirsty Gallagher that will leave you feeling inspired and equipped with new tools to enhance your spiritual journey. Whether you’re a seasoned astrology enthusiast or a curious beginner, this episode is packed with wisdom and practical guidance that you won’t want to miss.
Lots of love,
Dave & Steve
SPONSORS & DISCOUNT CODES:
Namawell Juicers are AMAZING! They have absolutely revolutionised the juicing game. We have an exclusive 10%
Enter the code HAPPYPEAR10
LINK: https://namawell.com/collections/juicers/products/nama-j2-cold-press-juicer?ref=thehappypear
VIVOBAREFOOT: Vivobarefoot Footwear have given our listeners an exclusive 20% discount and if you buy now you also get free access to their incredible course showcasing some of the biggest names in the health and wellness space.
Enter the code HAPPYPEAR20
LINK: https://www.vivobarefoot.com/uk/the-happy-pear
THE WHOLE HEALTH TRIBE – Join the community
LINK: https://eu1.hubs.ly/H0bmqxd0
THE HAPPY PEAR RECIPE CLUB – Blending health and happiness through a range of over 500 delicious plant-based recipes.
LINK: https://eu1.hubs.ly/H0bmqss0
Sign up to our Newsletter, for updates on our latest recipes, events, and news.
LINK: https://share-eu1.hsforms.com/1hKXaawjoQOONmJe4EXkCdwf92py
Produced by Sean Cahill & Sara Fawsitt
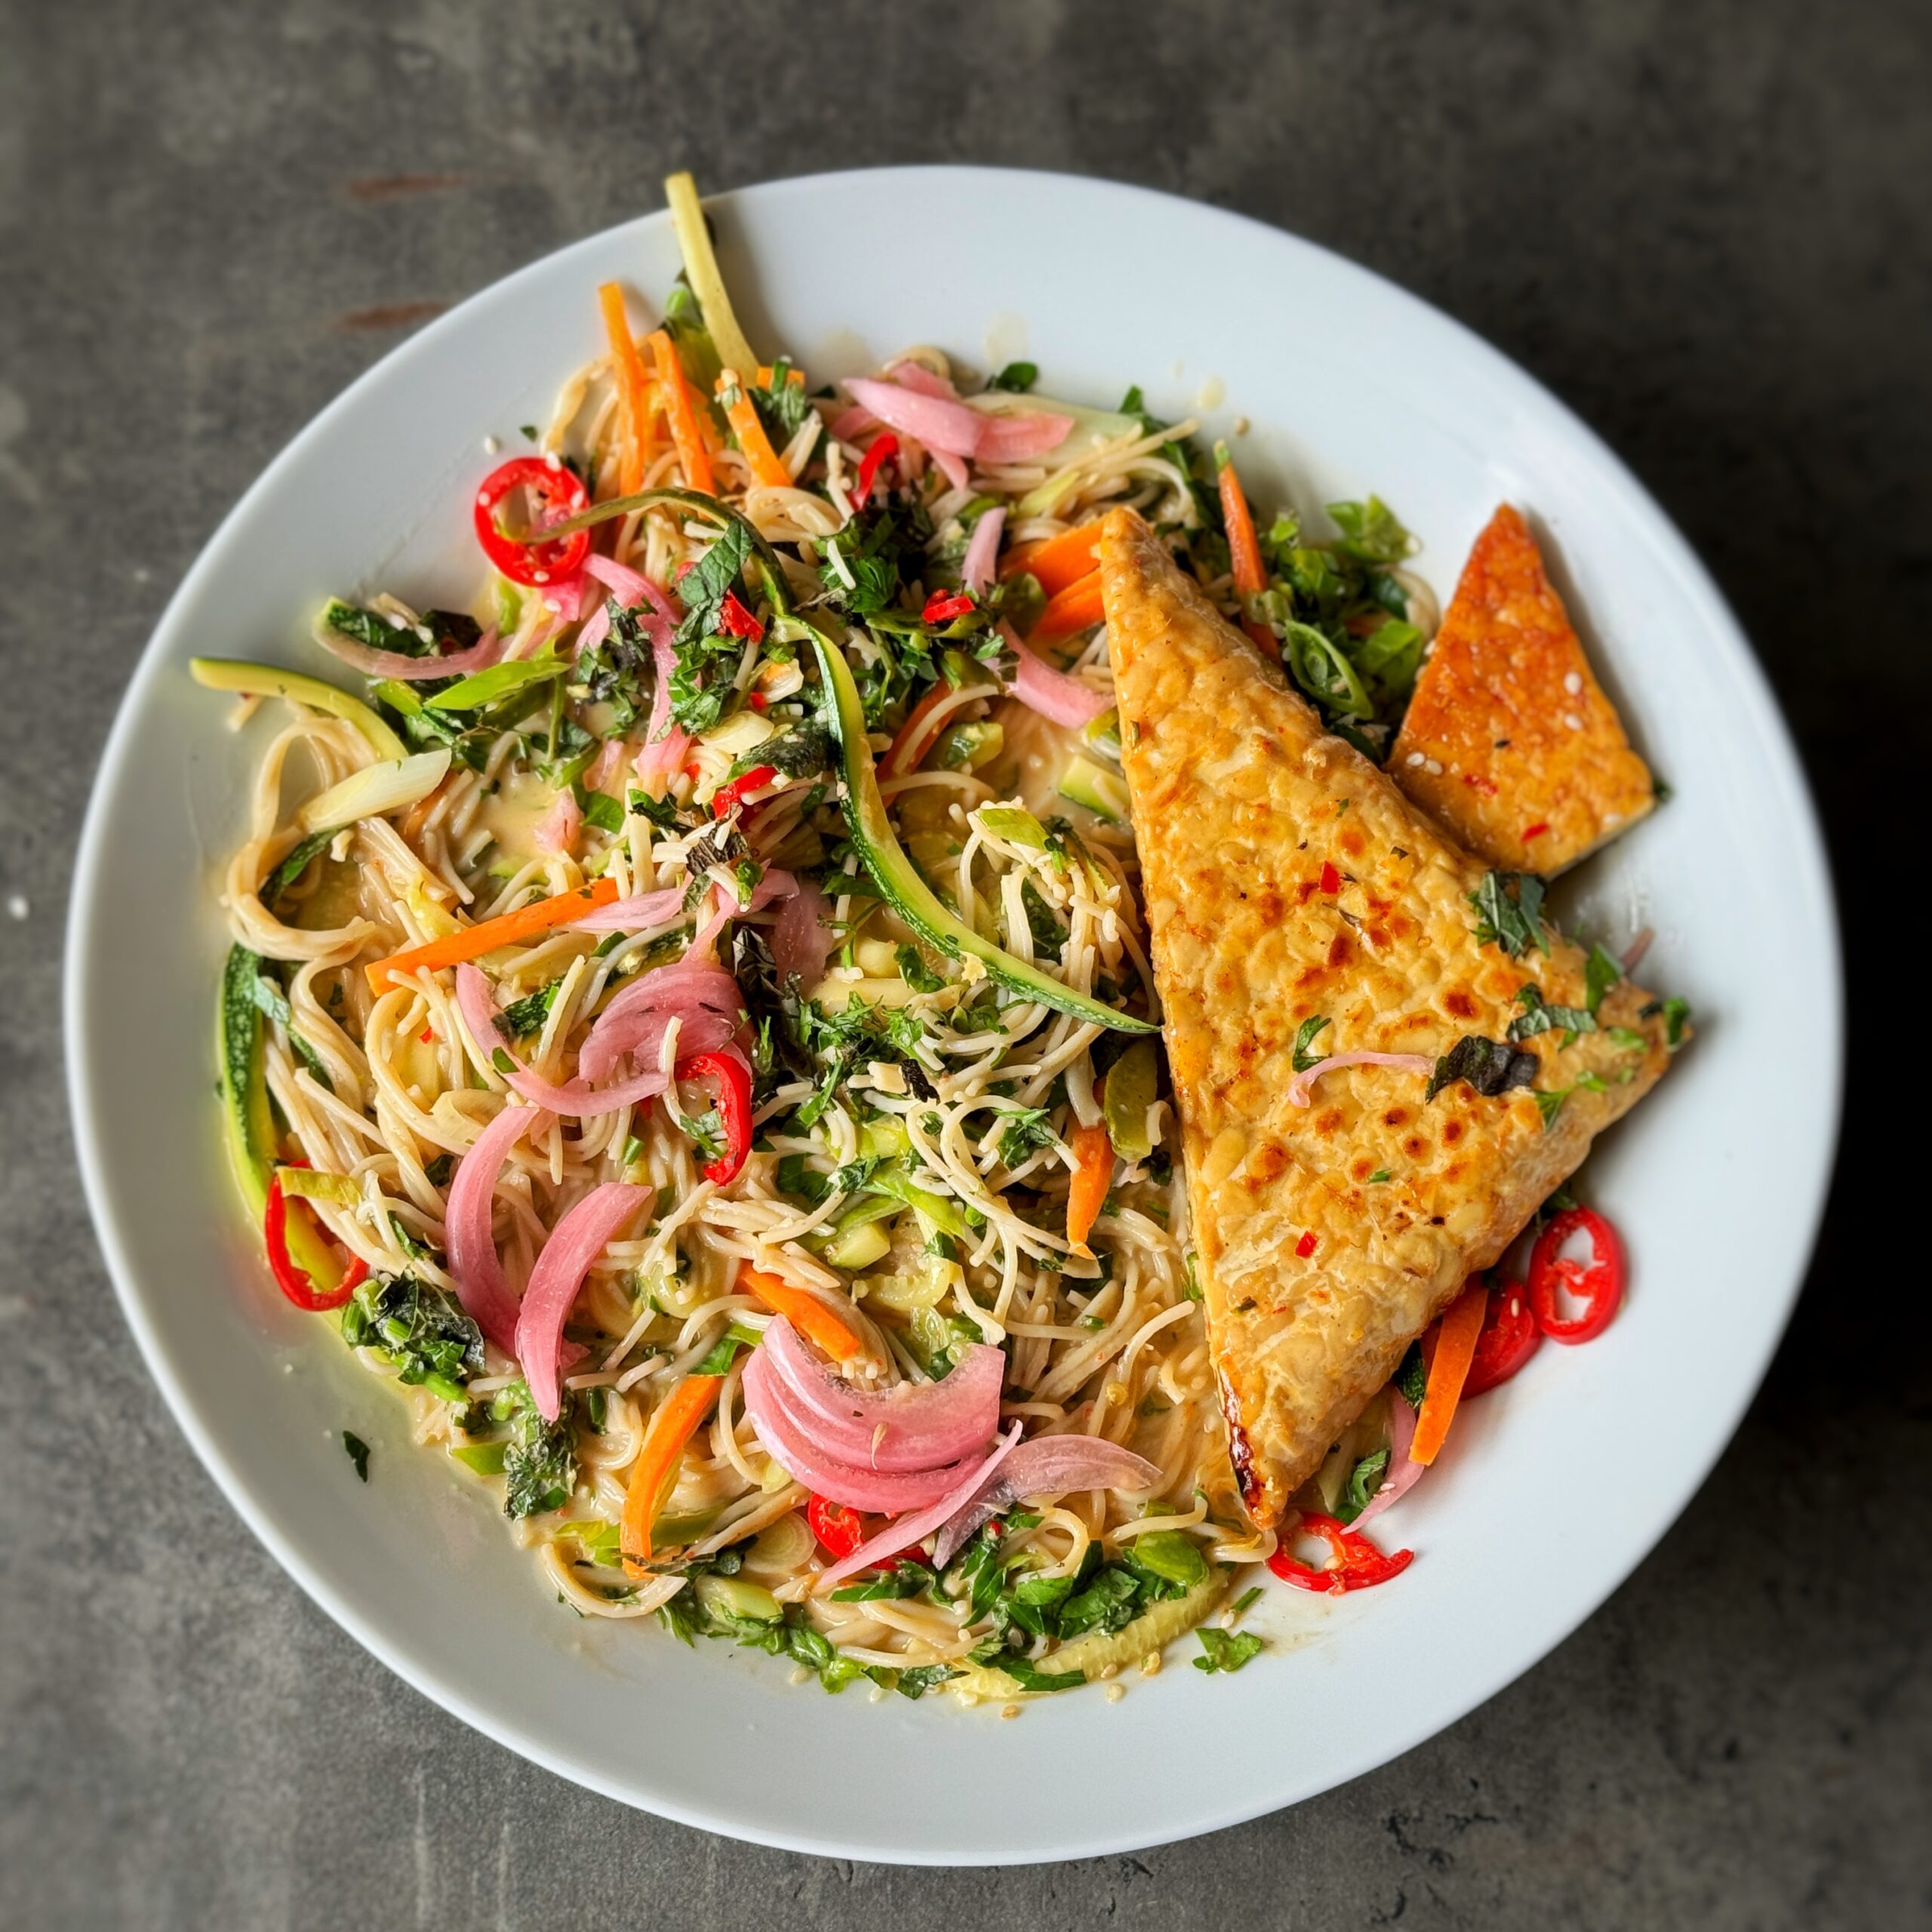
10 Minute Thai Noodles
Takes 10 minutes
Serves 3
Ingredients
- 250 g noodles of choice we used brown rice vermicelli
- 300 g tempeh/ tofu/ mushrooms
- 1 tin of coconut milk
- 400 ml veg stock
- ½ thumb sized piece of ginger 10g
- 1 large clove of garlic
- 1 lime
- 3 tbsp tamari or soy sauce
- 2 tbsp maple syrup
- 1 red chilli
- 20 g fresh herbs coriander and parsley or what ever you like and have available
- 1 carrot
- 1 courgette
- 1 bunch of scallions/ spring onions
To serve:
- Pickled red onions
- 2 tbsp sesame seeds
Instructions
Cook the noodles:
- Cook the noodles according to the pack instructions and drain and rinse
Sear the tempeh
- Heat a large non stick frying pan on high heat and slice the tempeh/ tofu into a thin slice that is approx ½-1 cm thick, we got 4 nice triangle shaped pieces. Once the pan is hot add 1 tbsp of oil followed by the tempeh. Fry the tempeh for 3 mins on each side until it starts to sear and go lightly golden.
Make the sauce
- Into a blender add the ginger, garlic, coconut milk, juice of ½ lime, tamari, maple syrup, ½ red chilli and blend till smooth.
Prepare the veg:
- Slice the carrot and courgette into thin match stick slices or jullienne slices, finely slice the spring onions and herbs and slice the remaining half a chilli into thin slices.
Finish the tempeh/ tofu
- Add in 3 tbsp of the sauce to the tempeh and turn to cook on both sides until it starts to caramelise slightly. This should take approx 1-2 mins.
Cook the veg
- Remove the tempeh/ tofu and set aside and add in the matchstick shaped carrot, courgette followed by a pinch of salt and the spring onions/ scallions cook for 2 minute moving them around the pan continuously.
Bring the dish together
- Add in the remaining coconut based sauce and the veg stock, followed by the cooked noodles and bring the dish together. Squeeze in the remaining half a lime, add in the chopped herbs and season to your liking.
Garnish and enjoy
- Divide between 2-4 large bowls and garnish with some pickled red onions and a sprinkle of sesame seeds, followed by a piece of tempeh on top
Enjoy!
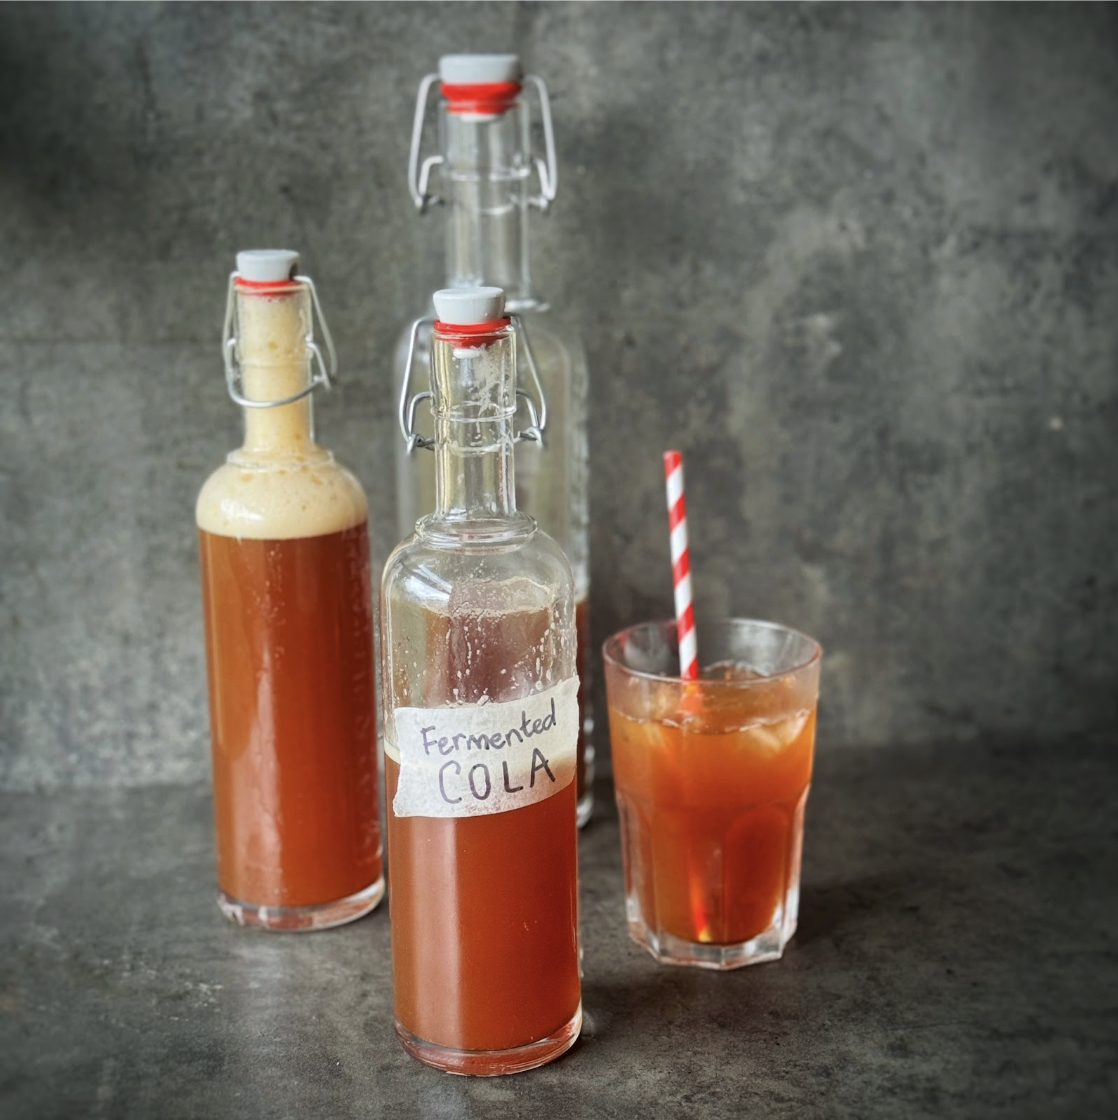
Naturally Fermented Homemade Cola
Takes 7 days 40 minutes
Serves 2
Ingredients
Fruits and Vegetables:
- 1 medium apple organic, unwashed, for wild yeast
- 1 medium orange organic, unwashed
- 1 lemon organic, unwashed
- 1 lime organic, unwashed
- 1 piece of fresh ginger about 5 cm, unpeeled
Flavorings:
- 1 cinnamon stick
- 1 vanilla bean split
- 5 star anise pods
- 6 cloves
- 1 tablespoon coriander seeds
- 1 tablespoon allspice berries or ground allspice
Sweetener:
- 250 g 8.8 oz coconut/ brown sugar
Water:
- 2 litres 2 quarts filtered water
Instructions
Prepare the Ingredients:
- Roughly chop the apple, orange, lemon, and lime, keeping the peels on as they contain wild yeasts.
- Slice the ginger thinly.
Make the Base:
- In a large pot, combine the cinnamon stick, vanilla bean, star anise, cloves, coriander seeds, and allspice berries.
- Add the filtered water and bring to a boil.
- Once boiling, reduce the heat and let it simmer for about 20-30 minutes to extract the flavours.
Add the Sweetener:
- Add the coconut sugar/ brown sugar to the pot and stir until completely dissolved.
- Remove the pot from heat and let the mixture cool to room temperature.
Add the Fruits for Fermentation:
- Once the base has cooled to room temperature, transfer it to a large, clean glass jar or fermentation vessel.
- Add the chopped apple, orange, lemon, lime, and ginger to the jar. The fruits should be added unwashed to ensure the wild yeast on their skins remains intact.
- Cover the jar with a clean cloth or cheesecloth secured with a rubber band to allow airflow while preventing contaminants.
- Place the jar in a warm, dark place (around 20-25°C / 68-77°F) for 2-4 days, stirring occasionally. You’ll start to see bubbles forming, indicating fermentation.
Strain and Bottle:
- After the fermentation period, strain out the solids using a fine-mesh sieve or cheesecloth.
- Pour the liquid into clean, airtight bottles, leaving some headspace at the top.
- Seal the bottles and let them ferment at room temperature for another 1-3 days, checking daily for carbonation. Be careful with pressure buildup in the bottles to prevent them from exploding.
Refrigerate and Serve:
- Once the desired level of carbonation is achieved, refrigerate the bottles to slow down the fermentation.
- Serve chilled and enjoy your naturally fermented cola!
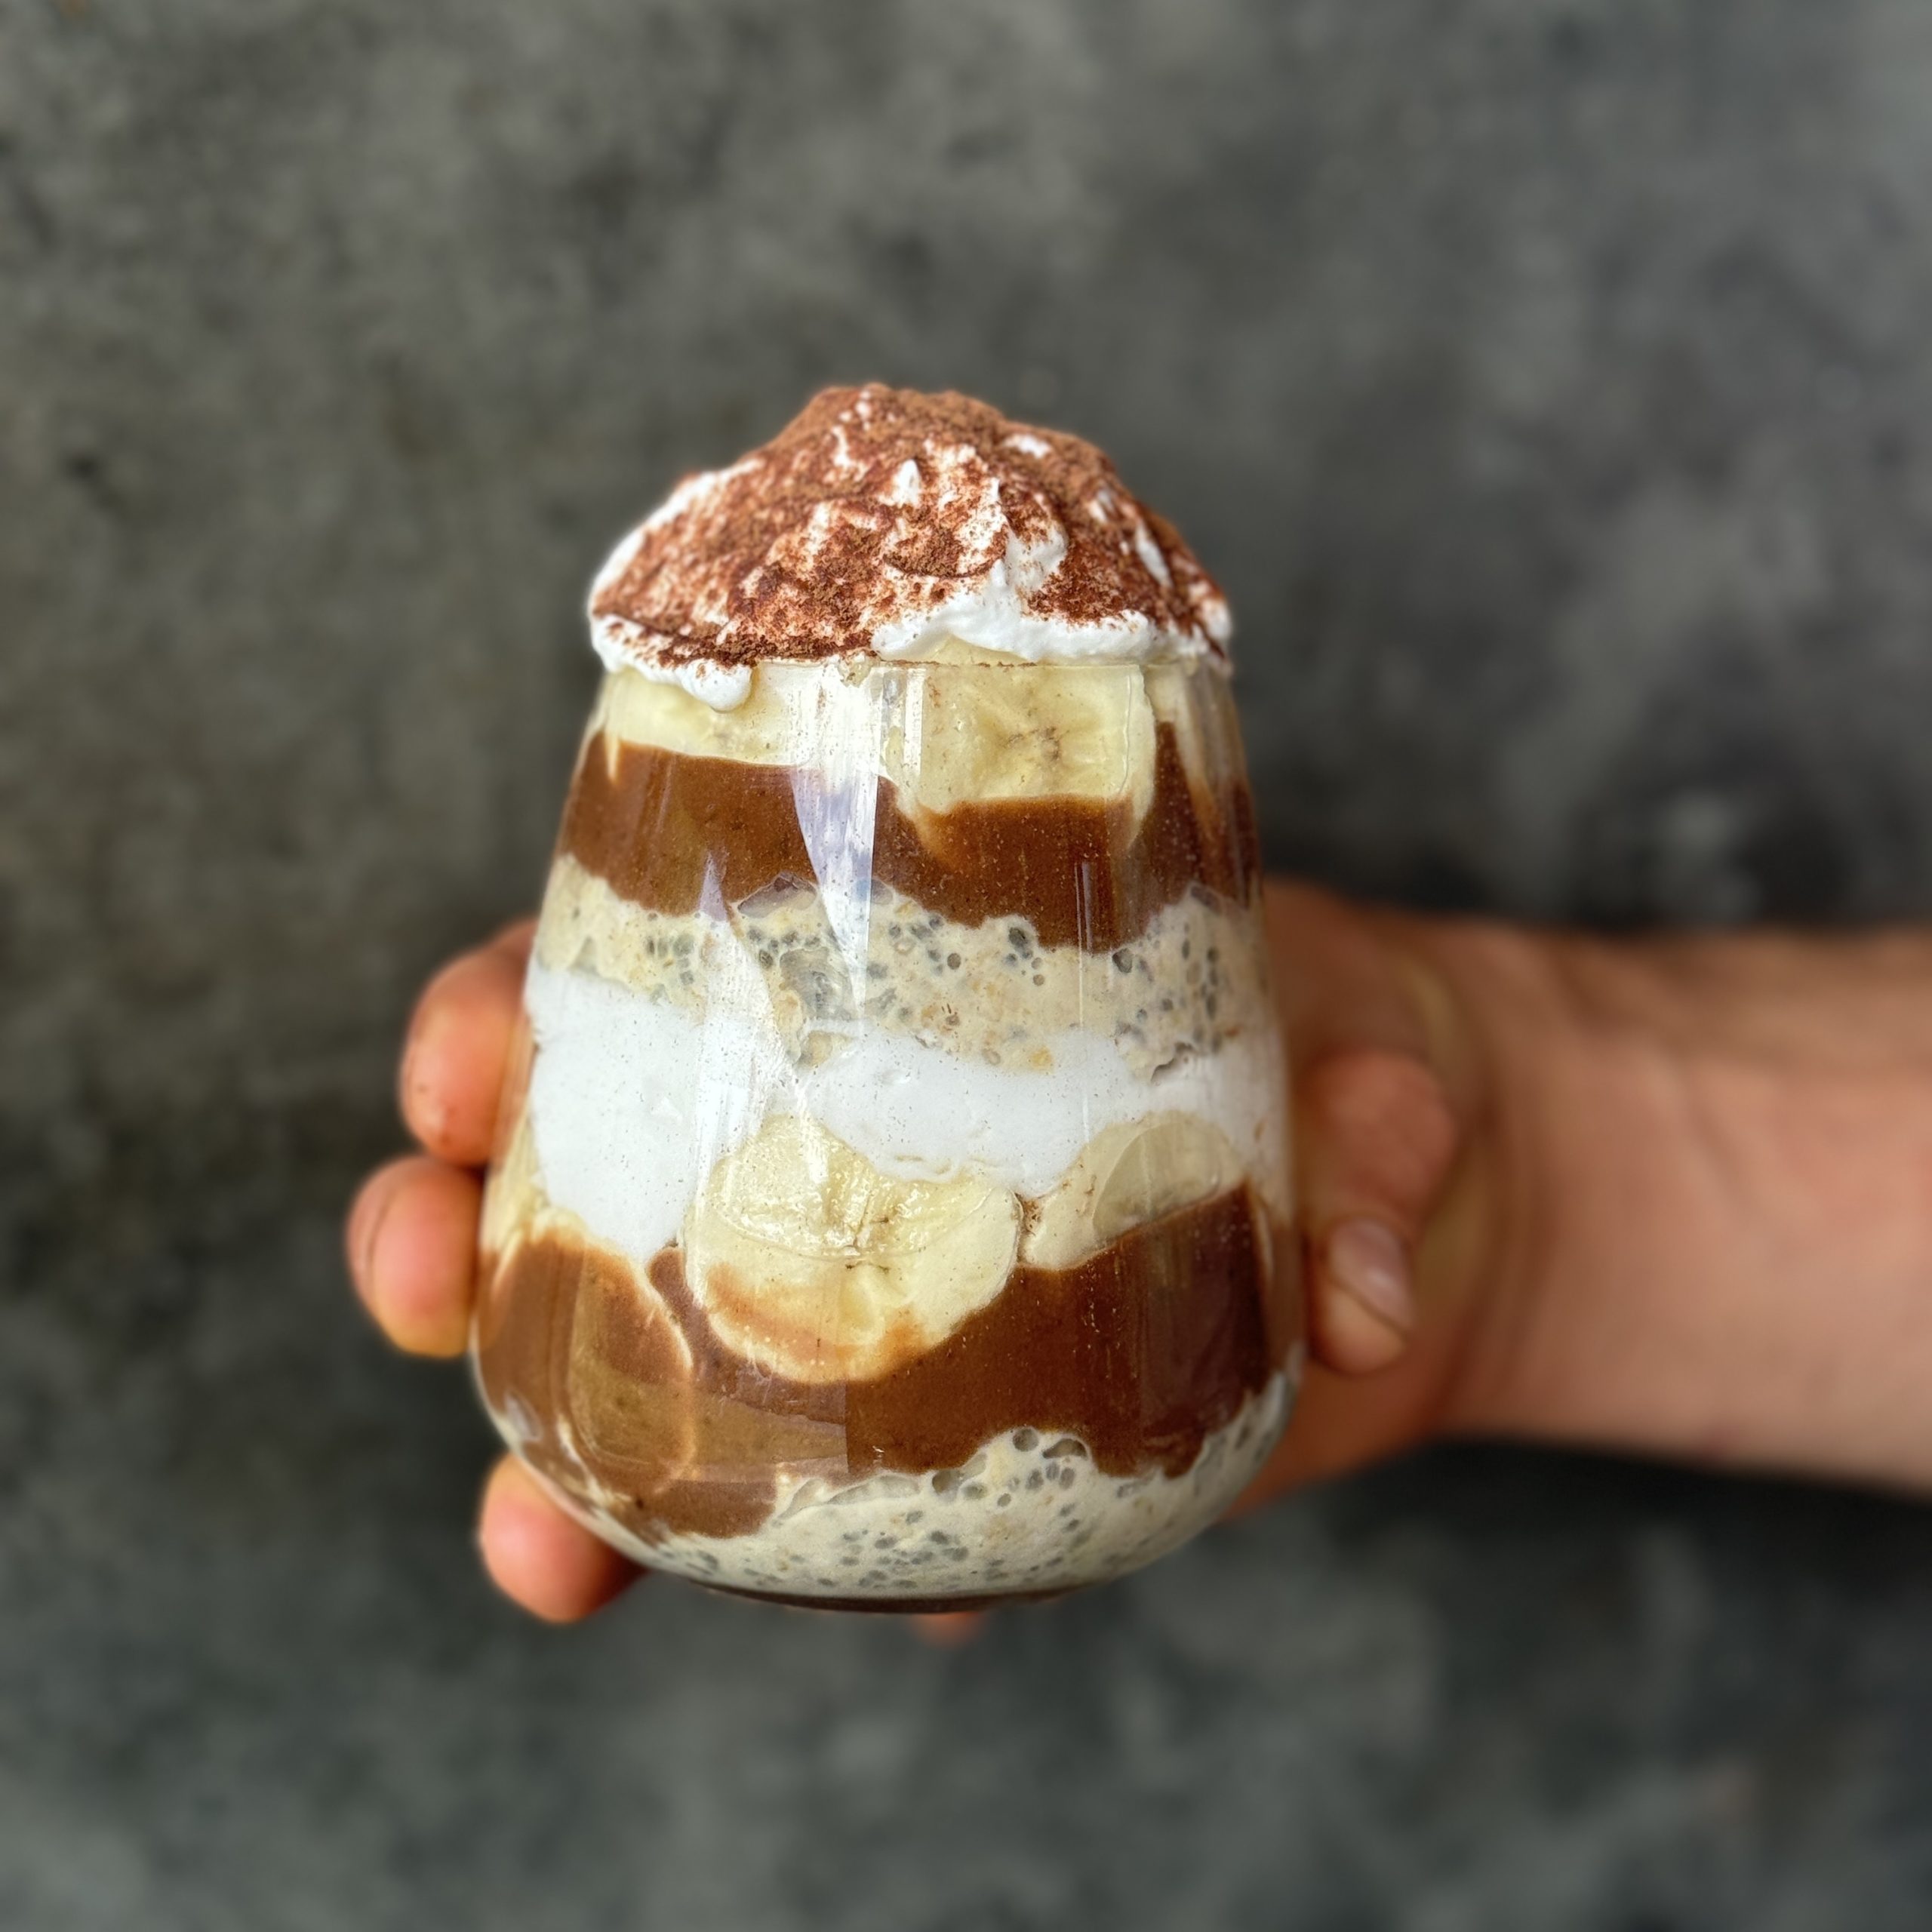
Banoffee Overnight Oats
Takes 9 minutes
Serves 4
Ingredients
Ingredients
Date Caramel:
- 150 g 5.3 oz pitted dates
- 350 ml 11.8 fl oz boiling water (for soaking dates)
- 100 ml 3.4 fl oz water (for blending)
- 1/2 tsp vanilla extract
- 2 tbsp 30 g / 1 oz almond butter
- Pinch of salt
Bircher Muesli:
- 250 g 8.8 oz oats
- 40 g 1.4 oz raisins
- 20 g 0.7 oz chia seeds
- 600 ml 20.3 fl oz oat milk
- A pinch of ground cinnamon
Caramelised Almond Sprinkle:
- 50 g 1.8 oz flaked almonds
- 2 tbsp 30 ml / 1 oz maple syrup
Other:
- 200 ml 6.8 fl oz coconut yoghurt (approx. 10% fat content)
- 2 bananas
Instructions
- Soak the Dates: Cover 150 g (5.3 oz) of pitted dates with 350 ml (11.8 fl oz) of boiling water and leave to soak for 5 minutes.
- Prepare the Bircher Muesli: In a large mixing bowl, combine 250 g (8.8 oz) of oats, 40 g (1.4 oz) of raisins, 20 g (0.7 oz) of chia seeds, 600 ml (20.3 fl oz) of oat milk, and a pinch of ground cinnamon. Stir well and leave to soak for at least 20 minutes, or overnight for best results.
- Caramelise the Almonds: In a non-stick pan over medium heat, toast 50 g (1.8 oz) of flaked almonds until golden brown, about 4-6 minutes. Drizzle 2 tbsp (30 ml / 1 oz) of maple syrup over the almonds and stir to coat evenly. Continue cooking until the syrup caramelises and coats the almonds, then remove from heat.
- Create Date Caramel: Drain the soaked dates and transfer them to a food processor. Add 100 ml (3.4 fl oz) of water, 2 tbsp (30 g / 1 oz) of almond butter, 1/2 tsp of vanilla extract, and a pinch of salt. Process until you achieve a smooth, caramel-like consistency.
- Slice the Bananas: Peel and slice 2 bananas into coins.
- Assemble the Oats: In clear glasses or jars, create the layers. Start with the date caramel, dividing it evenly between the glasses. Follow with a layer of the soaked Bircher muesli mixture. Add a layer of banana coins on top of the muesli. Spoon approximately 50 ml (1.7 fl oz) of coconut yoghurt over the bananas in each glass. Finish by sprinkling the caramelised almonds on top.
- Serve and Enjoy: Serve the Banoffee Overnight Oats immediately, or refrigerate until ready to eat. The flavours will meld together beautifully when allowed to set overnight. Enjoy your healthful and delicious treat!

Mood Boosting Nettle Seed Serotonin Energy Balls
Takes 15 minutes
Serves 20
Ingredients
- 100 g 3.5 oz oats
- 2 tbsp nettle seeds
- 150 g 5.3 oz pitted dates
- 50 g 1.75 oz cashew nuts
- 2 tablespoons chia seeds
- 2 tablespoons flax seeds
- 2 tablespoons cacao powder
- 2 tablespoons coconut oil
- 2 tablespoons maple syrup
- 1 teaspoon vanilla extract
- Pinch of sea salt
- 3 tbsp oat milk/ water
Instructions
- Prepare the base ingredients: In a food processor, combine 100g (3.5 oz) oats, 2 tablespoons nettle seeds, 50g (1.75 oz) nuts, 2 tablespoons chia seeds, 2 tablespoons flaxseeds, and a pinch of sea salt. Pulse until the mixture is finely ground.
- Blend the dates: Add 150g (5.3 oz) pitted dates to the food processor. Pulse until the dates are well incorporated into the dry mixture and form a sticky dough.
- Add flavour and binding agents: Add 2 tablespoons cacao powder, 2 tablespoons coconut oil, 2 tablespoons maple syrup,3 tbsp oat milk or water and 1 teaspoon vanilla extract. Blend until all ingredients are well combined and it comes together into a ball, the mixture should be smooth and sticky.
- Form the energy balls: Using your hands, scoop out small portions of the mixture and roll them into balls about the size of a walnut. You should get around 20 balls from this recipe.
- Coat the ball: we like to coat these energy balls in desiccated coconut or freeze dried raspberries
- Serve and store: Once firm, transfer the energy balls to an airtight container. Store them in the refrigerator for up to 2 weeks or freeze them for up to 3 months.
- Enjoy these nettle seed serotonin energy balls as a healthy snack to boost your energy and mood naturally!

Ice Cube Hydration Flavour Bombs
Takes
Serves 2
Ingredients
For juice
- 1 apple
- 1 beetroot
- 1 golden beetroot
- 1 bunch celery
- 1 orange
- 1 thumb ginger
- 1/2 lime
To decorate
- 1 punnet blueberries
- 1 punnet raspberries
- 2 limes
- 1 bunch mint leaves
Instructions
- Prepare the produce: Wash and prepare your produce. Peel and juice the orange (remove the skin as this can cause an unpleasant taste).
- Juicing: Juice the prepared apple, beetroot, celery, orange, ginger, and lime.
- Fill the Ice Cube Trays with berries, thinly sliced wedges of lime, and mint leaves (optional).
- Pour the juice into the ice cube trays, ensuring the fruit is submerged.
- Freeze overnight
- Add to a beverage of you choice. Pop 2-5 cubes in your water bottle in the morning for a naturally nutritious way of flavouring your water.

‘Happier’ With Dave Flynn
The Comfort Trap
The Paradox of Modern Life
Earlier this year we were in Boston for work and were lucky enough to be taken to see a Boston Celtic’s Basketball game. It was so spectacular yet completely overwhelming! Coming from Greystones, a small town in Ireland right by the sea, this massive indoor circus like stadium was a jarring contrast. The constant noise, bright lights, massive screens and relentless stimulation of the packed crowd and non-stop parade of action on the court felt almost alien to my ancient, evolutionary self. I felt very much like a country mouse in the big city!
Don’t get me wrong, it was an incredible experience to witness. But it also felt like the apex of modern culture – a captivating, high-energy spectacle that made me think of ancient Roman gladiators in the Colosseum. The stark juxtaposition between my nature-immersed life in Ireland and this urban sports cathedral left me feeling slightly out of place, as if my primal instincts were at odds with the frenetic pace and overstimulation of this modern entertainment circus extravaganza!

The contradiction of comfort
As I sit here on a comfortable couch with a comfortable blanket draped around me to keep me warm while sipping on a delicious drink of warm cacao, I can’t help but feel a nagging feeling of unease. My ancient primal self feels trapped in the comforts of modern life – heating, soft fabrics, lighting, excess of processed foods. A deep seated primal part of me, yearns to be more embodied, to be more connected to the natural landscape, outside in the natural world with all my senses fully engaged.
I am fascinated by the contradictions of modern life. On one hand, the technological advancements and innovation across every sector would have been impossible to even contemplate 100 years ago. However on the other hand we live in an environment of unprecedented ease and comfort which goes against our evolutionary hardwiring. As I dig deeper into this topic, I can’t help but feel that our cushy, sedentary lifestyle packed with time saving devices, isolated living and constant convenience is profoundly at odds with the lives of our ancestors and the evolutionary programming hardwired into our genes.
Humans have supposedly been around for about 300,000 years. 99%+ of this time life was uncomfortable and tough. Our ancestors spent their days roaming the natural environment in search of food, exerting themselves physically all day long and relying on their senses to survive. In Spite of the fact that life was hard, there were some silver linings, they lived in tight tribes, ate natural food from the environment and lived harmoniously with the natural habitat in a very physical embodied way.

Embracing discomfort
My daily sunrise swim in the cold Irish Sea is a way that I lean into this ‘comfort trap’. Even though I have done this daily for nearly a decade, 98% of the time I don’t feel like getting into that cold sea. It’s uncomfortable but I do so as I know that on the other side of this discomfort is a place of joy and gratitude, a much better version of myself. As a dear friend Mark says ‘I don’t always love the person getting in, but I always love the person getting out’.

Over the last three years Stephen and myself and some friends have embarked on an annual physical challenge that requires training and a journey of sorts to get ourselves physically fit to try to achieve our challenge. Three years ago we ran the Causeway Coastal Path up in Northern Ireland which was 52 km, this was the first time we had run that distance. Last year we took up swimming, having never swam a km before. We trained all summer long and swam 7 km from the nearby town of Bray to Greystones.

Our annual adventure
This year we are training to run the Wicklow Way, a former pilgrim path across the Wicklow mountains where we live from Dublin to Carlow. We plan to do it over two days in September, all 127 km of it, so just over 60km per day. These adventures are a way for us to reconnect and lean into discomfort. They are very much about the journey, much of the training I don’t feel like doing but the camaraderie and social accountability make me stick with the course. These physical challenges are a way that help push us out of our comfort zone and remind us of the importance of the journey and training with friends, learning more about the land that we live in and hopefully completing a fun physical challenge.

We are all products of the natural world, not evolved for the sterile, sedentary confines of modern life and concrete jungles. Perhaps it’s time we start to reclaim our birthright as embodied, earth-connected beings, and find a way to balance the comforts of the present with the wisdom of the past.
What are your thoughts on this? Do you see a way to reconcile our primal selves with the realities of 21st century living?
The key to thriving in the 21st century may lie in understanding your primal self. Tune in next week to explore this powerful idea further.
Thanks for taking the time to read this. I find this topic really interesting and am thinking of writing more on it. If you agree, please let me know in the comments below! Thanks a mill.
Dave x
More ‘Happier’ Articles
More ‘Happier’ Articles
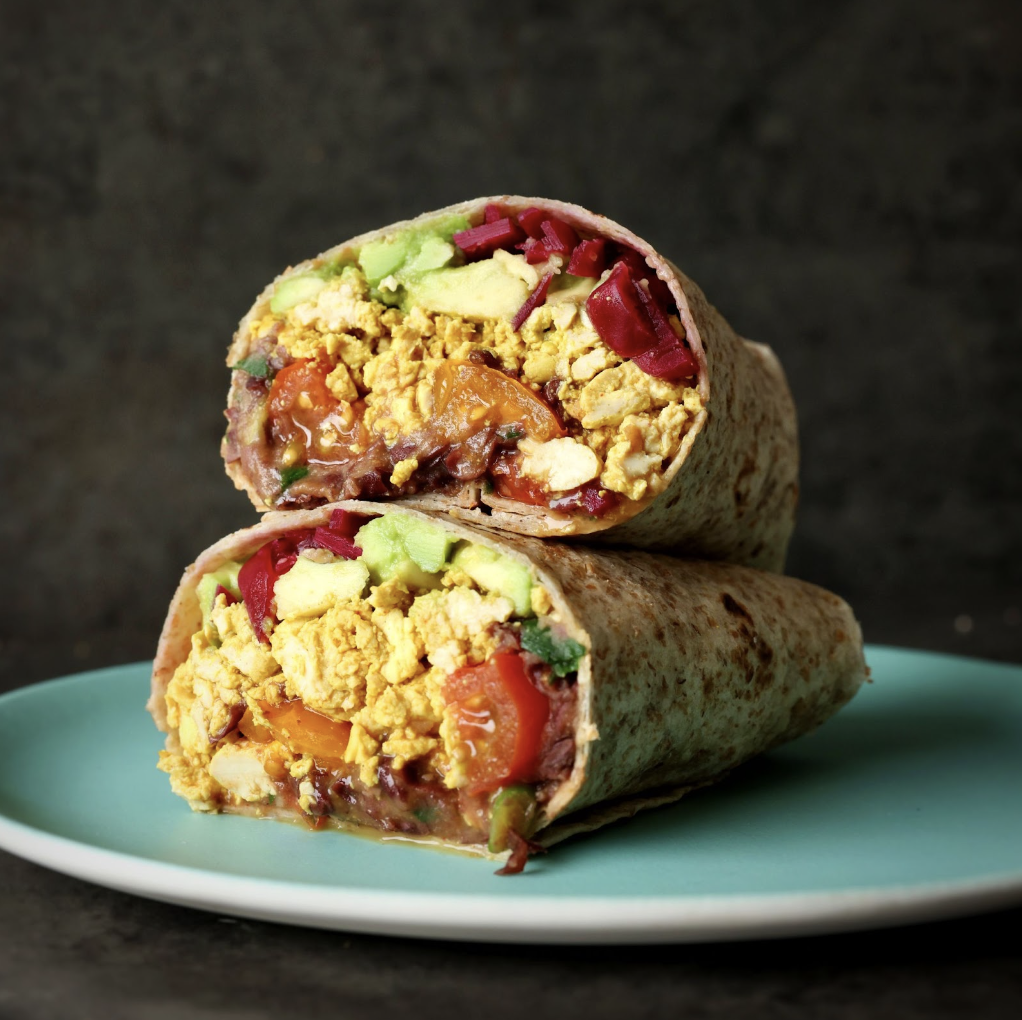
High Protein 10 Minute Breakfast Burrito
Takes 10 minutes
Serves 2
Ingredients
- 1 x 200g block of firm tofu
- 3 tablespoons of tamari/soy sauce divided
- 1 tsp turmeric powder
- 1 tsp smoked paprika
- Pinch of garlic powder
- 1 x 400g tin of kidney beans
- 10 cherry tomatoes
- 1 bunch of scallions
- 2-3 large wholemeal wraps
- 1 ripe avocados
- 1 lime
- Salt & black pepper to taste
Optional Serving suggestions:
- Cherry tomatoes
- Kimchi
- Spicy BBQ sauce
- Fresh coriander
Instructions
- Prepare the Scrambled Tofu: Put a wide bottom pan on a high heat and add 1 tbsp of oil. Crumble the tofu into the pan along with a pinch of salt and cook for 2 minutes stirring regularly. Mix in 1 tablespoon of tamari (or soy sauce), ½ tsp turmeric powder, ½ tsp of smoked paprika and a pinch of garlic powder, mix well and cook for a further minute. Add a splash of oat milk and deglaze the pan.
- Prepare the Refried Beans Salsa: Finely chop the scallions and cut the cherry tomatoes in half. Drain and rinse the kidney beans. Heat the wide-bottom pan over high heat, add the beans, a pinch of salt, and 1⁄2 teaspoon of black pepper. Cook for 2 minutes, stirring occasionally. Add 70ml of water and the remaining 1 tablespoon of tamari/soy sauce and heat for a further minute. Mash the beans using a potato masher until they have a smooth, paste-like texture (you may need to add a little more water). Add the scallions and cherry tomatoes and mix them right through it and continue cooking for a further minute.
- Make the Guacamole: Halve the avocado and remove the stone. Scoop out the flesh, chop it into small pieces, and transfer to a bowl. Add a pinch of salt, black pepper, and the juice of the 1 lime. Mash to your desired texture using a potato masher or fork. Taste and adjust seasoning as needed.
- Toast the Wraps: Place a wide-bottom pan over high heat. Once hot, reduce to medium heat. Toast each wrap/tortilla on the pan for about 1-2 minutes on each side or until it toasts and starts to golden. Repeat until all wraps are toasted.
- Serve: Place a toasted wrap on each plate and spoon on a serving of each of the components. Wrap and roll and enjoy!

‘Happier’ With Dave Flynn
‘Happier’
We Are Nature
I remember so many times in Spring of 2020, during covid lockdowns, standing barefoot on the stony shoreline of the cove in Greystones, waves lapping at my feet, as I watched the sun rise above the horizon against a pink sky. The air was thick with the scent of salt and damp earth, and I could feel the potential in the day rising and the pulse of the tides resonating within my own body. In that moment, the boundaries between myself and the natural world seemed to dissolve, leaving me in a state of deep connection and awe.

We are Nature
At our core, you and I are not separate from nature – we are nature. The truth is, the natural world is not something “out there” that we observe and admire. It is something that flows through us, courses through our veins, and makes up the very fabric of our being.
Consider that one of the most complex ecosystems on the planet resides within your own gut – it hosts billions of microbes, a diverse community that is in constant dialogue with the rest of your body. This inner wilderness is just as much a part of the natural world as the forests, oceans, and skies outside your doors. The cycles and rhythms that sustain all life on this planet also animate the life within us, ebbing and flowing in perfect harmony and synchronicity.
Yet in our modern culture, I find that we’ve grown increasingly disconnected from this fundamental truth. We might have fallen into the trap of seeing ourselves as separate from nature, as somehow superior to or independent from the natural order. This has fueled a mindset of scarcity, where we grasp and hoard rather than allowing the regenerative abundance of the natural world to nourish us.
By reconnecting to the nature that ‘lives inside each of us’, we can begin to dissolve this artificial separation. We can attune ourselves to the cyclical patterns of growth and rest, expansion and contraction, that animate all living things. In doing so, we may find that our own lives become a seamless extension of the natural world – no longer at odds with it, but deeply connected as an integral, harmonious part of the great web of life.
This is the invitation before us: to remember that we are nature, and that the abundance and balance we seek is not something foreign, but a profound truth written into the very fabric of our being. When we live in alignment with this reality, we unlock a wellspring of vitality, creativity, and connection that can nourish us and the earth we call home.
Retuning to Nature’s Rhythms: What We Can Learn from the Cycles of the Natural World
In our fast-paced, technology-driven, concrete based modern life, it’s easy to lose touch with the natural rhythms that have guided life on this planet for millennia. Yet, by reconnecting with these cycles, we may unlock greater balance and harmony.
In nature, we witness the universal dance of day and night, the waxing and waning of the moon, the changing of the seasons. It is easy to forget these natural cycles yet they offer the opportunity to become profound teachers, if we choose to attune ourselves to their wisdom.
Consider the cycle of the seasons. In spring, the earth awakens with new growth and vitality. Summer brings a flourishing abundance, followed by autumn’s shedding and winter’s necessary rest and regeneration. This annual cycle mirrors the ebbs and flows we experience within ourselves.

As an identical twin who has always been driven and goal-oriented, learning to embrace the natural cycles of rest and renewal has been an ongoing practice for me. There have been countless times when I have pushed myself relentlessly, ignoring my body’s signals for a needed break. It has only been as I’ve gotten older and become more aware that maybe my deep seated need for productivity is likely rooted in an insecurity that I better understand the importance of allowing myself to ebb and flow like the tides. Just like night proceeds day, I need to prioritise rest, reflection in order to renew after demanding periods of focus and productivity.
By endeavouring to live more harmoniously with the cycles of nature, you will likely find that your stress levels decline, your creativity flourishes, and your sense of connection to the natural world, and to yourself, deepens. By returning to nature’s rhythms, we can rediscover the inherent balance and connection that has sustained life on this planet for Eons.
Abundance vs Scarcity
When I look to the natural world, I am met with an abundance that stands in stark contrast to the scarcity mindset so prevalent in modern human culture. The cycles of nature exemplify a generative, replenishing flow, rather than the linear, finite capitalist systems we have all grown accustomed to.
As I observe the seasons change each year, I’m struck by nature’s effortless cycles of renewal, of expansion and contraction. In spring, I witness the world springing forth with vibrant new life, blossoming into the lush abundance of summer. Even as autumn brings a shedding of leaves, the trees do not cling desperately to their resources. Instead, they gracefully let go, trusting in the replenishing rest of winter to revitalise them for the next cycle of growth. This pattern of expansion and contraction, of giving and receiving, sustains the natural world in a state of perpetual regeneration that I find profoundly inspiring.
In comparison, in our human society and culture we often operate from a mindset of scarcity, hoarding resources and guarding against perceived lack. Most of us have been conditioned to see the world as a zero-sum game, where one person’s gain must come at the expense of another. This mindset fuels competition, anxiety, much stress and the persistent illusion that there is never enough. Yet the abundance of nature reminds me that this is a construction of our own making, a man made creation, the universe from what I can see operates based on principles of complete abundance generously sharing resources without a sign of withholding.
I am inspired by the rhythms and generosity of the natural world. I believe there is much to learn about shedding the deep rooted scarcity mindset of modern culture. Leaning more open heartedly into giving and receiving and learning to not cling on to our money and materials so tightly. This likely sounds very idealistic but I believe we can learn to trust in the replenishing cycles that sustain all life, and find freedom in the knowledge that abundance is our natural birthright, not scarcity. In doing so, we open ourselves up to a more harmonious, fulfilling way of living with a much deeper connection to the earth and the natural world and creatures upon it. .
The natural world has touched me in so many ways, it connects me to myself in so many profound ways on a daily basis whether via my morning sunrise sea swims, running through the woods or working on our regenerative farm and learning more about how we can grow tasty nutritious food in the most harmonious way with nature.
Thanks for reading this weeks ‘Happier’ column. I really appreciate it. Let me know your thoughts in the comments below and as always thanks to those who have left comments on previous articles, I really appreciate your input.
Lots of love,
Dave x
More ‘Happier’ Articles
More ‘Happier’ Articles
The Happy Pear Podcast
In this week’s episode we sit down once again with Nicole Masters, an independent agroecologist, systems thinker, author, and educator. Nicole is renowned for her extensive work in soil health and regenerative agriculture, empowering farmers and communities worldwide to adopt sustainable practices that benefit both the environment and their livelihoods. With over two decades of experience, Nicole is a sought-after consultant and the author of the acclaimed book, For the Love of Soil: Strategies to Regenerate Our Food Production Systems.
We were delighted to have Nicole join us in person for this second episode, where we had the opportunity to take her around our own no-dig regenerative farm. This unique setting allowed us to delve deeper into the practical aspects of regenerative farming and the principles of soil health that Nicole advocates.
Episode 169
Main Topics Covered:
- Introduction to Agroecology: Understanding the principles and practices that define agroecology and how it differs from conventional farming.
- Regenerative Agriculture: Exploring the key concepts of regenerative agriculture and its importance in restoring soil health and biodiversity.
- Soil Health: Delving into the critical role of soil in our ecosystems, including techniques for assessing and improving soil health.
- Systems Thinking: Applying a systems thinking approach to agriculture and environmental management for more holistic and sustainable outcomes.
- Education and Advocacy: The role of education in promoting sustainable agriculture practices and how to advocate for change within communities and policy.
- Real-world Applications: Success stories and practical examples of regenerative agriculture in action from around the globe.
- Challenges and Solutions: Addressing the common challenges faced by farmers and communities in transitioning to regenerative practices and the innovative solutions being implemented.
Nicole Masters’ expertise and passion for soil and sustainability shine through in this episode, making it a must-listen for anyone interested in the future of food production and environmental stewardship. Tune in to gain a deeper understanding of how we can all contribute to a healthier planet through thoughtful and regenerative approaches to agriculture.
Lots of love,
Dave & Steve
SPONSORS & DISCOUNT CODES:
Namawell Juicers are AMAZING! They have absolutely revolutionised the juicing game. We have an exclusive 10%
Enter the code HAPPYPEAR10
LINK: https://namawell.com/collections/juicers/products/nama-j2-cold-press-juicer?ref=thehappypear
VIVOBAREFOOT: Vivobarefoot Footwear have given our listeners an exclusive 20% discount and if you buy now you also get free access to their incredible course showcasing some of the biggest names in the health and wellness space.
Enter the code HAPPYPEAR20
LINK: https://www.vivobarefoot.com/uk/the-happy-pear
THE HAPPY PEAR RECIPE CLUB – Blending health and happiness through a range of over 500 delicious plant-based recipes.
LINK: https://eu1.hubs.ly/H06JvgK0
Sign up to our Newsletter, for updates on our latest recipes, events, and news.
LINK: https://share-eu1.hsforms.com/1hKXaawjoQOONmJe4EXkCdwf92py
Produced by Sean Cahill & Sara Fawsitt
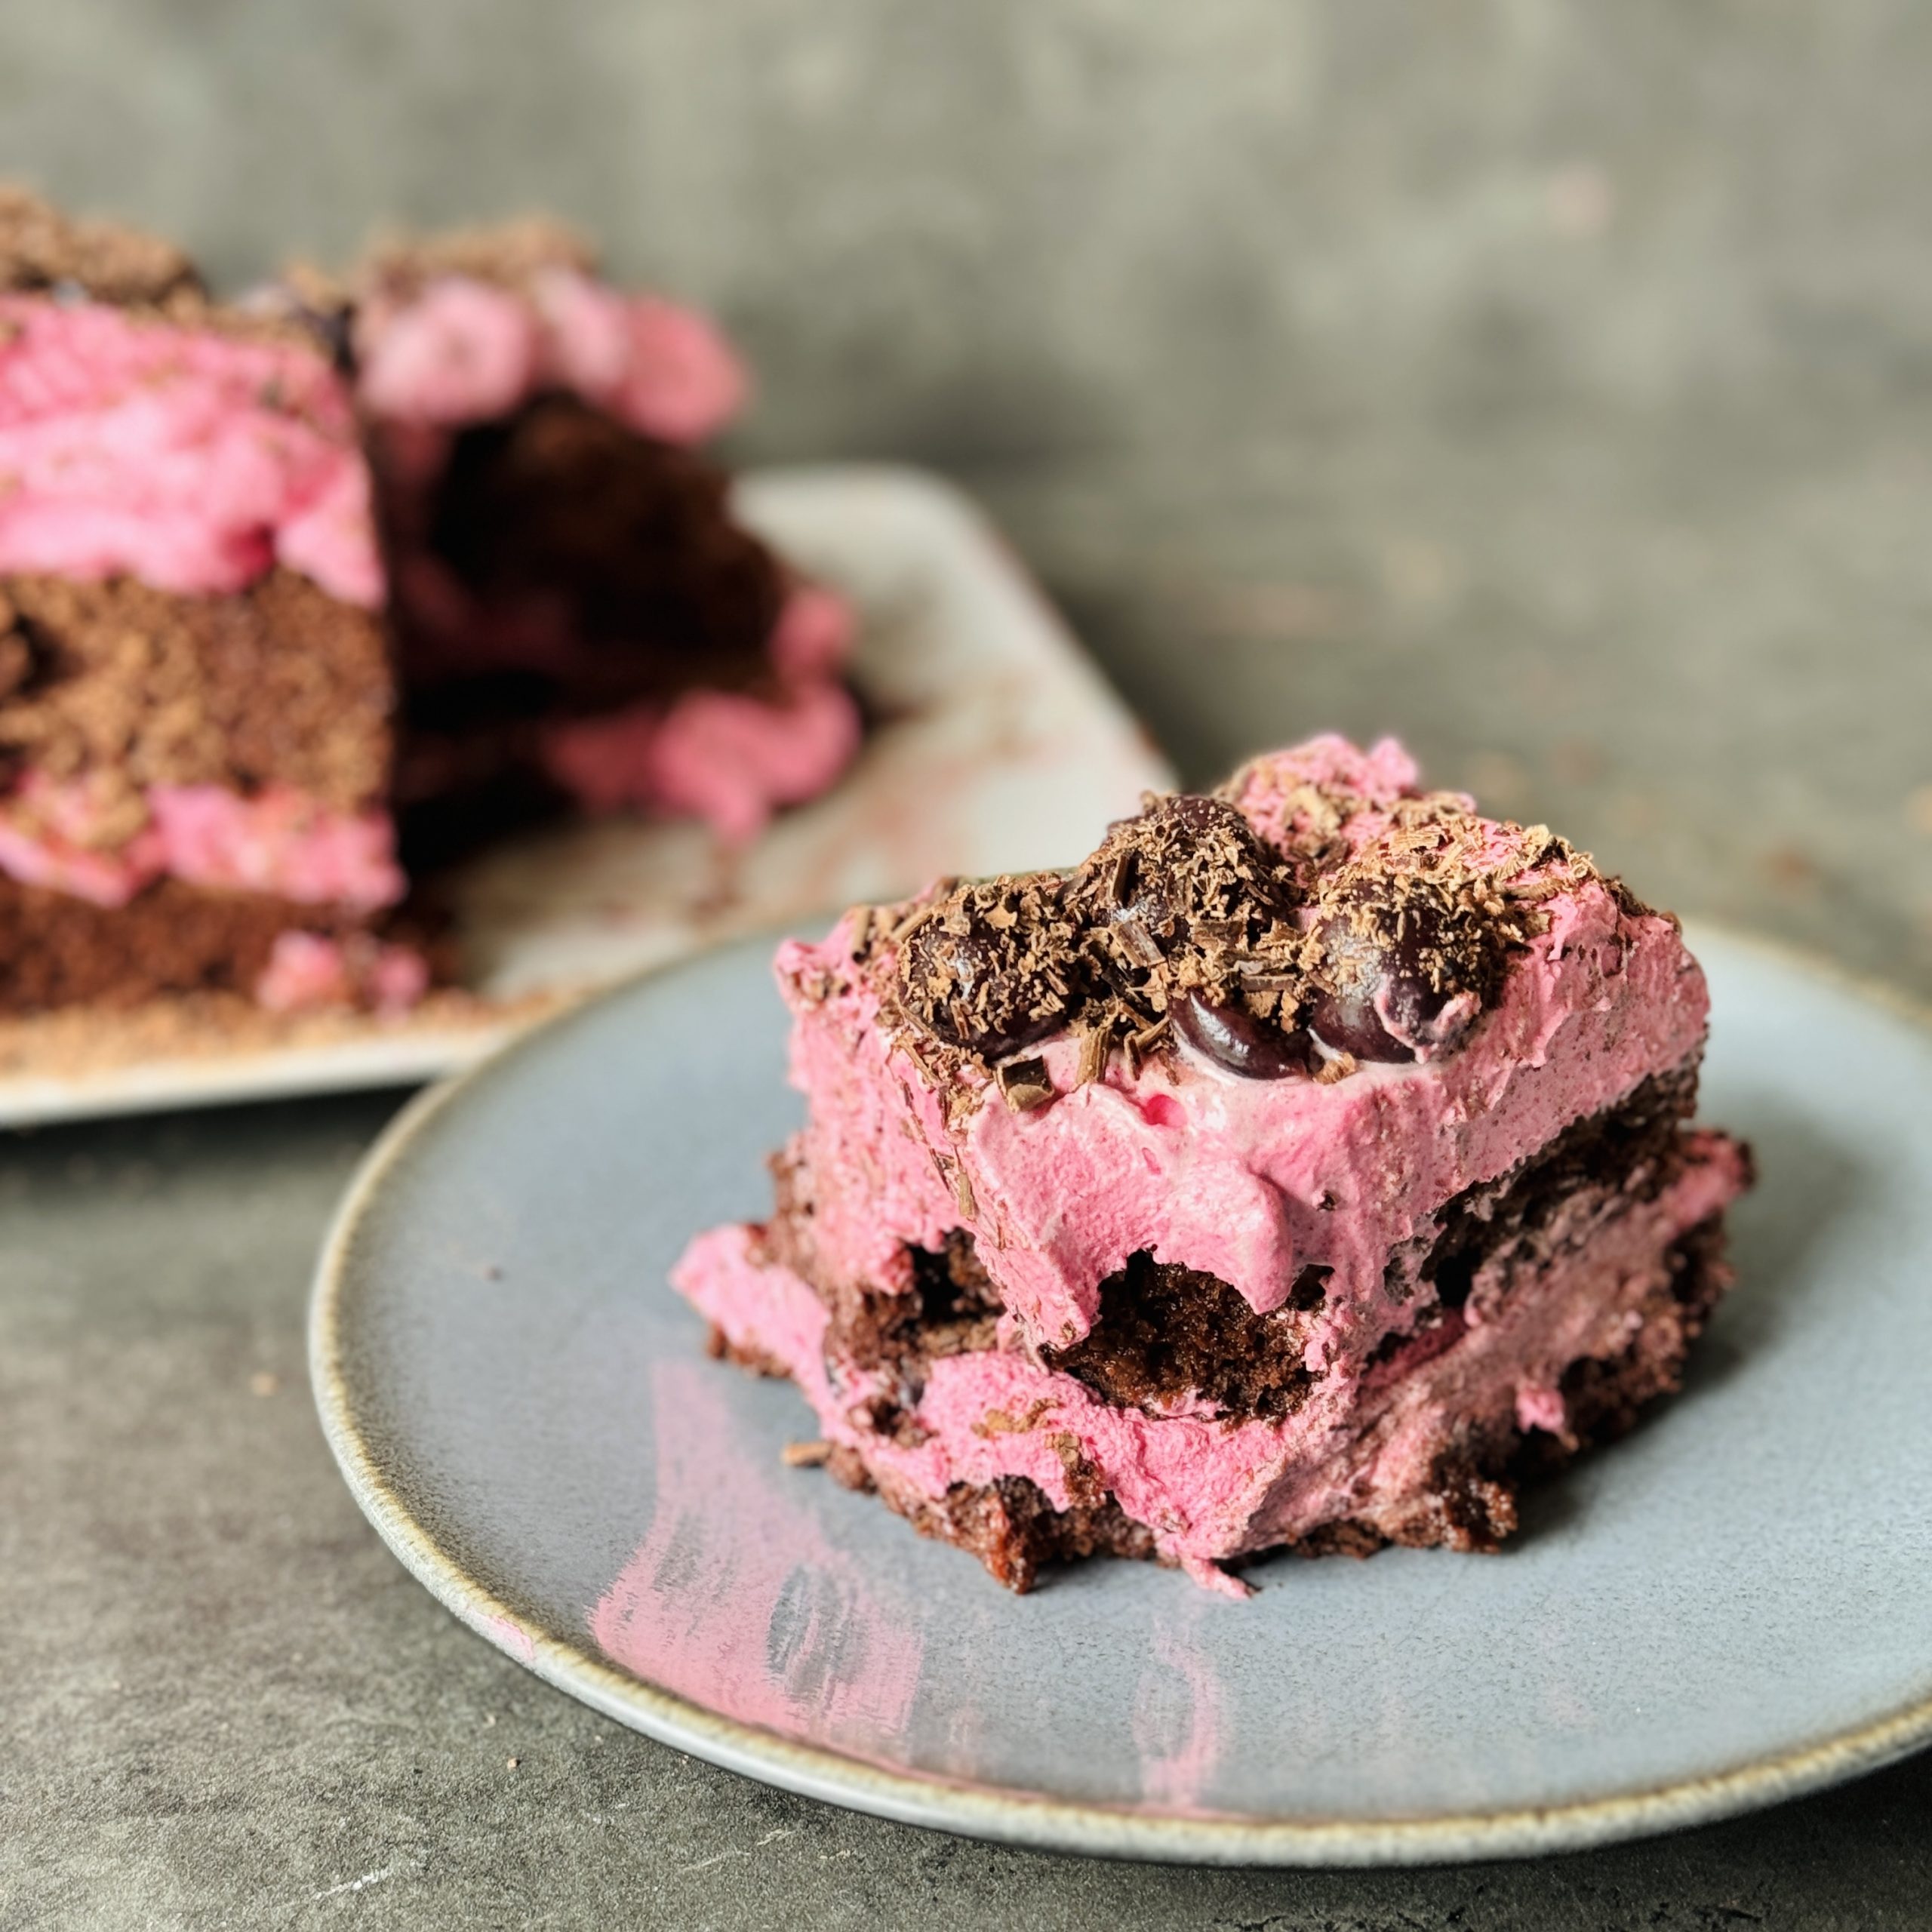
Chocolate and Cherry Tiramisu with Pink Beet Cream
Takes 40 minutes
Serves 8
Ingredients
Chocolate Coffee Sponge
- 250 g Self-raising flour
- 200 g Sugar
- 50 g Cacao powder
- 1 tsp Baking powder
- ¼ tsp Baking soda
- 200 ml Strong black coffee/ oat milk
- 75 ml Vegetable oil
- 1 tsp Vanilla essence
- 75 g Coconut yoghurt or soy yoghurt
Coffee soak
- 200 ml strong black Coffee
- 50 ml cherry liqueur
- 2 tbsp icing sugar
Cream Layer
- 500 ml vegan cream
- 250 ml vegan cream cheese
- 1 Vanilla pod
- 6 tbsp icing sugar
- 2 tbsp beetroot powder
Garnish
- 50 g cacao powder
- 50 g of chocolate 70% cocoa solids
- Chocolate to garnish
- Fresh cherries on top
- 1 x 400g tin of black cherries
Instructions
Preheat oven 160 degrees C (320°F)
Make and bake sponge
- Sieve the flour, sugar, baking powder and baking soda and cocoa into a large bowl and mix well together.
- In a separate bowl mix together the coffee, vanilla essence, oil and yoghurt and fold the batter together until well combined do not over mix.
- Line a baking tray approx 23 x 35cm x 5 cm with baking parchment and add the batter and level it out.
- Bake for 20-25 mins until it starts to dry out and look baked and when you insert a wooden skewer it comes out dry. If using gluten free bake for approx 14 mins until you insert a wooden skewer and it comes out dry.
- Set aside and leave to cool.
Whip cream
- Add the plant based cream to a large bowl along with the icing sugar and scrap out the inside of the vanilla pod and add it to the cream.
- Using an electric whisk whip the cream until you reach stiff peaks, this should take 3-4 mins.
- Add in the vegan cream cheese and whip again until it's all well combined and super smooth with stiff peaks.
- Sieve in the beetroot powder and fold it in until the cream turns a lovely bright pink colour. You want to ensure it's thick enough so that it will hold its shape.
Make Coffee soak
- Sieve in the 2 tbsp of icing sugar to the coffee, add in the kirsch or cherry liquor and mix well.
Plate up & decorate
- Get the plate you want to serve the tiramisu from and cut the sponge in half. Put a sheet of baking parchment on top of the sponge and flip it over and remove the bottom baking paper. This will be easier to transfer.
- Carefully transfer half of the sponge to the plate with the bottom of the sponge now facing up (the coffee will soak in better). Use a fork to gently pierce the top of the sponge so the coffee soak will soak in better.
- Gently pour over half the coffee mixture onto the sponge and use a pastry brush to brush with the coffee mixture until you have covered the sponge evenly.
- Add half the cream on top of the sponge and spread it out so that the sponge is well covered.
- Drain the tin of cherries and leave them to drain dry. Add a few of the cherries on top of the cream (approx 15 cherries). Sieve over some cocoa powder on top or grate on some chocolate.
- Next carefully add on the remaining half of the sponge again bottom side up and try to line it up so it's exactly on top of the base layer. Pierce lightly with a fork.
- Pour over the remaining coffee mixture and spread it around with a pastry brush so it's well covered.
- Add the remaining cream layer, a few cherries on top, and finish with a coating of cacao powder and finely sliced chocolate.
This cuts into 6-8 generous slices and is so wonderful!
Serve & enjoy!
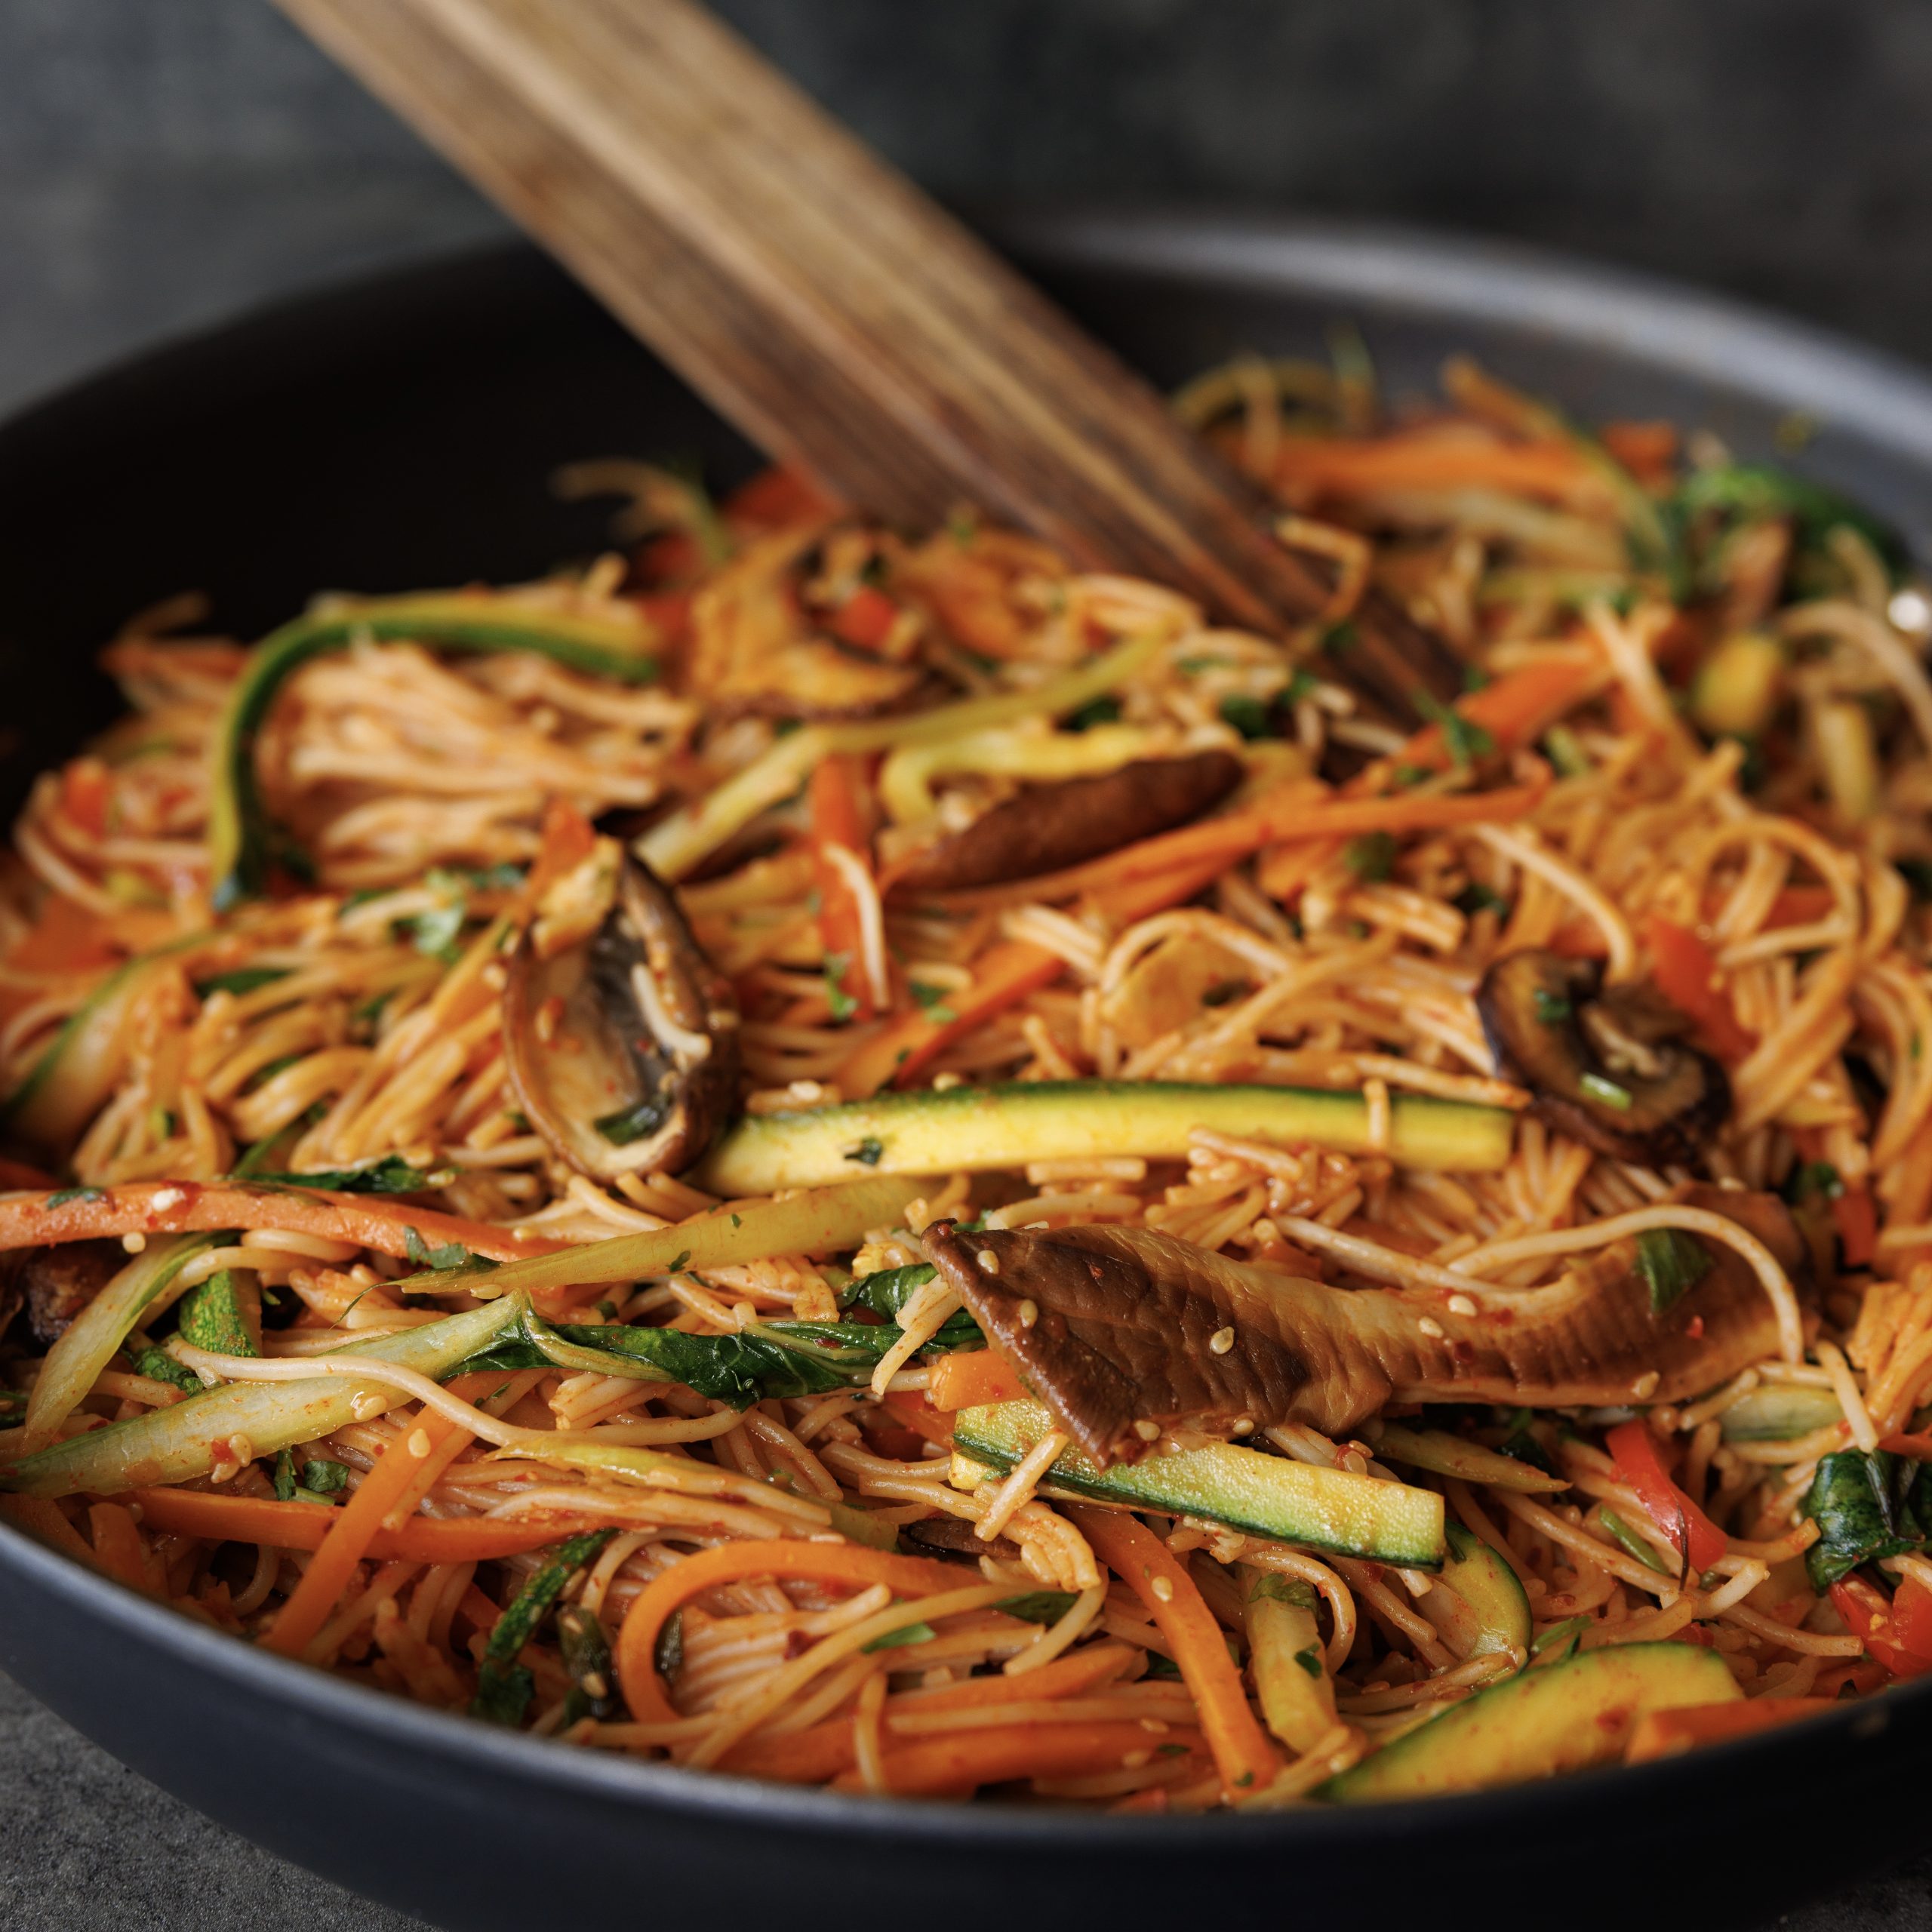
Easy Korean Style Noodles
Takes 15 minutes
Serves 2
Ingredients
Sauce/Seasoning
- 3 tbsp of tamari / soy sauce
- 2 tbsp gochujang
- 1 tbsp gochugaru
- 1 tbsp sesame oil
- 2 cloves garlic
- 1 tbsp grated ginger
- 1 tbsp maple syrup of liquid sweetener of choice
- 1 tbsp rice vinegar or vinegar of choice
- 2 tbsp toasted sesame seeds
- 2 tbsp of water
Veg
- 150 g mushrooms 5.3oz
- 4 scallions/ green onions
- 1 courgette/ zucchini
- 1 carrot
- 1 red pepper
250g brown rice noodles
Instructions
- Cook the noodles: Fill and boil the kettle, fill a large saucepan with boiling water and add a generous pinch of salt. Add the noodles and cook according to the package instructions.
- Make the sauce: Peel the garlic and ginger and grate finely Into a measuring jug or bowl, add in the rest of the ingredients and mix well until well combined.
- Prepare the veg: Slice the mushrooms into thin strips and slice the scallions/ green onions at an angle and set aside. Julienne or cut the carrots, pepper and courgette into thin matchsticks. Roughly chop the coriander.
- Cook the mushrooms: Heat a large non-stick frying pan on high heat, once hot add ½ tbsp of oil followed by the mushrooms. Cook for 4-5 mins stirring regularly until they start to go brown around the edges, add in the scallions and mix through. Add in the rest of the veg except the coriander along with a pinch of salt and cook for 1-2 mins.
- Bring the dish together: Add in the cooked noodles followed by the sauce and mix well.
- Taste and season: taste and adjust the seasoning to your liking and garnish with the coriander and any extra sesame seeds.
- Serve up and enjoy!
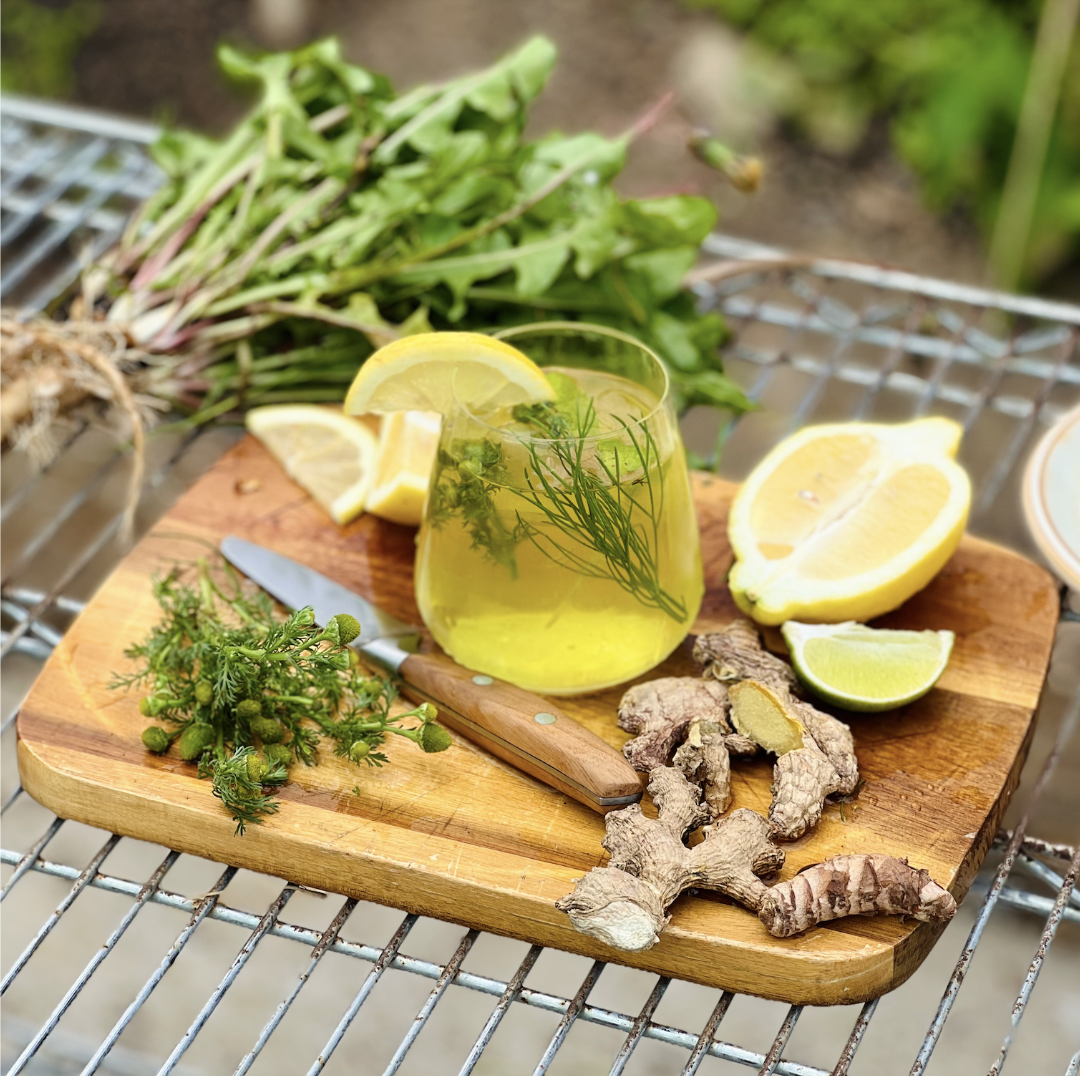
Digestive Support Iced Tea with Pineapple Weed & Dandelion Root
Takes 30 minutes
Serves 1
Ingredients
- 5-10 sprigs pineapple weed
- 5-10 sprigs of fennel fronds
- 5-10 mint leaves
- 1 thumb sized piece of ginger
- 1 thumb sized piece of turmeric
- 1 thumb sized piece of dandelion root
- ½ lemon
Instructions
- Forage your Ingredients:
- Gather your pineapple weed & dandelion root (you may need a shovel or trowel to pull the root up whole). When foraging dandelion root, look for large plants which will have a well-developed root.
- Cut your ingredients:
- Slice the lemon, Finely dice the ginger, turmeric & dandelion root.
- Roughly chop or tear your pineapple weed, mint leaves & fennel fronds (you can also just brew them whole)
- Brew:
- Add all ingredients to a tea pot and brew with approx 1 L of boiling water
- Leave to brew for 5 mins
- Serve: Once cooled serve over ice for a delicious digestion-easing beverage
Select Seller To Pre-Order From:


Pre-Order Our New Book:
The Happy Pear 20
Pre-order now to be in with the chance of winning one of the following prizes!
- Four Weeks of Private Coaching & 1-year membership to our Whole Health Tribe
- Live 1:1 Cook along with Dave & Steve (online or in-person) OR an in-person exclusive tour of the farm & coffee tasting at the private roastery with Dave & Steve
- Exclusive 1:1 lunch with Dave & Steve (online or in-person) OR 1-year membership to our Recipe Club
After pre-ordering, simply email your confirmation or receipt to books@thehappypear.ie to be entered into our competition draw.
We’re so excited to announce that our new book “The Happy Pear 20: Recipes and Learnings From the First 20 Years” will be coming out this October!
This book really does mean so much to us. Celebrating some of the most popular recipes we’ve created in the last 2 decades!
We talk about the big life lessons we’ve learned on our journey from our successes and failures, and all of the amazing people we met along the way.
With recipes from the most requested dishes in our cafe, our most viral recipes on social media, as well as what we love to cook up at home, we can’t wait to share our favourite dishes with you!
Click on your favourite seller above to order from their site.
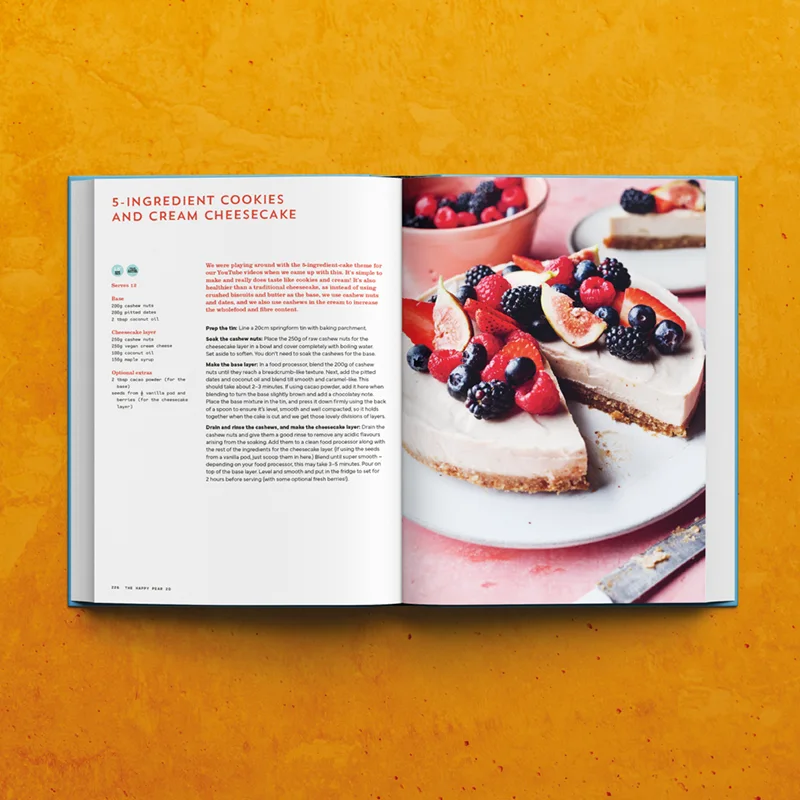
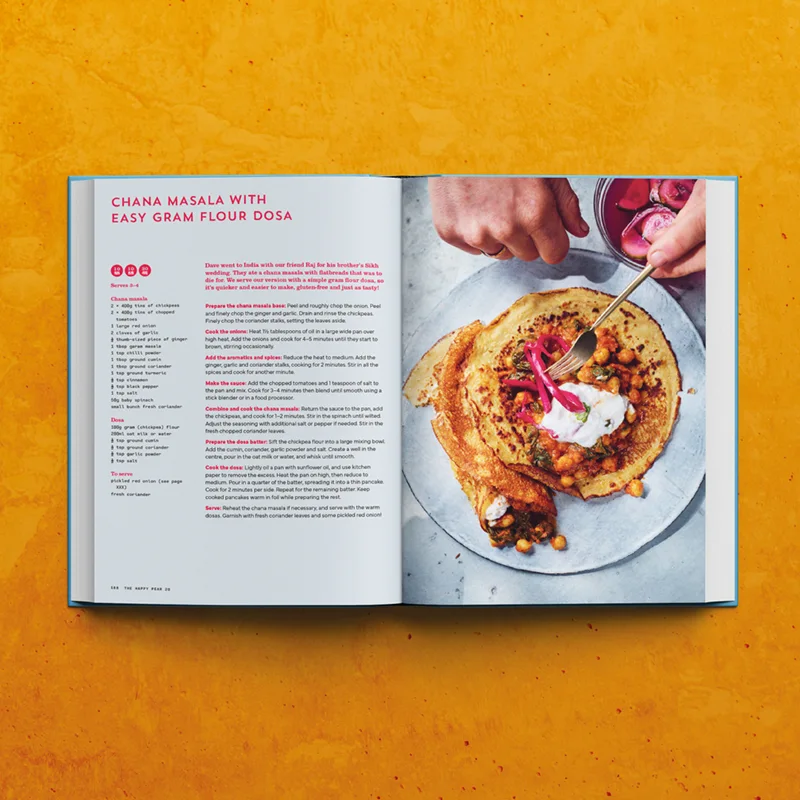
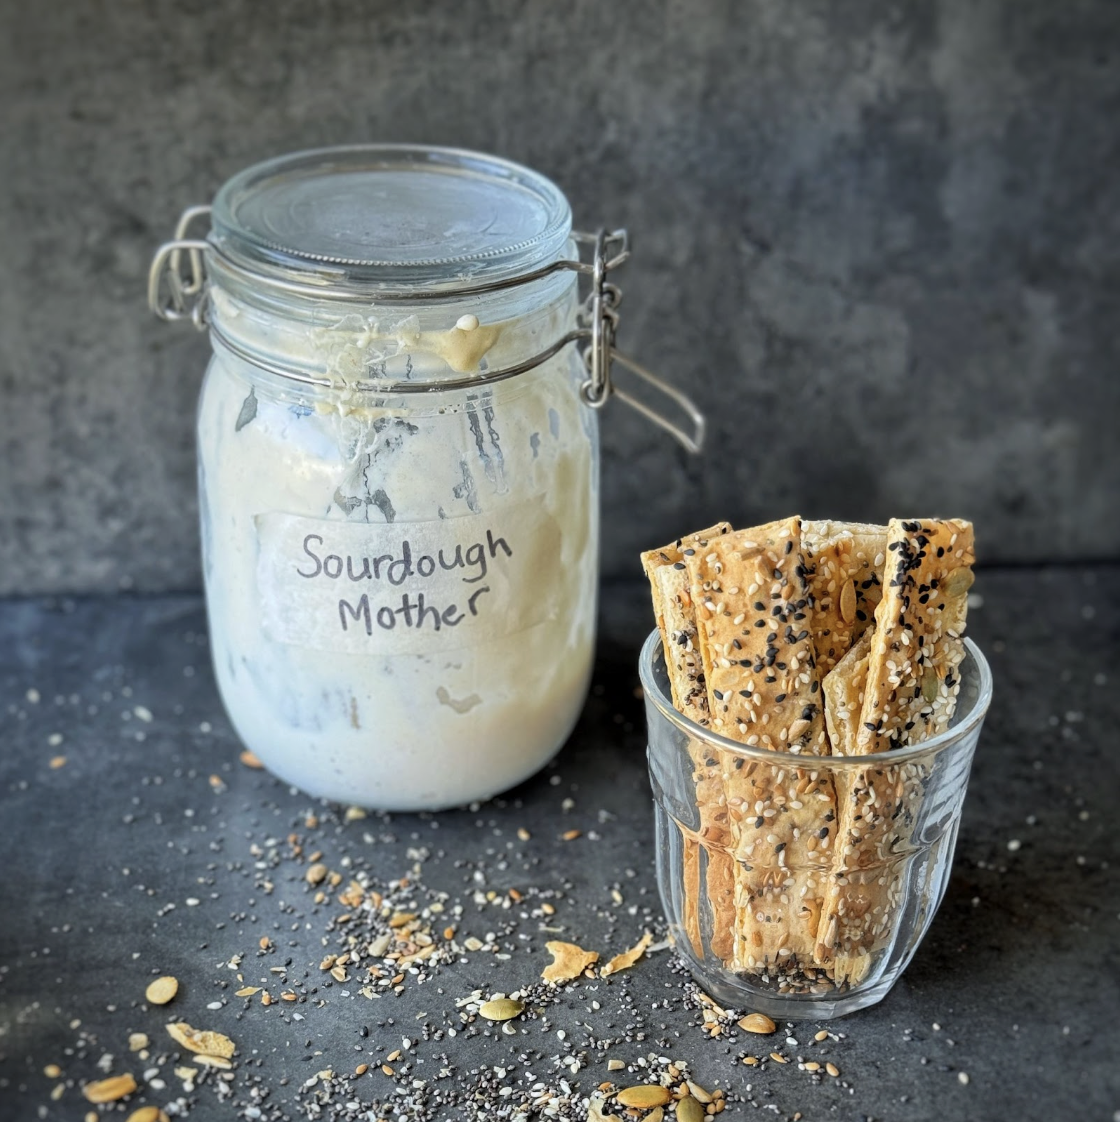
Sourdough Discard Crackers
Takes 1 hour
Serves 20
Ingredients
- 200 g sourdough discard 7 oz
- 2 tbsp olive oil
- Pinch salt
- Pinch of mixed herbs
- 2 tbsp mixed seeds of choice
Instructions
- Preheat the oven: Preheat the oven to 180°C (356°F).
- Mix ingredients: Into a large bowl, add 200g (7 oz) sourdough discard, 2 tbsp olive oil, a pinch of salt, and a pinch of mixed herbs. Mix until well combined.
- Prepare the baking tray: Line a baking tray with baking parchment. Remove the parchment from the baking tray and place it directly on the table. Pour out the dough onto the parchment and spread out a really thin layer using the back of a spoon. It should be approximately ½ cm (0.2 inches) thick.
- Add seeds: Sprinkle with 2 tbsp of mixed seeds of choice (such as sesame, chia, flax, sunflower, and pumpkin seeds) and a sprinkle of salt. If you have coarse sea salt, this would be perfect, but fine sea salt will also work.
- Initial bake: Place the baking parchment back onto the baking tray and bake in the oven for 10 minutes at 180°C (356°F).
- Cut crackers: Remove from the oven and cut the crackers into the shapes you would like, approximately 8 cm x 2 cm (3.1 inches x 0.8 inches) is what we went with but you could cut them into squares or whatever shape you like.
- Final bake: Put the tray back in the oven for 30-40 minutes until the crackers are dry and golden on top.
- Cool and store: Remove and let cool fully. Store in an airtight container. They will last for approximately 1 month.
- We love to serve these with our hummus and pestos!
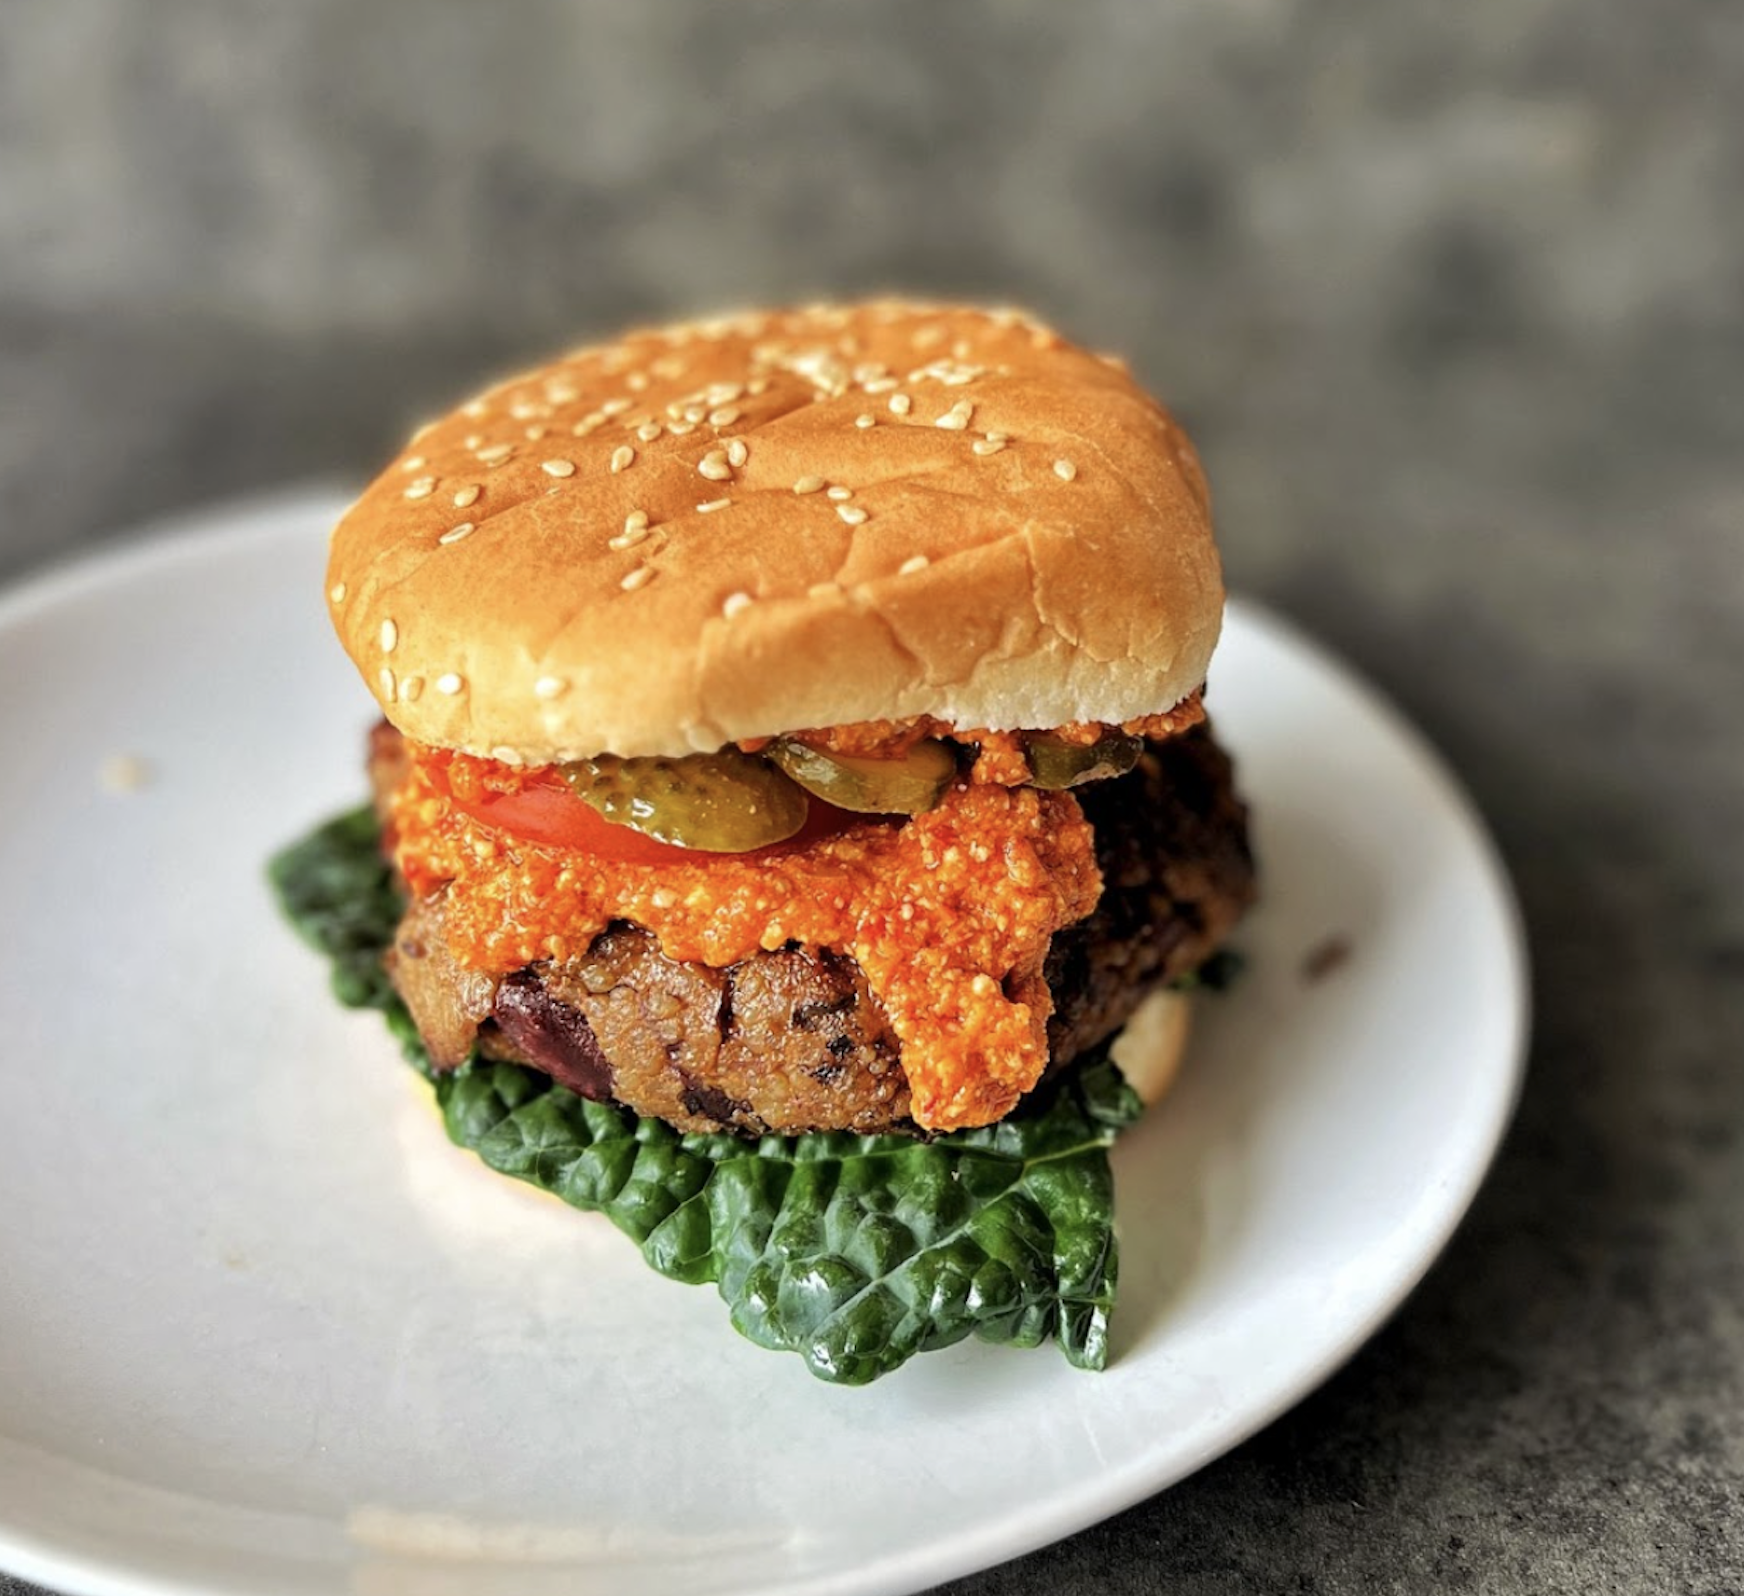
10-Minute High-Protein Wholefood Burger
Takes 10 minutes
Serves 3
Ingredients
- 150 g cooked quinoa you can buy vacuum-packed cooked quinoa
- 1 x 400g can kidney beans drained and rinsed
- 3 tbsp tamari
- 2 tbsp nutritional yeast
- 1 tsp smoked paprika
- ½ tsp chilli powder
- 150 g mushrooms
- 3 tbsp gram flour chickpea flour or vegan protein powder
To Serve
- 3 burger buns
- Vegan mayo
- 50 g Pesto or ketchup
- 3 lettuce/kale leaves
- 3 slices of tomato
- 3 Gherkins
Instructions
- Prepare the mushrooms: Tear up the mushrooms. Heat 1 tbsp oil in a wide-bottom pan over high heat.
- Add the mushrooms and place a pot on top to compress them. Cook for 4 minutes, stirring occasionally.
- Add 1 tbsp tamari to the mushrooms and cook for an additional minute until all the tamari has been absorbed.
- Make the burger mixture: In a large bowl, combine the cooked quinoa, drained and rinsed kidney beans, nutritional yeast, smoked paprika, chilli powder, gram flour (or vegan protein powder), and cooked mushrooms. Using a potato masher or your hands, mash the beans and mix all the ingredients together until well combined.
- Form the patties: Shape the mixture into 3 equal-sized patties.
- Cook the patties: Using the same pan you cooked the mushrooms in, heat 2 tbsp oil over high heat. Fry the patties for 2 minutes on each side until both sides are charred and golden.
- Assemble the burgers: Slice the tomatoes and gherkins. Spread some vegan mayo on the bottom bun and pesto or ketchup on the top bun. Place a lettuce leaf on the bottom bun, followed by the burger patty. Add a spoon of pesto or ketchup over the burger patty and spread it out. Top with a slice of tomato and some gherkin slices, then finish with the top bun.
- Enjoy your homemade high-protein wholefood burger!
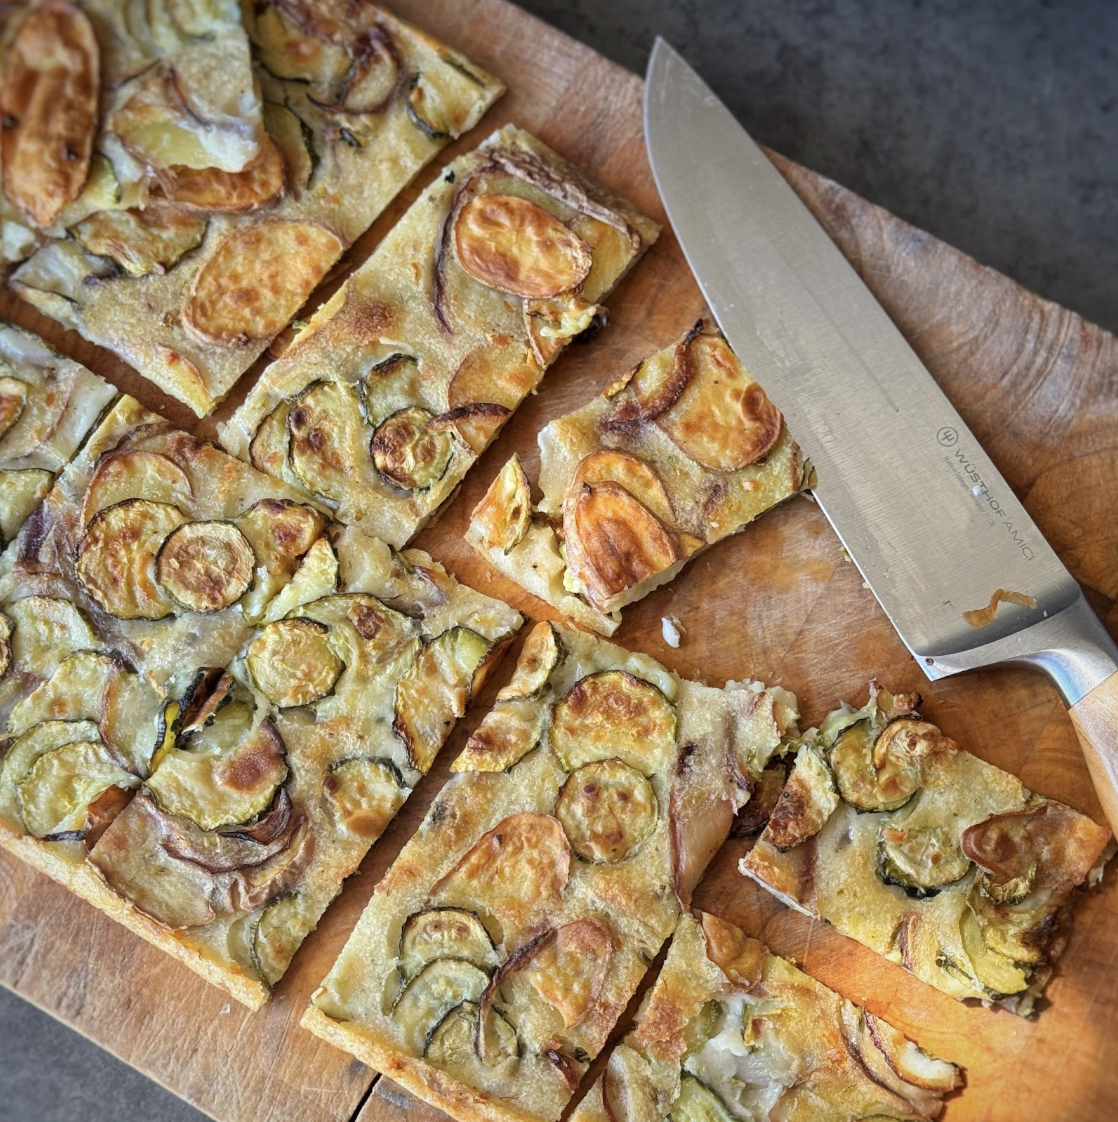
Scarpaccia with Courgettes and Potatoes
Takes 1 hour
Serves 6
Ingredients
For the batter:
- 150 g plain flour 5.3 oz
- 375 ml water 12.7 fl oz
- 3 tbsp olive oil 1.5 fl oz
- 1 tsp salt 0.18 oz
- 1 tsp black pepper 0.18 oz
For the topping:
- 300 g courgettes zucchini, thinly sliced 10 oz (approx 2 courgettes)
- 300 g potatoes thinly sliced 10 oz
- 1 small red onion thinly sliced
- 2 cloves garlic minced 0.35 oz
- 1 tbsp fresh thyme leaves 0.53 oz
- 1 tbsp fresh rosemary finely chopped 0.53 oz
- 2 tbsp olive oil 1 fl oz
- Salt and pepper to taste
Instructions
Prepare the batter:
- In a large mixing bowl, whisk together 150g (5.3 oz) of plain flour, 375ml (12.7 fl oz) of water, 3 tbsp (45ml) of olive oil, 1 tsp (5g) of salt, and 1 tsp (5g) of black pepper until smooth and lump-free. Let the batter rest while preparing the toppings.
Prepare the vegetables:
- Preheat the oven to 200°C (392°F). Line a baking sheet with parchment paper.
- Thinly slice 300g (10.5 oz) of courgettes (zucchini) and 300g (10.5 oz) of potatoes using a mandoline or sharp knife. Thinly slice 1 small red onion and mince 2 cloves of garlic. Add to a bowl along with 1 tbsp of oil and a generous pinch of salt and mix well.
Assemble the Scarpaccia:
- Spread the courgettes, potatoes, red onion, and minced garlic evenly over the prepared baking sheet. Sprinkle 1 tbsp (15g) of fresh herbs of choice (we used fresh fennel but thyme or rosemary work great just remove them from their stalk)
- Pour the batter evenly over the veg, ensuring everything is well coated.
- Drizzle 1 tbsp (15ml) of olive oil over the batter and season with salt and pepper to taste.
Bake the Scarpaccia:
- Bake in the preheated oven for 60 minutes, or until the edges are crispy and golden brown. The centre should be firm and cooked through. Bake for a little longer if it is still not firm enough in the centre.
- Allow the scarpaccia to cool for a few minutes before slicing and serving.
Serve:
- Serve warm or at room temperature, cut into squares or wedges. Enjoy this delicious and healthy scarpaccia as an appetiser, snack, or light meal.

Crispy Kimchi & Nettle Gyoza
Takes 25 minutes
Serves 30
Ingredients
- 100 g gyoza pastry
Filling
- 100 g kimchi
- 50 g mushrooms
- 50 g firm tofu
- 1 handful of wild nettles approx 6g
Dipping sauce
- 3 tbsp of tamari / soy sauce 2 fl oz
- 2 tbsp gochujang 1 oz
- 1 tbsp gochugaru 0.5 fl oz
- 1 tbsp sesame oil 0.5 fl oz
- 2 cloves garlic 0.35 oz
- 1 tbsp grated ginger 0.18 oz
- 1 tbsp maple syrup of liquid sweetener of choice 0.5 oz
- 1 tbsp rice vinegar or vinegar of choice 1 fl oz
- 2 tbsp toasted sesame seeds 1 oz
- 2 tbsp of water 1-2 fl oz
Instructions
- Prepare your veg: Crumble the tofu, finely dice the mushrooms, thoroughly wash the nettle and roughly dice, roughly chop the kimchi
- Make the sauce: Peel the garlic and ginger and grate finely Into a measuring jug or bowl, add in the rest of the sauce ingredients and mix well until thoroughly combined.
- Cook the veg: Heat a wide bottomed non-stick pan on high heat. Add in 1 tsp of oil and once hot add in the crumbled tofu and diced mushrooms, fry for 4-5 mins stirring regularly, until the tofu has turned lightly golden all over. Add in 2 tbsp of tamari and mix well until all the mushrooms and tofu have absorbed the tamari. Turn off the heat and remove the tofu, mushroom mix to a medium bowl.
- Mix the filling: Add in the diced kimchi and diced nettle on top of the tofu and mushrooms and mix well.
- Fill the gyozas: To fill the gyozas take one gyoza pastry and wet your finger in water and brush this water around the edge of the pastry (this will help it seal closed). Add in 1 tsp of the filling into the centre of the pastry and fold over crimping on one side as you fold. You are aiming to get somewhere between 3-7 crimps per gyoza. Repeat with the remaining filling, you should get approx 3040 gyozas.
- Cook the gyozas: Heat up the frying pan and add in 1 tsp of oil and once hot add in 8-10 gyozas. Fry for 2-3 mins on one side and then add in 50ml of water and put the lid on and leave to cook for 2- 3 mins. Remove the lid and let the steam release and check that the bottom has gone golden brown and looks crispy. Remove from the pan and repeat with the remaining gyozas.
- Dip and enjoy: Dip into the dipping sauce and enjoy!

‘Happier’ With Dave Flynn
‘Happier’
Your Purpose Is You
We recorded a podcast last week with a Best Selling author and astrologer Kirsty Gallagher, and her words have been resonating with me ever since. She said a line that I found profoundly impactful: “Your purpose is you.” This simple yet powerful statement has been circling in my mind, serving as a great reminder whenever I catch myself falling into old patterns of feeling the urge to be productive or busy.
The concept of “purpose” can often feel lofty, nebulous and elusive, the source of many an existential crisis. Typically we look outward to find purpose through concrete achievements & goals, helping others, or fulfilling societal expectations, such as teaching children or tending to the needs of our community. But what if the key to unlocking our deepest sense of purpose lies not in the world beyond us, but within the very core of our authentic selves?
I’ve come to believe that our purpose is indeed rooted in becoming more fully who we are – embracing our true values, interests, and passions as the foundation for finding meaning and direction in our lives. It’s not about forcing ourselves into someone else’s or society’s mould, but about the courageous journey of unravelling the hidden layers within.

The more you become authentically yourself the more you give others permission to do the same.
In our modern world of monoculture food and often homogenous values, where globalisation and Western consumerism are spreading across the globe – finding and expressing your true self is an act of rebellion and profound empowerment. What I love most about the idea of “your purpose being you” is that at its root lies the courageous journey toward your authentic self, your truest essence independent of external expectations.
You are fundamentally unique, you are 1 in 9 billion. Even me, as an identical mirror twin with 99.99% the same DNA as my twin Steve, I am completely unique too, as is Steve. The more we are brave enough to step into our individual light and shed the pervasive constricting values of Western capitalism, the more we in turn inspire others to follow suit. Just as a cold or flu is contagious, authenticity too has a viral quality – it inspires and spreads. We all want to feel free to be ourselves and sometimes seeing others being unapologetically themselves gives us permission in a sense. As Gandhi so eloquently stated, “be the change you wish to see in the world.” The more we embrace our authentic selves, the more we give others permission to do the same.
In a world that constantly pressures us to conform, to fit neatly into prescribed boxes, the act of self-discovery and self-expression becomes a quiet rebellion. When we have the courage to show up as our unvarnished selves, we create a ripple effect that can transform not only our own lives, but the lives of those around us. This is the true power of purpose – not found in external accomplishments, but in the beautiful, messy, ever-evolving journey of becoming who we were born to be.
It starts with acceptance and love

This week, I caught myself acting from that habitual, automatic urge and habit to be productive – an impulse that is so often rooted in fear. In that moment, the line “your purpose is you” spontaneously popped into my head, serving as a potent reminder. Instead of mindlessly forging ahead, I noticed a shift; self-compassion, self-acceptance, and even self-love began to arise within me. It felt like I was momentarily breaking free from entrenched patterns, no longer losing myself in the frenetic need to stay busy for busy’s sake, to be a productive cog in the machine. Productivity and busy-ness is a habit I’ve sometimes excelled at, equating my worth with the outward markers of productivity and achievement.
But in that pivotal moment, I was able to pause, reconnect with my deeper self, and make a different choice. It was a small yet profound act of rebellion against the relentless pressure to conform to society’s narrow definitions of success. By choosing presence over productivity, I re-aligned with my deeper sense of who I am and what is important to me in the moment. This experience has reinforced my belief that our truest calling lies not in external accomplishments, but in the courageous journey of becoming more fully ourselves.
At the heart of living a purposeful life is the ability to fully accept and love yourself (last week’s column on ‘the wisdom of insecurity’ touched on this!). It is so easy to get caught up in the relentless pursuit of external validation, comparing ourselves to unrealistic standards and judging our worth based on others’ perceptions (previous Happier Column on Self worth). However, your unique purpose can only be found when you make peace with who you are at your core, flaws and all. Self-acceptance is not about complacency or becoming passive, but about creating a solid foundation from which you can grow and flourish. When you cultivate genuine self-love, you tap into your deepest desires, values, and unique gifts – the very building blocks of a fulfilling purpose.
Redefining success on your own terms
As identical twins and business owners, Steve and I are all too familiar with society’s often narrow definition of success, wealth, status and external achievements being touted as the hallmark of a life well lived. However, what if you took a step back and redefined success based on your deeper values and what really gives you meaning?
What if you peel back the layers of societies ‘success programming’ and instead start to determine what really floats your boat, what makes your spirit soar and awakens a child-like wonder in you? Your purpose being you means that it needs to be a genuine expression of who you are. In my thirties I very much bought into the success equals social status paradigm and reflecting back I was the personification of success equals external achievements and impressing others. Now that I am a decade older, 44, I have largely shed this belief and find true success is quality time with my family and friends and spending time on the farm in nature. I still see the old habitual programming of seeking external validation arise but I find I am less susceptible to it than before! Progress over perfection!
The most meaningful purpose is found not in external achievements, but in the courageous act of becoming more fully yourself. May you have the courage to shed societal expectations and tap into the wellspring of purpose that lies within. Your unique gifts and authentic expression are a profound gift to the world. The more you do this, the more you inspire others to do the same. Together lets create a ripple of authenticity!
Thank you for taking the time to read this week’s Happier column. I hope the idea of “your purpose is you” has resonated and inspired you to embrace a more authentic and purposeful path. I have written many previous Happier columns exploring topics like self-worth, feeling enough, and living with greater intention which you can read here.
All the best
Dave
More ‘Happier’ Articles
More ‘Happier’ Articles
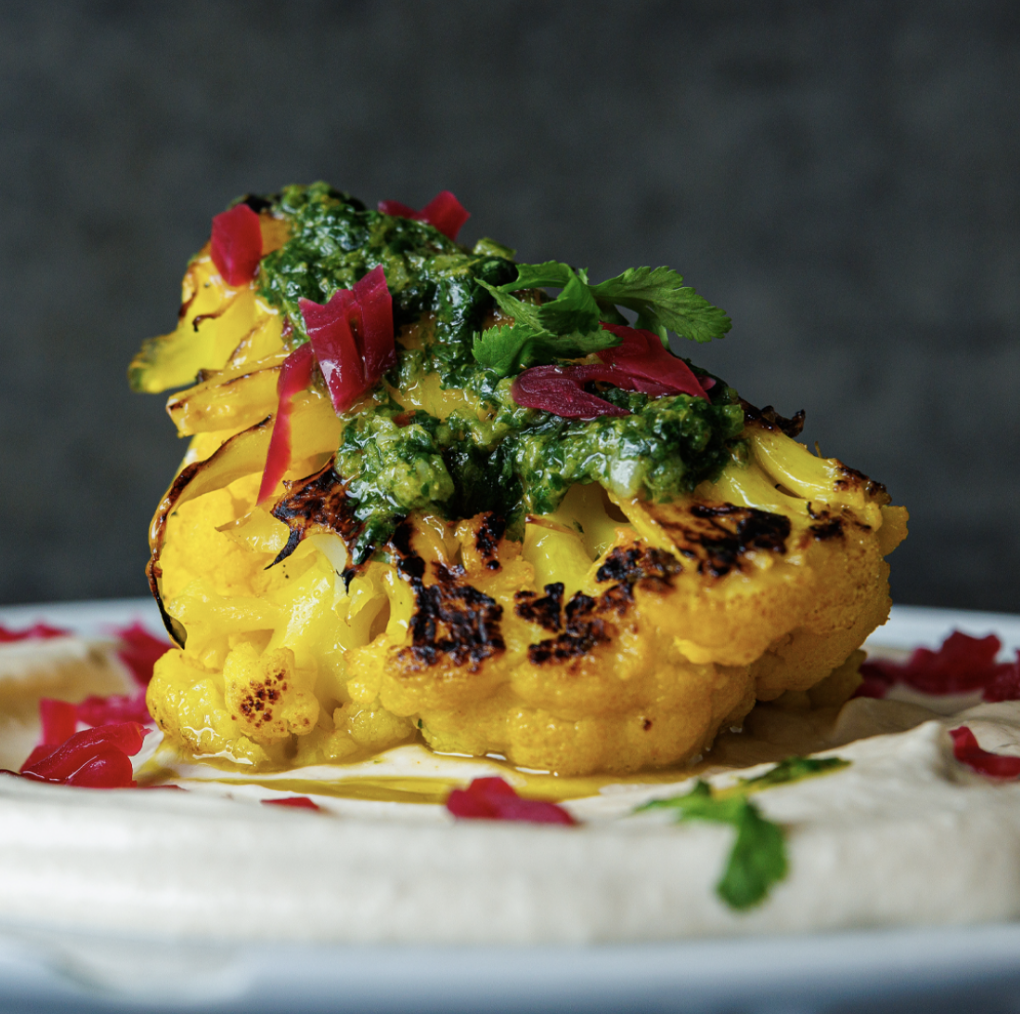
Golden Roasted Cauliflower with Tahini Cream & Zhoug
Takes 40 minutes
Serves 2
Ingredients
For the Cauliflower:
- 1 cauliflower
- 1 tbsp ground turmeric
For the Tahini Cream:
- 500 g natural soy yoghurt
- 8 tbsp light tahini
- Juice of 1 lemon
- Pinch of salt
For the Zhough
- 2 cloves Garlic
- 20 g fresh Coriander
- 1 Green chilli
- 1/2 tsp ground Cardamom
- 1 tsp Ground cumin
- 75 ml Oil
- Juice 1/2 lemon
- 1/2 tsp salt
- Pinch black pepper
- Pinch chilli flakes
Garnish
- 15 g fresh coriander
- 30 g red sauerkraut
Instructions
- Prep Cauliflower: Wash and cut the cauliflower into quarters, including the leaves.
- Boil Cauliflower: Boil the cauliflower and leaves with salt and turmeric until al dente, about 8-10 minutes, then drain.
- Make Tahini Cream: Combine soy yoghurt, tahini, lemon juice, and a pinch of salt to create the cream.
- Sear Cauliflower: Heat a wide bottomed non-stick pan on high heat and add 2 tbsp of oil and a pinch of salt. Once hot carefully place the cooked cauliflower open side down and cook on each side until golden brown in the centre, approx 3-4 mins on each side)
- Make the Zhoug: For the Zhoug blend all ingredients till smooth and taste and adjust the seasoning to your liking.
- Garnish Prep: Chop coriander or parsley and roughly chop the sauerkraut
- Assemble Dish: Spread tahini cream on a plate, place cauliflower on top, drizzle with the zhoug, and garnish with coriander and sauerkraut
- Serve and Savour: Dive into this beautiful and flavorful dish that elevates cauliflower to new heights. Enjoy!
Boost Your Gut Health with Fiber: The Plant-Based Secret to Digestive Bliss
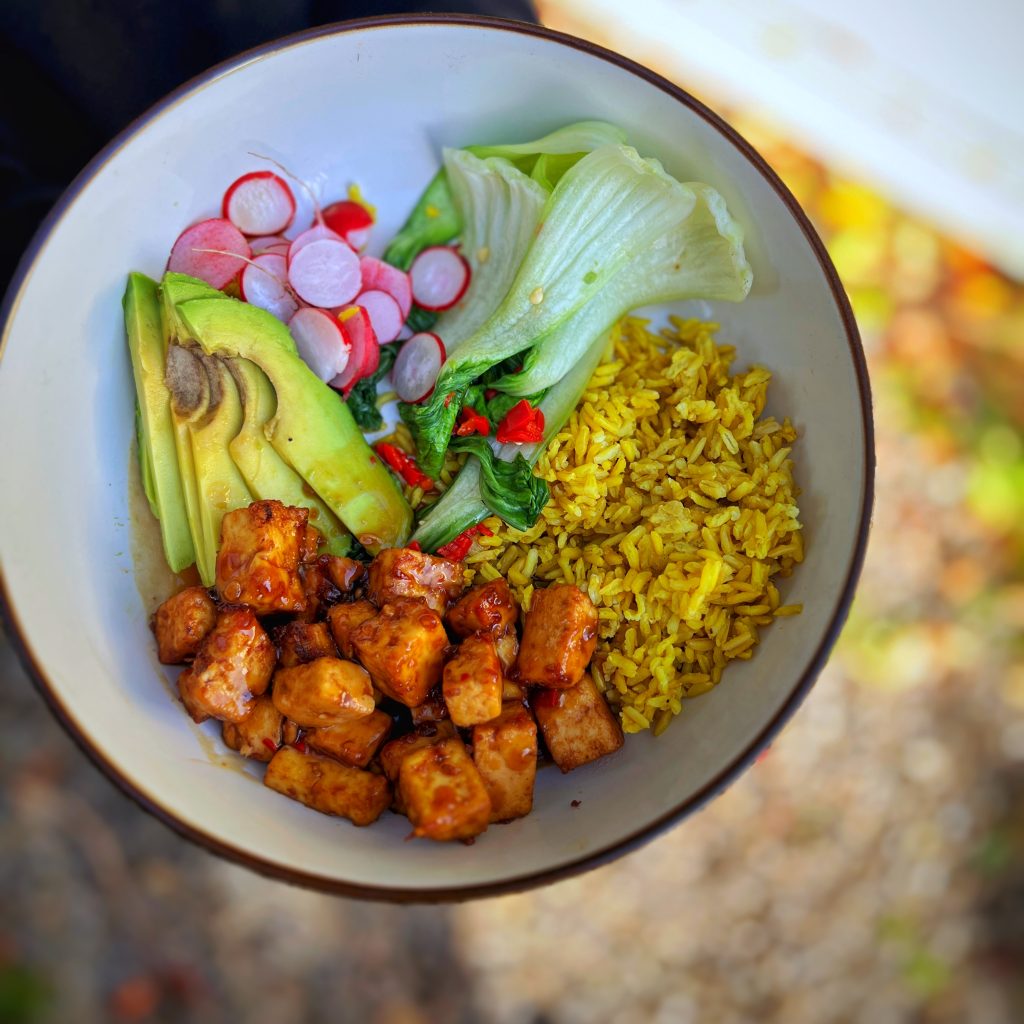
Fiber – The Unsung Hero of Your Plate
In the realm of nutrition, where vitamins and minerals often steal the spotlight, there’s one humble nutrient that quietly works wonders from the wings: fiber. By utilizing plant-based fiber for gut health, we can significantly enhance our digestive wellness and overall health. Think of fiber as the quiet kid in class who, unbeknownst to many, is actually a superhero in disguise, keeping your digestive system and overall health in tip-top shape.
Embarking on a plant-based diet unveils an exciting world where fiber isn’t just a guest; it’s the star of the show. This narrative isn’t about depriving yourself of flavors or joy. Oh, no! It’s about embracing a rainbow of foods that bring not only color and texture to your plate but also a myriad of health benefits, thanks to our fibrous friends.
Fiber’s superpowers are many, from helping you feel fuller for longer to making sure your digestive system runs like a well-oiled machine. And the best part? Plant-based diets are like a treasure map to this nutrient goldmine, with each meal offering a new opportunity to discover the joys and benefits of fiber.
As we set sail on this adventure, imagine your kitchen transforming into a laboratory, where each fiber-rich plant food is a fun experiment waiting to unfold. Together, we’ll explore the fascinating ways fiber works its magic, introduce you to the most fiber-rich foods the plant kingdom has to offer, and share secrets on how to keep your gut microbiome thriving, day in and day out.
So, buckle up! We’re about to take a ride through the colorful, flavorful, and utterly joyful world of fiber on a plant-based diet. Trust us, it’s a journey worth taking, filled with discoveries, health perks, and, most importantly, delicious food!
The Magic of Fiber: A Tale of Two Types
Fiber is an essential part of a healthy diet, especially when it comes to plant-based eating. It’s unique because it comes in two varieties: soluble and insoluble, each with its own set of benefits for our bodies.
Soluble Fiber: The Smooth Helper
Soluble fiber dissolves in water to form a gel-like substance, aiding in digestion and helping to keep blood sugar levels steady. It’s like the friend who’s always there to smooth things over, ensuring everything in your digestive system is running as it should. Foods rich in soluble fiber include oats, peas, beans, apples, and citrus fruits. By including these in your diet, you’re not just eating well; you’re actively contributing to your heart’s health and keeping hunger pangs at bay.
Insoluble Fiber: The Bulk Builder
Insoluble fiber doesn’t dissolve in water. Instead, it adds bulk to the stool and helps food pass more quickly through the stomach and intestines. It’s the dietary equivalent of keeping the traffic moving on the highway of your digestive tract, preventing any jams that can lead to discomfort or constipation. Whole wheat flour, wheat bran, nuts, and vegetables like cauliflower and potatoes are great sources of insoluble fiber. Adding these to your meals ensures that your digestive system stays on track.
Why Both Types Matter
Having both soluble and insoluble fiber in your diet is key to maintaining good digestive health. They work together to help manage blood sugar levels, reduce the risk of heart disease, and prevent constipation. A plant-based diet naturally offers a wide variety of both types of fiber, making it easier to enjoy their benefits in every meal.
Understanding the roles of soluble and insoluble fiber can help you make informed choices about what to include in your diet. As we move on to explore the fiber-rich stars of the plant-based diet, remember that diversity in your food choices is not just enjoyable—it’s essential for your health.
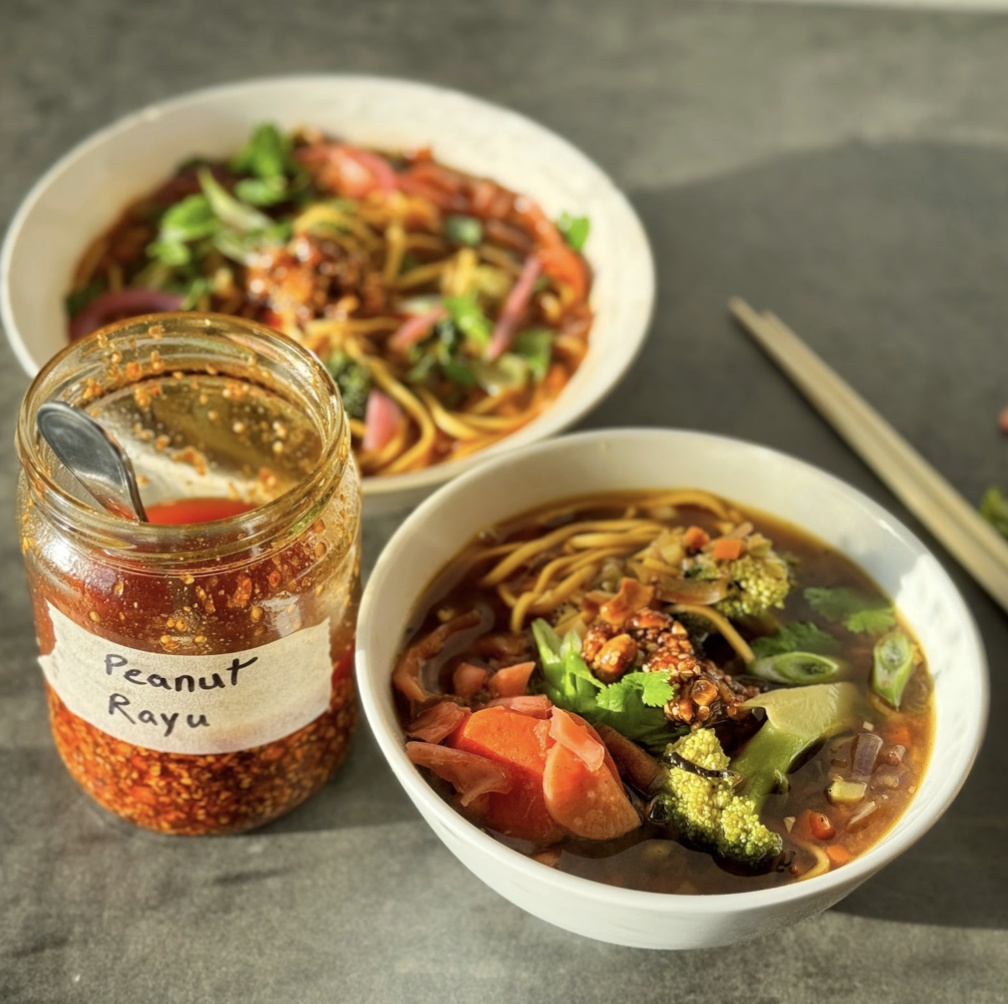
The Plant-Based Panorama: Where Fiber Reigns Supreme
Diving into a plant-based diet opens up a treasure trove of foods high in both soluble and insoluble fiber. Here’s a closer look at some of these nutritional superstars and how to weave them into your daily meals for a delicious, fiber-rich diet.
Legumes: Beans, Peas, and Lentils
Legumes are not only protein powerhouses but also fiber champions. Whether it’s black beans, chickpeas, lentils, or peas, these versatile ingredients can be the heart of any meal. Think beyond the humble chili or stew. How about a smooth, creamy hummus as a snack or black bean brownies for dessert? The options are as endless as they are delicious.
Whole Grains: Oats, Barley, and Quinoa
Move over, refined grains! Whole grains like oats, barley, and quinoa bring texture, flavor, and a hefty fiber punch to the table. Start your day with a bowl of oatmeal topped with fruit and nuts, or stir up a quinoa salad loaded with veggies for lunch. These grains make it easy to keep things interesting and fibrous.
Vegetables: Broccoli, Brussels Sprouts, and Sweet Potatoes
Vegetables are the backbone of any plant-based diet, and for good reason. Not only do they offer a variety of vitamins and minerals, but they’re also rich in fiber. Roast a mix of broccoli and Brussels sprouts for a crispy side dish, or bake a sweet potato for a filling meal. The more colorful your plate, the better!
Fruits: Berries, Apples, and Pears
Fruits are nature’s dessert, sweet and packed with soluble fiber. Berries can top off your morning cereal, apples can be baked into a healthy snack, and pears can add sweetness to a savory salad. Each fruit not only satisfies your sweet tooth but also supports your digestive health.
Incorporating a diverse array of plant-based foods into your diet isn’t just about meeting fiber needs—it’s about enjoying a wide range of flavors and textures. Experimenting with different fruits, vegetables, legumes, and grains can keep your meals exciting and your body well-nourished.
Fiber and Gut Health: The Feel-Good Alliance
Fiber’s role in maintaining gut health is both fascinating and vital. While it doesn’t get digested in the traditional sense, fiber has a profound impact on our digestive system, especially within a plant-based diet. Here’s how this nutrient helps keep our gut happy and healthy.
Fostering a Friendly Gut Microbiome
Fiber acts as a prebiotic, providing food for the beneficial bacteria in our gut. These friendly microbes ferment soluble fiber, producing short-chain fatty acids (SCFAs) that nourish the colon walls and help regulate the immune system. It’s like throwing a feast for your gut’s good bacteria, encouraging them to multiply and maintain a healthy gut flora balance. This, in turn, can reduce inflammation and even lower the risk of chronic diseases.
Keeping Things Moving
Insoluble fiber’s claim to fame is its ability to add bulk to stools and facilitate regular bowel movements. Think of it as the body’s natural way of keeping the digestive tract clear, preventing constipation, and reducing the risk of colon cancer. A diet rich in fiber from whole foods ensures that everything in the digestive system moves along smoothly, without any hiccups.
A Shield Against Diseases
Beyond digestion, a fiber-rich diet, particularly from plant sources, has been linked to lower risks of developing conditions like heart disease, type 2 diabetes, and certain types of cancer. Fiber’s ability to regulate blood sugar levels and cholesterol is a testament to its role beyond just gut health, showcasing its comprehensive benefits for overall well-being.
Weight Management Ally
Fiber has a fantastic ability to make you feel full and satisfied after meals, helping to curb overeating and assist in weight management. This is particularly beneficial in a plant-based diet, where high-fiber foods can provide volume and nutrients without an excess of calories.
Embracing a diet rich in plant-based fiber not only supports your digestive system but also contributes to a healthier, more vibrant you. As we look at incorporating more fiber into our diets next, remember that it’s not just about quantity; variety and enjoyment are just as important.
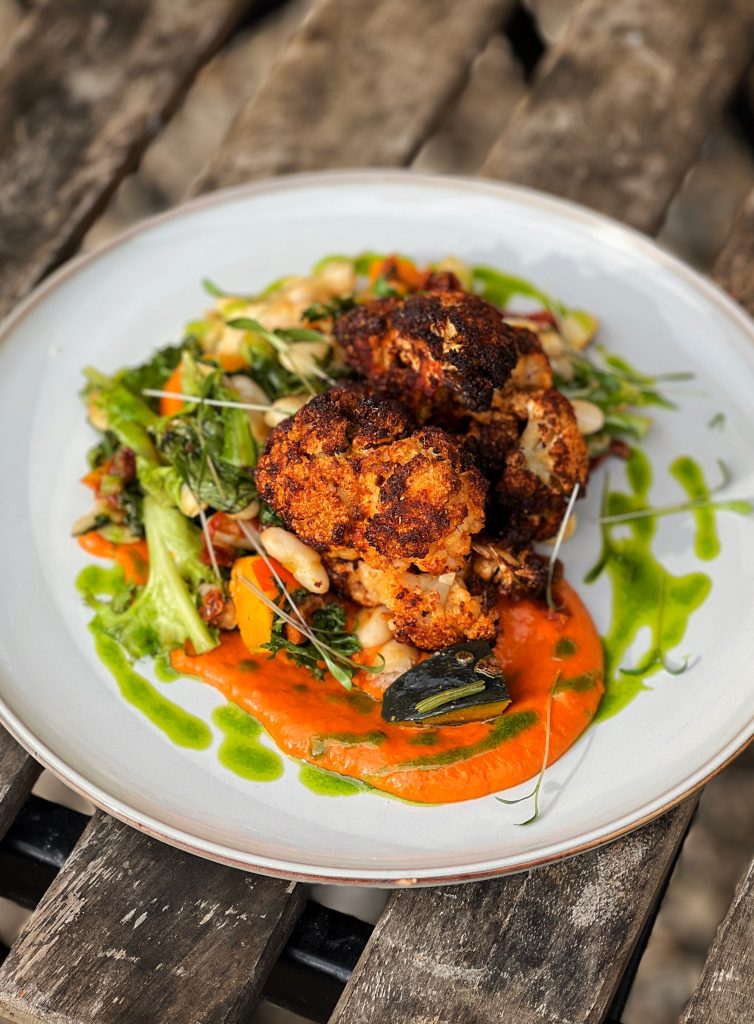
Embracing Fiber: Everyday Adventures
Increasing the fiber in your diet doesn’t have to be a chore. In fact, it can be a delicious and adventurous journey. Here are some tips and tricks to help you seamlessly add more fiber to your meals, making each bite not only nutritious but also delightful.
Start Your Day on a High (Fiber) Note
Breakfast is the perfect time to get a head start on your fiber intake. Swap out your regular cereal for a bowl of oatmeal topped with berries and chia seeds, or blend up a green smoothie with spinach, pear, and avocado. These choices pack a punch of both soluble and insoluble fiber, keeping you full and energized until lunch.
Snack Smart
For snacks, reach for raw veggies with hummus, a piece of fruit, or a handful of nuts. These not only satisfy hunger pangs but also provide a fiber boost. Preparing these snacks ahead of time makes it easier to make fiber-rich choices when you’re in a hurry or on the go.
Upgrade Your Grains
Choose whole grains over refined ones whenever possible. Whole grain bread, brown rice, and quinoa are not only tastier but also richer in fiber. These swaps can easily be made in any meal, enhancing both its flavor profile and nutritional value.
Experiment with Legumes
Legumes are incredibly versatile and a powerhouse of nutrition, especially fiber. Try adding beans to salads, using lentils in place of ground meat, or experimenting with chickpea-based recipes like falafel. Each addition introduces a new texture and flavor, making your meals more interesting and fibrous.
Fiber-Rich Desserts
Yes, desserts can be fiber-rich too! Bake with whole grain flours, incorporate fruits like apples or pears, or use nuts for crunch. These ingredients can transform any dessert into a guilt-free treat that still satisfies your sweet tooth while contributing to your daily fiber goal.
Incorporating more fiber into your diet is about making small, manageable changes that add up over time. With a bit of creativity and exploration, you can enjoy a diverse, flavorful, and fiber-rich diet that supports your gut health and overall well-being.
The Importance of Community
Transitioning to a new dietary lifestyle is often more manageable with the support of a community or network of individuals with similar interests. Online forums, local meetups, and plant-based cooking classes are excellent resources for encouragement, sharing experiences, and gathering valuable tips for those new to plant-based eating with a focus on gut health. The Gut Health Revolution Course has a wonderful community centered around the whole food, plant-based lifestyle, aiming to significantly improve your gut health!
Embracing the Fiber-Rich Life: A Path to Vibrant Health
As we wrap up our fiber-filled exploration, it’s clear that fiber is not just a dietary necessity but a cornerstone of a vibrant, plant-based lifestyle. The journey through the types of fiber, their sources, and their myriad benefits for gut health highlights an undeniable truth: embracing fiber-rich foods can transform our health in profound ways.
Fiber, in its humble essence, does more than just aid digestion. It’s a catalyst for a healthier, more energetic life. Its roles, from nurturing a balanced gut microbiome to preventing chronic diseases and aiding in weight management, illustrate fiber’s multifaceted impact on our well-being. The journey through the plant-based kingdom, with its legions of legumes, whole grains, vegetables, and fruits, showcases the abundance and variety available to those who choose to embrace this lifestyle. Each meal is an opportunity to nourish not only the body but also the soul, with vibrant colors, textures, and flavors.
Incorporating more fiber into our diet is an adventure—a chance to experiment with new foods, recipes, and eating habits. It’s about making intentional choices that align with our health goals and ethical values. The practical tips provided, from starting the day with a fiber-rich breakfast to indulging in fiber-packed desserts, offer a roadmap for this journey. They demonstrate that increasing our fiber intake is not only achievable but also enjoyable.
Moreover, this exploration underscores the importance of diversity in our diet. Just as a tapestry is more robust and beautiful for the variety of threads woven into it, so too is our health enhanced by a diverse intake of fibrous foods. Each type of fiber, each plant-based food, brings its unique benefits, contributing to a holistic picture of health that extends beyond the gut to encompass our entire being.
As we conclude, let’s remember that the path to a healthier, more fulfilling life is paved with fiber-rich, plant-based foods. It’s a path that invites creativity, demands mindfulness, and rewards with vitality. Whether you’re a seasoned plant-based eater or just beginning to explore this lifestyle, the world of fiber offers endless possibilities for enrichment and joy.
Embracing fiber is more than a dietary choice; it’s a commitment to nurturing our bodies, protecting our health, and celebrating the bounty of the plant-based world. Let this journey through fiber’s wonders inspire you to make choices that not only satisfy your palate but also support your health and the health of the planet. Here’s to a life lived with vitality, color, and, of course, plenty of fiber!
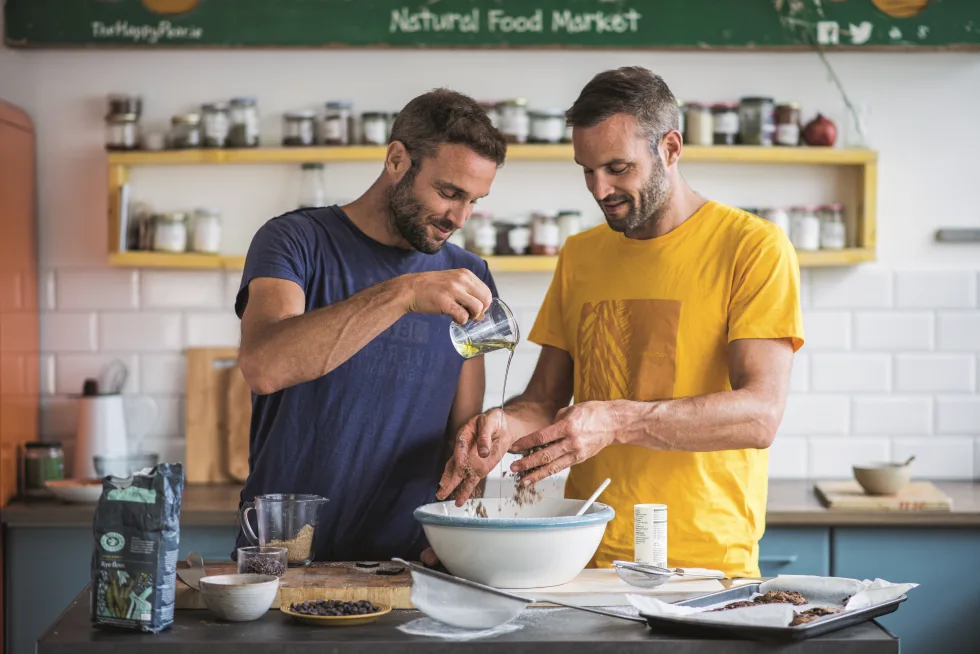
The Gut Health Revolution Course
If you are seeking a guided approach to improving gut health through plant-based eating, our “Gut Health Revolution” course, led by Gastroenterologist Dr. Alan Desmond, offers an in-depth exploration of the subject. This comprehensive 4 week course to revolutionise your gut covers everything from the science behind gut health to practical cooking demonstrations, making it an invaluable resource for anyone looking to transform their health through diet.
In addition to the course, you will get access to over 600 delicious, plant-based recipes, 100s of yoga lessons, meditations and workouts as well as access to our thriving community of like-minded people in various stages of their plant-based eating journey.
The Happy Pear Podcast
In this episode, we’re thrilled to have Dan Kittredge, the founder and executive director of the Bionutrient Institute. Dan is a lifelong organic farmer and an expert in nutrient density. Through his work, he aims to improve the quality of food by focusing on soil health and farming practices that enhance nutrient content. His passion for sustainable agriculture and deep understanding of the link between soil health and human health makes this a truly inspiring episode.
Episode 168
Main Topics Covered:
- The Journey to Nutrient Density: Dan shares his personal journey from organic farming to founding the Bionutrient Institute and his mission to improve food quality through nutrient density.
- Understanding Soil Health: A deep dive into the importance of soil health, how it impacts the nutrient content of food, and practical steps farmers can take to enhance soil quality.
- Bionutrient Food Association: The role and initiatives of the Bionutrient Food Association in promoting nutrient-rich farming practices and supporting farmers.
- Measuring Nutrient Density: An overview of the tools and techniques developed by the Bionutrient Institute to measure nutrient density in crops and why this is crucial for consumer health.
- Consumer Awareness and Education: How increasing consumer awareness about nutrient density can drive demand for healthier food options and support sustainable agriculture.
- Challenges and Solutions in Agriculture: Discussing the common challenges faced by farmers in adopting nutrient-dense farming practices and the solutions proposed by the Bionutrient Institute.
- Future of Agriculture: Dan’s vision for the future of agriculture, where nutrient density and soil health are prioritized to improve global food systems.
Tune in to gain valuable insights into the world of nutrient density, sustainable farming, and the future of our food systems. Whether you’re a farmer, a consumer, or simply someone interested in the quality of the food you eat, this episode is packed with actionable information and inspiring ideas.
Lots of love,
Dave & Steve
SPONSORS & DISCOUNT CODES:
Namawell Juicers are AMAZING! They have absolutely revolutionised the juicing game. We have an exclusive 10%
Enter the code HAPPYPEAR10
LINK: https://namawell.com/collections/juicers/products/nama-j2-cold-press-juicer?ref=thehappypear
VIVOBAREFOOT: Vivobarefoot Footwear have given our listeners an exclusive 20% discount and if you buy now you also get free access to their incredible course showcasing some of the biggest names in the health and wellness space.
Enter the code HAPPYPEAR20
LINK: https://www.vivobarefoot.com/uk/the-happy-pear
THE HAPPY PEAR RECIPE CLUB – Blending health and happiness through a range of over 500 delicious plant-based recipes.
LINK: https://eu1.hubs.ly/H06JvgK0
Sign up to our Newsletter, for updates on our latest recipes, events, and news.
LINK: https://share-eu1.hsforms.com/1hKXaawjoQOONmJe4EXkCdwf92py
Produced by Sean Cahill & Sara Fawsitt
Available now from all good podcast providers:
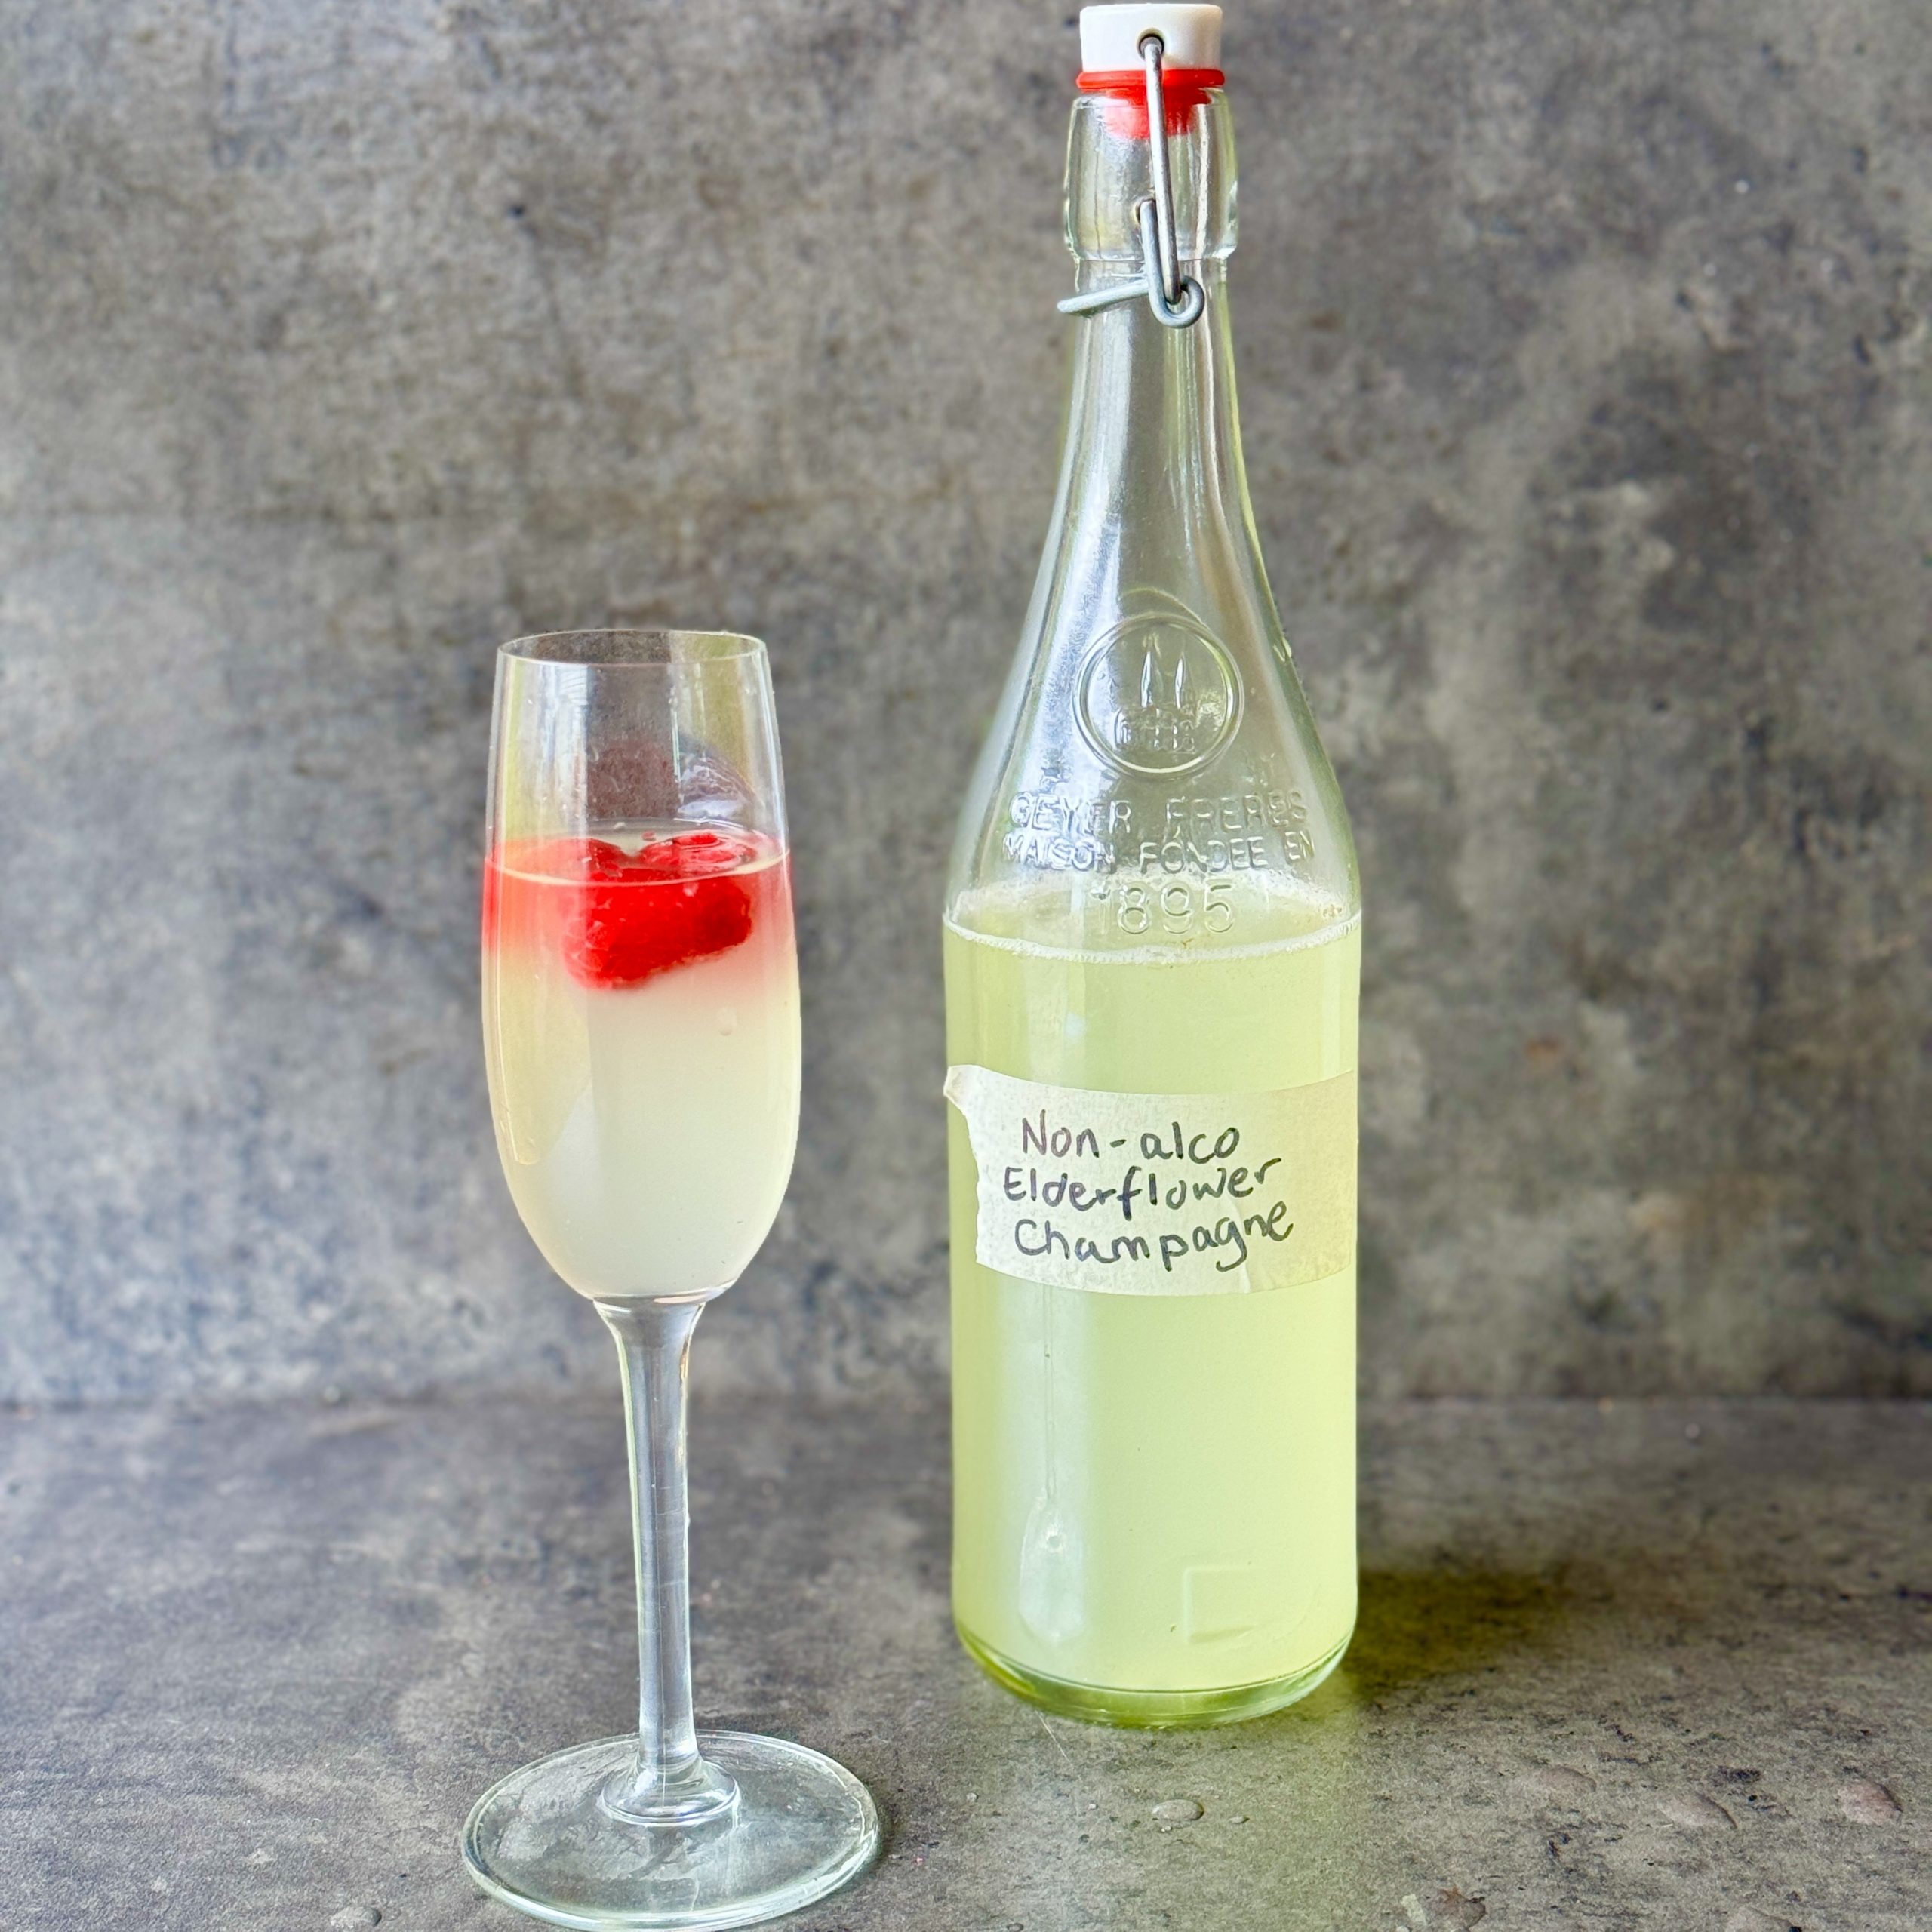
Alcohol-Free Fermented Elderflower Champagne
Takes 6 days 30 minutes
Serves 8
Ingredients
Elderflowers:
- 10-12 elderflower heads
Water:
- 4 litres 16 cups
Sugar:
- 500 g 17.6 oz
Citrus:
- 2 large limes organic, if possible
White Wine Vinegar:
- 2 tbsp
Instructions
Prepare the Elderflower Infusion:
- Pick and Clean Elderflowers: Pick 10-12 elderflower heads, ensuring they are fully open and fragrant. Shake gently to remove any insects but do not rinse as the natural yeasts on the flowers are essential for fermentation.
- Boil the Water: Boil 2 litres (8 cups) of water and pour it into a large, heatproof bowl or container.
- Add Sugar: Add 500g (17.6 oz) of sugar to the hot water and stir until completely dissolved.
- Cool the Water: Add the remaining 2 litres (8 cups) of cold water to the bowl to cool the mixture down to lukewarm temperature.
- Prepare the Limes: Thinly slice 2 large limes, removing any seeds.
- Add Ingredients: Add the elderflower heads, lime slices, and 2 tbsp of white wine vinegar to the sugar water mixture.
Start Fermentation:
- Cover and Ferment: Cover the bowl with a clean cloth and let it sit at room temperature for 2-3 days. Stir the mixture once a day. You should start to see some bubbles forming, indicating that fermentation has begun.
Bottle and Continue Fermentation:
- Strain and Bottle: After 2-3 days, strain the liquid through a fine mesh sieve or cheesecloth into clean, sterilised bottles. Seal the bottles tightly.
- Ferment Further: Leave the bottled elderflower champagne at room temperature for another 3-4 days to build up carbonation.
Chill and Serve:
- Refrigerate: After the second fermentation period, refrigerate the bottles for at least 24 hours before serving.
- Serve: Carefully open the bottles to release the built-up carbonation, pour into glasses, and enjoy your naturally fizzy, alcohol-free elderflower champagne!
Notes
Notes
- Natural Yeasts: Do not wash the elderflowers, as the natural yeasts on them are crucial for fermentation.
- Fermentation Time: The fermentation time may vary depending on the temperature and yeast activity. Monitor the bottles carefully to avoid over-carbonation.
- Safety: Use sturdy bottles designed for carbonation to prevent any risk of explosion.

‘Happier’ With Dave Flynn
‘Happier’
The Wisdom of Insecurity
Insecurities in my romantic relationship
When I first started dating my wife Sabrina I used to get jealous when she would go out to parties or events without me. When she was away travelling for work or pleasure without me I would get jealous when she would talk about other guys she had met. I didn’t acknowledge this to her at the start but over time I couldn’t suppress it anymore and I was forced to look at it with her supportive help. Possibly on some level I may not have felt worthy or good enough that she would stay with me. We have now been together for 8 years and married for nearly 3 years. I remember that I sometimes felt embarrassed by my jealousy but I couldn’t help it. I don’t remember feeling jealous over the last few years, I know it has and possibly will provide a great opportunity for growth for me.
I used to see insecurities – like my jealousy – as really negative, uncomfortable parts of myself that I just wanted to hide from everyone. I certainly didn’t want to acknowledge or share these insecurities, I preferred to sweep them under the metaphorical mat. I preferred to project the childish illusion that I was different and didn’t have any insecurities, that I had my ‘sh*t’ together.
Recently while soaking in the bath, (my chosen place of solitude to reflect and pontificate) I was ruminating over the idea that insecurities and the pieces that we find most uncomfortable about ourselves can likely be our greatest teachers, our greatest opportunities for growth and increasing awareness.
Failure being a better teacher than success
To share another example, I recently watched a clip of Ed Sheeran discussing his success. He emphasised that his achievements were due to hard work, not just raw talent. The interviewer suggested he was being humble, but Ed insisted otherwise. He pointed to a song he had published on YouTube at 14, four years before his breakthrough. His singing was rough, just as he described. Ed explained that failure had shaped him. He failed repeatedly until he could sing melodies and harmonies proficiently. “Success teaches you nothing,” he said. “Failure is the best teacher of all.” It’s humbling and often tough to swallow, but it builds real character.
This perspective on failure aligns with my own experiences. My insecurities, once seen as weaknesses, have provided opportunities for growth and self-awareness. Embracing failure and insecurity, rather than hiding from them, allows us to learn and grow. Just as Ed Sheeran didn’t shy away from his early, imperfect music, we can embrace our insecurities as part of our journey toward self-understanding and personal growth.
The wisdom of insecurity.
Most of us unconsciously try to control our environment to varying degrees – with the goal to feel more secure. For example, we may look for security in our day to day jobs, for permanent contracts with good benefits like health insurance. We may marry to help provide some form of security that our spouse will not leave us as long as we are married. We may have pensions to help give us some financial security for the future. We are living trying to mitigate some future worries in the hope that we feel more secure and in control now.
The illusion of security?
While all this feels relatable to some degree, I wonder if this way of thinking is an illusion? We are not even in control of our own bodies, most processes happen automatically, breathing for example, it happens whether we are aware of it or not, the same goes for digestion, healing, pumping blood etc.
On a larger scale, each of us is just one among nearly 9 billion people living on a dynamic, ever-changing planet. We are part of complex webs of natural ecological systems, constantly in flux, alongside intricate human-made political and governing structures. This vast, unpredictable environment shows how the idea of security is an illusion and highlights the need to embrace life’s uncertainties.
I remember my granny, May, who died at 92, had most of her money in AIB bank stocks. Her husband, my grandfather, worked there, so they invested their savings in these seemingly safe, blue-chip stocks. However, the 2008 financial crash wiped out their value entirely. This experience highlights the illusion of security. Even the safest investments can become unstable, showing that true security is elusive and reinforcing the need to embrace life’s inherent uncertainties.
As is often said, change is the only real constant. I remember doing a 10-day silent meditation retreat in Boston over 22 years ago. We got up at 4:30 AM and meditated for about 14 hours a day in complete silence, with no reading, writing, or eye contact. One key message reinforced every day was that change is the only constant. This experience made me realise how true this is and highlighted the illusion of security. By accepting and embracing change, we can better handle life’s uncertainties and grow from our insecurities.
Embracing the insecurity of life
Uncertainty is deeply challenging, particularly with the rate of change that new tech is forcing upon us. However, the very nature of life is uncertainty. Parts of me wish it wasn’t as then it might be more predictable and controllable.
I think cultivating a deeper capacity to let go and not resist change is key to not ‘breaking’. I have a good few friends who have gone through tough burnouts. They were high achievers who worked really hard and also had high tendencies toward control. Yet ultimately their burnouts were a really tough messenger to help them to let go, to redefine their relationship with work and control by setting better boundaries and learning to let go of this idea of perfection. Trying to control something that is uncontrollable simply creates anxiety. Learning to let go and be more present with what is unfolding could possibly be a better strategy for feeling happier.
Vulnerability – the ultimate connector
Insecurities make us more human and relatable yet most of us – like me – try to hide these feelings from others. I get it, I do the very same, as feeling vulnerable is uncomfortable. You usually feel exposed, sensitive and a bit raw and your ego and pride are suppressed.
In my twenties I used to be so proud of any of my accomplishments and was only too happy to share them with anyone who was interested. I suppose I had an inflated sense of ego and then with the rise of social media this only added petrol to the fire. Maybe it is getting older or maybe it is spending much less time on social media and the endless game of likes and popularity but I feel much less concerned with impressing people. I like to think maybe I am just becoming more comfortable with my insecurities.
Most of us project an image of self-confidence and having our lives together. However, on the inside, we often feel insecure and vulnerable, sometimes even dealing with imposter syndrome daily. I believe we connect much more through these tender, insecure feelings than through our achievements and strengths. Everyone can relate to insecurities, challenges, and vulnerabilities. Embracing these aspects of ourselves can lead to deeper, more meaningful connections, embodying the wisdom of insecurity.
I think a key piece to feeling happier is becoming more ‘friendly’ with our insecurities and vulnerabilities. Insecurities are really tough and everyone deals with them, our internal struggles are likely much more relatable than any accomplishments we may have had.
What do you think? What insecurities drive you? I would love to know your thoughts. Thank you for taking the time to read this. If you want to add to the conversation leave a comment below and if you want to read some of my other happier columns I have written 13 now, you can find my previous Happier columns here
All the best
Dave x
More ‘Happier’ Articles
More ‘Happier’ Articles

Courgette Fritters with a Tzatziki Tahini Cream and Chilli Sauce
Takes 25 minutes
Serves 2
Ingredients
Fritters
- 300 g courgettes zucchini (10.6 oz)
- 2 cloves of garlic
- 1/2 red chilli optional
- 1/2 bunch of scallions spring onions (approx 4)
- 240 g tinned butter beans 8.5 oz
- Small bunch of fresh mint or coriander cilantro (10g) (0.35 oz)
- Juice of 1/2 lemon
- 2 tsp lemon zest
- 4 tbsp regular flour or gram flour chickpea flour
- 1/2 tsp salt
- 1/2 tsp black pepper
Cucumber Tahini Tzatziki
- 1/2 cucumber or 2 snacking cucumbers
- 400 g natural soy yoghurt 14.1 oz
- 8 tbsp light tahini
- Zest and juice of 1/2 lemon
- Pinch of salt
- 1 clove of garlic
- To Garnish
Chilli sauce (homemade or store-bought)
Instructions
Make the Fritters:
- Prepare the Courgettes: Grate 300g (10.6 oz) of courgettes into a muslin cloth or sieve, sprinkle with a pinch of salt,and leave to sit for about 5 minutes.
- Prepare the Other Ingredients: Meanwhile, peel and finely chop 2 cloves of garlic, finely dice 1/2 red chilli, and finely chop 1/2 bunch of scallions. Drain and rinse the tin of butter beans. Finely chop a small bunch (10g or 0.35 oz) of mint or coriander.
- Squeeze the Courgettes: After 5 minutes, squeeze all the juice out of the courgettes and drink or discard the liquid. Place the courgettes in a large bowl.
- Mix the Batter: Zest 1/2 lemon and in the zest and juice of 1/2 lemon into the bowl. Add the garlic, chilli, scallions, butter beans, mint, 4 tbsp flour, 1/2 tsp salt, and 1/2 tsp black pepper. Mix and mash using a potato masher or fork until well combined.
- Form the Fritters: Using your hands, take the equivalent of 2 tablespoons of the batter and roll into small fritters (disk shape).
- Cook the Fritters: Heat a non-stick pan over high heat, add 1-2 tbsp of oil, and fry the fritters for a few minutes on each side until golden brown (approx 2 minutes on each side). Repeat until all are cooked. You can cook them in an airfryer or oven for a lower oil version.
Make the Tahini Cream:
- Prepare the Cucumber: Grate 1/2 cucumber into a sieve, add a pinch of salt, and let sit for a few minutes.
- Mix the Tahini Cream: In a bowl, mix 400g (14.1 oz) soy yoghurt, 8 tbsp tahini, zest and juice of 1/2 lemon, mint, a pinch of salt, and 1 finely chopped garlic clove. Add the grated cucumber and mix well. Adjust seasoning to taste. Drink the remaining cucumber juice which should taste sweeter than the courgette juice or you could discard it.
Serve:
- Plate the Fritters: Divide the tzatziki cream between 2-3 plates.
- Add the Fritters: Divide the courgette fritters between the plates.
- Garnish: Drizzle with chilli sauce and enjoy!

Rhubarb and Apricot Bakewell Slices
Takes 1 hour 10 minutes
Serves 12
Ingredients
- 1 sheet pre rolled vegan shortcrust pastry 320g
Rhubarb and apricot jam
- 200 g rhubarb
- 200 g fresh apricots
- 50 ml water
- 200 g caster sugar
Frangipane
- 200 g ground almonds
- 175 g caster sugar
- 125 g self raising flour
- 150 ml plant based butter
- 120 ml water
- 1 tsp almond extract
- 25 g flaked almonds
Instructions
Make the Jam
- This is technically more of a compote than jam which actually makes it easier to work with and quicker to make. Using a small knife cut the apricots in half, remove the stone and slice into thin slices. Finely slice the rhubarb. In a large saucepan add the sugar, water, and mix until the sugar dissolves in the water then add the rhubarb and half of the apricots. Turn the heat on high, bring to the boil and reduce to a simmer for 15 mins, stirring occasionally until the rhubarb has broken down and it starts to thicken and resemble a very thick soup. If you don't like texture you can blend till smooth but we prefer to leave some fruit pieces in it. Set aside to cool.
- Preheat oven to 180 C fan assisted.
Roll out pastry and blind bake
- Defrost the pastry if using frozen.
- Roll out the pastry. Line a 25 x 18cm (3.5cm deep) sized dish with parchment paper. Transfer the pastry to the tray and trim it to roughly fit your tray (no need to bring it up the sides).
- Next we have to blind bake pastry. To do this, line with another sheet of parchment paper on top of the pastry and fill with cooking beans or dried beans (approx 200g). Bake in the oven for 10 mins – remove the beans and top baking parchment, and pop back in the oven for 5 mins so the base cooks. Remove and allow to cool.
Make frangipane
- Make the frangipane while pastry is blind baking. Sieve the flour and sugar into the almond meal in a large mixing bowl with a pinch of salt and mix to combine with a whisk so there are no lumps. For the wet ingredients, melt the butter and mix it with the almond extract and 120ml of water until well combined. Add into the dry ingredients. Mix until combined into a smooth batter.
Add jam layer on top of pastry
- Add the rhubarb and apricot jam to the cooked cooled pastry and spread an even layer over the pastry.
Add frangipane on top and bake
- Carefully spoon the frangipane or almond mixture on top of the jam layer. It will be quite a thick batter so carefully spread it over the jam so it’s fully covered.
- Spread the remaining sliced apricots over the frangipane in a design or pattern that you like, we went for 5 layers and scatter the flaked almonds over the top.
- Bake for 50 mins until golden on top and a skewer comes out dry or almost dry. Remove from the oven and allow to cool fully in the tray before cutting. We like to cut our bakewells into thin slices or else fingers, approx 3 x 6 cm (you should get 12-18 fingers) but portion into your preferred size and slice. Enjoy!

Fermented Hormone Balancing Tonic
Takes 10 days 15 minutes
Serves
Ingredients
Kombucha
- 180 g caster sugar
- 6 rooibos tea bags
- 250 ml boiling water
- 2.5 L cold water
- 1 scoby symbiotic culture of bacteria and yeast
- 250 ml of kombucha
Juice for secondary fermentation
- 1 medium beet
- 3 carrots
- ½ lemon
- 15 g fresh ginger
- 8 g fresh turmeric
- 1 medium cucumber
- 1 apple
Instructions
- Make Kombucha: To make our kombucha, boil the kettle. Into a measuring jug or medium bowl add in the sugar, tea bags and the 250ml of boiling water. Leave to brew for 5 mins and stir to ensure the sugar has all dissolved and remove the tea bags. Into your fermentation vessel or jar add in 2.5L of water followed by the freshly brewed sugary tea. Next add in the SCOBY followed by the 250ml of unpasteurised kombucha. This kombucha will act as the starter culture that will help with correct fermentation.
- Get a SCOBY: A SCOBY is a Symbiotic Culture Of Bacteria and Yeast, resembling a jellyfish or a silicone disc. Obtain one either by purchasing online or from a friend who brews kombucha. With each batch you make, your SCOBY will grow, allowing you to share with friends or expand your brewing.
- Brew the Tea: Boil 250ml of water. In a large bowl, steep the tea bags and dissolve the sugar in the hot water, allowing the flavours to infuse for about 5 minutes. Discard the tea bags after use.
- Combine Ingredients: Add the remaining 2.5 litres of water to the 3L jar. Mix in the brewed sugary tea and the temperature should have cooled to below 37°C (body temperature) to avoid harming the SCOBY.
- Fermentation: Place the SCOBY and the 250ml of live kombucha into the jar. Cover with a tea towel and let it ferment for 7-12 days at room temperature, away from direct sunlight.
- Post-Fermentation: After the fermentation period, remove the SCOBY. Your kombucha is now ready for consumption. This is your first fermentation.
- Make juice for second fermentation: Freshly juice the beet, carrot, cucumber, apple, lemon, ginger and turmeric.
- Second Fermentation (for increased carbonation and flavouring):
- Transfer the kombucha into smaller jars or bottles and fill them ⅔ full with the fermented kombucha. Fill the remaining ⅓ with the fresh juice ensuring to leave approx 2-3 cm from the top empty for the build up of gases and for fermentation.
- Carbonation: Seal the jars and let them sit, you will have to "burp" them daily to release excess gas ( by slightly opening the lid ). Leave for 1-3 more days before drinking. Longer fermentation will increase carbonation.
Notes
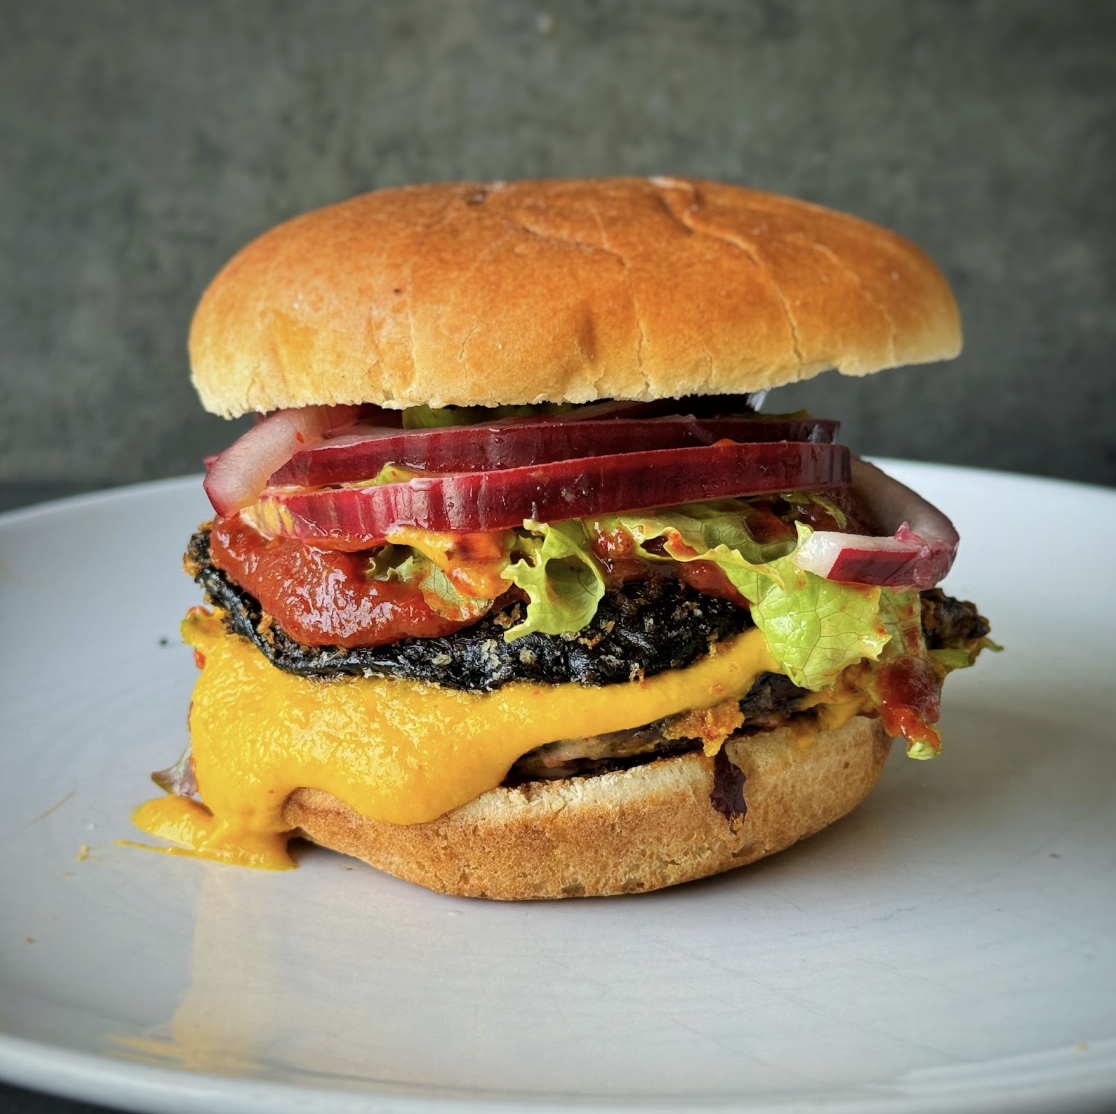
Korean-inspired Kim-Cheese Burger
Takes
Serves 2
Ingredients
Portobello Mushrooms:
- 4 large portobello mushrooms
Dressing:
- 3 tbsp tamari/soy sauce
- 2 cloves garlic
- 10 g fresh ginger ½ thumbsized piece (0.35 oz)
- 1 tbsp mirin or vinegar of choice
- 1 tbsp coconut sugar or brown sugar
Coating:
- 50 g panko breadcrumbs 1.75 oz
- 2 tbsp gochugaru Korean chilli powder or 1 tsp chilli powder
Kim-Cheese:
- 100 g kimchi no juice (3.5 oz)
- 80 ml sunflower oil 2.7 fl oz
- 50 g carrot 1 small carrot (1.75 oz)
- 50 g potato 1 small potato (1.75 oz)
- Generous pinch salt
To Serve:
- 4 tbsp vegan mayo
- 1 tbsp gochugaru
- 4 tbsp ketchup
- Handful of lettuce
- 50 g pickled red onion 1.75 oz
- 2 burger buns
Instructions
Boil the vegetables for kim cheese:
- Fill the kettle and boil it. Cut 50g (1.75 oz) carrot and 50g (1.75 oz) potato into small bite-size pieces and add to a small saucepan. Cover with just boiled water, bring to the boil, then reduce to a simmer for 10-15 mins or until soft. Drain and set aside.
Prepare the dressing:
- Peel and finely dice 10g (0.35 oz) fresh ginger and 2 cloves garlic. Add to a glass along with 3 tbsp tamari, 1 tbsp mirin, and 1 tbsp coconut sugar, and mix well.
Fry the mushrooms:
- Heat a large frying pan on high heat. Once hot, add 1 tbsp oil followed by the 4 portobello mushrooms and a generous pinch of salt. Ensure all mushrooms touch the bottom of the pan. Use a saucepan lid to compress the mushrooms for 2-3 mins, then turn and repeat on the other side.
Add the dressing:
- Add the dressing to the pan and spread it around to ensure each mushroom absorbs the flavour. Turn the mushrooms to coat evenly and cook for 1-2 mins. Turn off the heat and set aside.
Bread the mushrooms:
- In a bowl, mix 50g (1.75 oz) panko breadcrumbs and 2 tbsp gochugaru. Add the mushrooms to the breadcrumbs and mix well to coat evenly.
Fry the breaded mushrooms:
- Heat the frying pan over high heat. Once hot, add 1 tbsp oil followed by the breaded mushrooms. Fry for 2-3 mins on each side until lightly golden. Remove from the pan and set aside.
Make the kim-cheese:
- Add the cooked potato and carrot to a blender along with 80ml (2.7 fl oz) sunflower oil, 100g (3.5 oz) kimchi, and a generous pinch of salt. Blend until smooth and creamy. Adjust seasoning to taste.
Prepare the spiced mayo:
- Mix 1 tbsp gochugaru with 4 tbsp vegan mayo until well combined.
Assemble the burgers:
- Toast the burger buns. On the bottom bun, add some spiced mayo, followed by 1 mushroom, a generous amount of kim cheese, another mushroom, 2 tbsp ketchup, 25g (0.875 oz) pickled red onions, some lettuce, and the top bun. Repeat for the second burger.
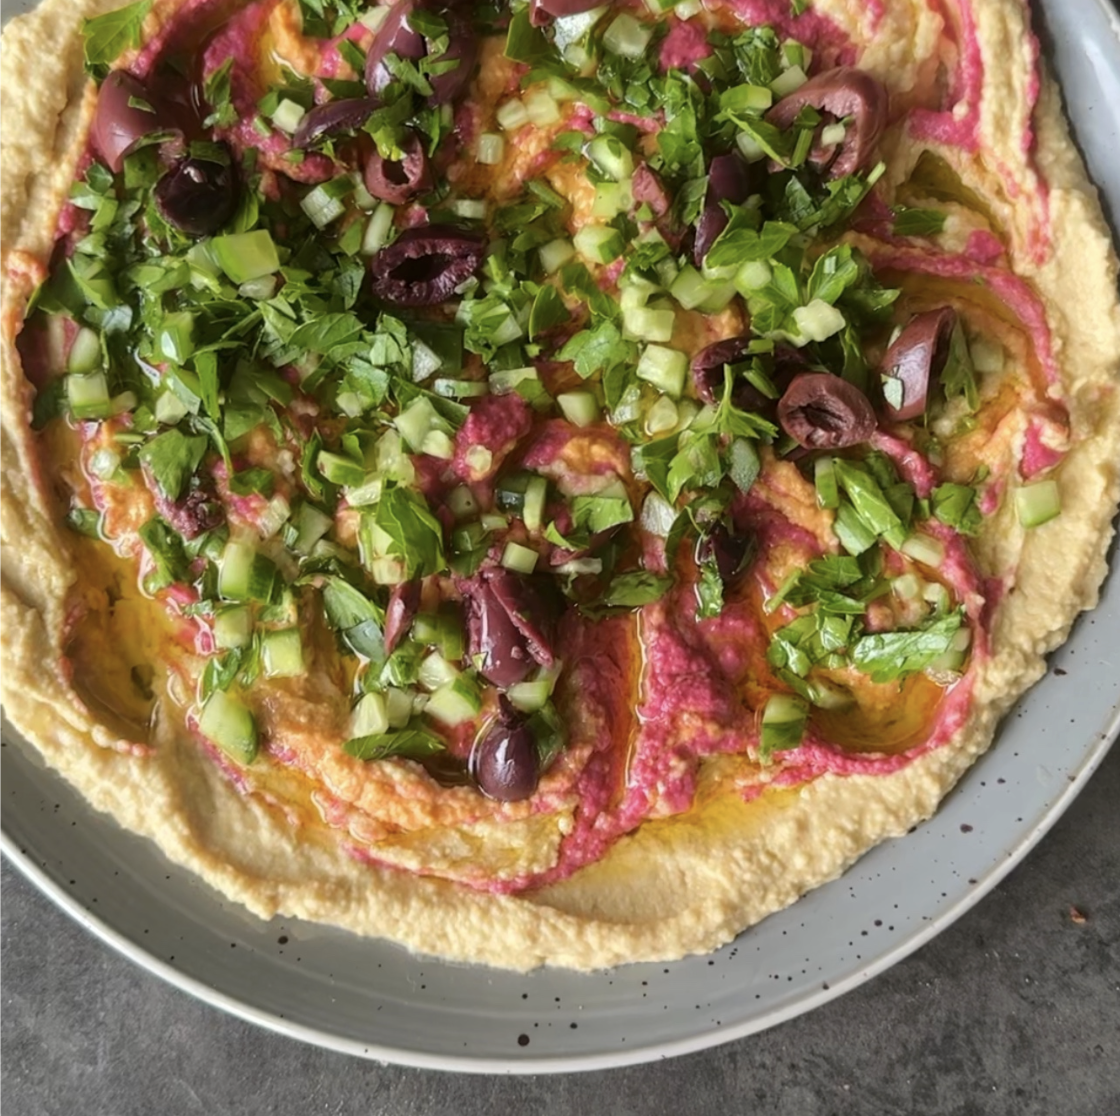
Sunrise Hummus Plate
Takes 20 minutes
Serves 4
Ingredients
Basic hummus recipe
- 3 x 400g tins of chickpeas 750g net weight
- 3 cloves garlic
- 120 ml light tahini
- Juice of 3 medium lemons
- 2.5 tsp of salt
- 4 cubes of ice
- 80 ml water
- 60 ml olive oil
- 1/2 tsp ground cumin
Variations
- 135 g of spicy red pepper pesto The Happy Pear or Harissa
- 5 tbsp of beetroot juice
- 2 tbsp beetroot powder optional
To serve
- 15 g of fresh parsley
- 100 g of pitted kalamata olives
- ½ medium cucumber
- 1 loaf of sourdough
- 50 ml of olive oil
Instructions
- Drain and rinse the chickpeas, peel the garlic and add them into a food processor together with the tahini, ice, water, salt, olive oil and ground cumin and blend till super smooth. In certain parts of the middle east they will blend hummus for a minimum of 30 mins – 3 hours for a silky smooth texture – so blend for as long as your patience will allow! Taste and adjust the seasoning to your liking. If it's too thick add some water until you get your desired texture, then, season to taste by adding more salt or lemon juice.
- Divide the main batch of original hummus into 3 equal batches.
- In the first batch add the spicy red pepper pesto and mix till smooth.
- In the 2nd batch add the beetroot juice and mix through till smooth and pink (if it is not as pink as you would like it a good trick to do it to add 2 tbsp of beetroot powder for a more vibrant pink)
To serve:
- Toast the sourdough
- Finely dice the parsley, cucumber and olives
- Add the original humus to a large plate or bowl, add a few dollops of the pink hummus and a few dollops of the spicy red pepper hummus followed by a drizzle of olive oil, carefully spread so they bleed together, garnish with the chopped parsley, olives and cucumber and serve with the toasted sourdough for a beautiful spread!
The Happy Pear Podcast
This week we speak to the wonderful, charming, friend that is Dan Sheehan. Dan is the visionary founder of Namawell, a company that has revolutionised the juicing industry with its innovative products. Dan’s journey from a health-conscious entrepreneur to the creator of cutting-edge juicers is inspiring and packed with valuable insights for anyone interested in health, wellness, and entrepreneurship.
Episode 167
Dan Sheehan is a trailblazer in the world of juicing, dedicated to making healthy living accessible and enjoyable. With Namawell, he has introduced juicers that not only extract the maximum nutrition from fruits and vegetables but also make the juicing process more efficient and user-friendly. His passion for wellness and innovation has positioned Namawell as a leading name in the industry.
In this episode, we explore Dan’s entrepreneurial journey, the challenges he faced, and the vision that drives Namawell. We delve into the technical advancements of their juicers and discuss broader topics around health and wellness. Join us for an inspiring conversation filled with practical tips and insights.
Main Topics Covered:
- Dan’s Background and Journey:
- How Dan’s incredible personal health journey led him to found Namawell.
- The early challenges and milestones in establishing the company.
- Innovations in Juicing Technology:
- The unique features of Namawell juicers and what sets them apart.
- The importance of preserving nutrients in the juicing process.
- Health and Wellness Insights:
- The benefits of incorporating fresh juices into your diet.
- Tips for maintaining a balanced and healthy lifestyle.
- Sustainability and Ethical Practices:
- How Namawell prioritizes sustainability in its business model.
- Ways consumers can make more sustainable choices in their daily lives.
Tune in to gain a deeper understanding of the juicing revolution and get inspired by Dan Sheehan’s story. Whether you’re a juicing enthusiast, a budding entrepreneur, or someone interested in health and wellness, this episode offers something for everyone.
Lots of love,
Dave & Steve
SPONSORS & DISCOUNT CODES:
Namawell Juicers are AMAZING! They have absolutely revolutionised the juicing game. We have an exclusive 10%
Enter the code HAPPYPEAR10
LINK: https://namawell.com/collections/juicers/products/nama-j2-cold-press-juicer?ref=thehappypear
VIVOBAREFOOT: Vivobarefoot Footwear have given our listeners an exclusive 20% discount and if you buy now you also get free access to their incredible course showcasing some of the biggest names in the health and wellness space.
Enter the code HAPPYPEAR20
LINK: https://www.vivobarefoot.com/uk/the-happy-pear
THE HAPPY PEAR RECIPE CLUB – Blending health and happiness through a range of over 500 delicious plant-based recipes.
LINK: https://eu1.hubs.ly/H06JvgK0
Sign up to our Newsletter, for updates on our latest recipes, events, and news.
LINK: https://share-eu1.hsforms.com/1hKXaawjoQOONmJe4EXkCdwf92py
Produced by Sean Cahill & Sara Fawsitt
Available now from all good podcast providers:

‘Happier’ With Dave Flynn
‘Happier’
Less Effort, More Ease
Sitting soaking in the bath I watched a short video by Alan Watts about not forcing anything. It made me reflect on the question: How can I live with more ease and less striving and forcing?
As I reflect, I wonder about how you and I are a product of our current culture of quicker, faster, now! In comparison, I marvel at the effortlessness of nature. Lao Tzu, the late Chinese philosopher said “Nature does not hurry, yet everything is accomplished.” I wonder how I can live more in harmony with this natural flow, with the rhythm of nature. And ultimately, how I can live with more ease, more flow and alignment?
Does effort equate to success?
In today’s world, success is often equated with effort. The harder you work, the more you achieve, right? ‘No pain, no gain’. I wonder do we have this wrong? I have been as susceptible to this as anyone. As an identical twin, I certainly embodied this effort equates to success idea. When Steve and I were younger and more competitive we were always striving to outdo one another, and as a result were often ‘busy fools’, busy striving for unimportant things!I wonder if the key to achieving more is actually to do less and use the extra time to ensure that what you are doing aligns with what is truly important to you? Your actions will likely be better directed, helping you to avoid the pitfall of tirelessly chasing unworthy goals.
I reflect on some key moments in my life, some of the most pivotal life events just seemed to have happened without any striving or struggle, they simply unfolded with ease.
For example, my wife Sabrina and I were lucky enough to buy our current home in 2021, while we weren’t even looking for a house, a friend sent me a message with a link to it and before I knew it, we were going to see it. In fact, it was the first house we ever went to see. There was of course some back and forth with mortgages etc. but it all unfolded with an ease to it that felt a little like there might have been an invisible hand helping to guide the process. I don’t know if it was meant to be or that the timing was just right, either way it just unfolded seamlessly.
My Little Guru
My third daughter, Fia, is now 9 months old and started trying to walk. Watching her take her first steps with the help of her walker is truly amazing. She isn’t in any rush or hurry; she’s not striving to walk or even particularly concerned about it. I don’t even know if she is conscious that she is trying to walk. It just seems to be happening naturally, in its own rhythm, and in its own time, very much like nature just exists and trees just grow.
It was the same easy natural unfolding as we watched her learn to roll over and then crawl. Observing Fia reminds me that when we are aligned and present with what is unfolding, circumstances tend to flow and unfold in a more effortless manner. In my perspective, babies are the purest form of human with little to no conditioning, they are closest to the source, this is my I look to baby Fia as my guru!
Is the journey the destination?
Early last year, I noticed a persistent low-level anxiety following me around, especially regarding work. We weren’t hitting our targets, and it felt overwhelming. To overcome this, I decided to let go of focusing on goals and outcomes and instead chose to concentrate on the journey, the process and the things I can control. I remember at the time we had lots of goals on digital course sales and membership sign ups which we weren’t hitting. I instead focused on my process of sharing really good content that might inspire people to sign up rather than stressing over what I couldn’t control. This simple shift helped me manage stress and anxiety much more effectively.
Acceptance vs resistance.
I’ve noticed that struggle, striving, and hustling often come from resisting reality—trying to force things to go the way we want. Acceptance, on the other hand, isn’t about giving up or letting life bowl us over. It’s about recognising and aligning with what’s actually happening.
When I accept things as they are, I feel more in harmony with life. For example, yesterday I was frustrated that my 13-year-old daughter Elsie was taking so long to get ready in the morning. We had planned to go to a cafe, and she took more than 20 minutes to get dressed, so my impatience was growing. Realising my frustration wasn’t helping either of us feel better, I told her I’d walk ahead and meet her there.
This small shift made such a big difference. Instead of stewing in annoyance, I enjoyed a leisurely walk and was in a much better mood when she arrived. I wrote about acceptance in terms of having enough in a previous Happier column titled: ‘Feeling enough’.
Acceptance embodies the principle that, in this present moment, your most basic needs are likely met. Needs and wants are quite different. A key to experiencing less effort and more ease is to be happy with what you have by accepting your current situation.
Aligning with Nature’s pace
I ran along the cliffs this morning as the sun was rising and I marvelled at how nature unfolds with ease and balance. Just as seasons change smoothly and rivers flow naturally, nature shows us a harmonious way of living. Trees grow and shed leaves effortlessly, animals follow natural rhythms, and ecosystems thrive through connections.
An essential aspect of this harmony is recognizing that humans are not separate from nature but an integral part of it. As Alan Watts beautifully put it, “We do not ‘come into’ this world; we come out of it, as leaves from a tree.” By understanding and embracing this interconnectedness, we can live more harmoniously and simply.
Nature has seasons, there is winter and summer, night and day. Yet modern human culture tends to be ‘always on’, usually striving forward on a mission to accomplish something. Instead, if we can mimic some of these natural processes, such as rest and growth we can bring more harmony into our lives.
Where we live in Greystones, we do our best to foster and nurture a strong sense of community just like the roots of a tree interconnecting with the mycelium and roots of the forest to support and nourish together. Nature’s wisdom shows us that aligning with it can lead to greater ease and harmony in our daily existence.
Simplifying Your Life: Knowing When Enough is Enough
Simplifying your life is about recognizing when enough is truly enough. In a world where the goalposts are constantly shifting and material pursuits never seem to end, I find it crucial to pause and reflect on what truly matters. By focusing on essentials and letting go of unnecessary clutter—both physically and mentally—we can find greater peace and contentment.
Coming back to the example of housing, we moved from a normal sized family home to a small town house 5 years ago before buying our home a year after that. It had 2 small bedrooms and no storage space. As we moved, we were forced to let go of everything that wasn’t essential to fit it all into those 2 bedrooms. I remember that it was tough at the time, yet somehow liberating to let go and to gift some of the things we thought were important to friends and the community.
To me, simplifying means valuing experiences over possessions, nurturing relationships over accumulating more stuff, and finding joy in simple, everyday moments like I wrote about in a previous Happier Column on taking a daily 1 hour holiday. Learning to live a simpler life can help us to stop chasing after endless goals, and instead appreciate the abundance that is already present in our lives.
To be really honest, I don’t have all the answers about living a more effortless life. I am on the same journey as you are. And I wish you more ease, more flow and alignment moving forward. I hope that struggle is a less common guest at your table and when you must carry a burden, I hope you can embrace a little more acceptance. Life is so rich and the more ease and presence we can cultivate, the more joy we are likely to experience.
Thank you for reading my writings, I get so much joy from it and I really hope they help you in some way. If you have anything to share on this topic please leave a comment below.
Thanks a mill.
All the best
Dave x
More ‘Happier’ Articles
More ‘Happier’ Articles
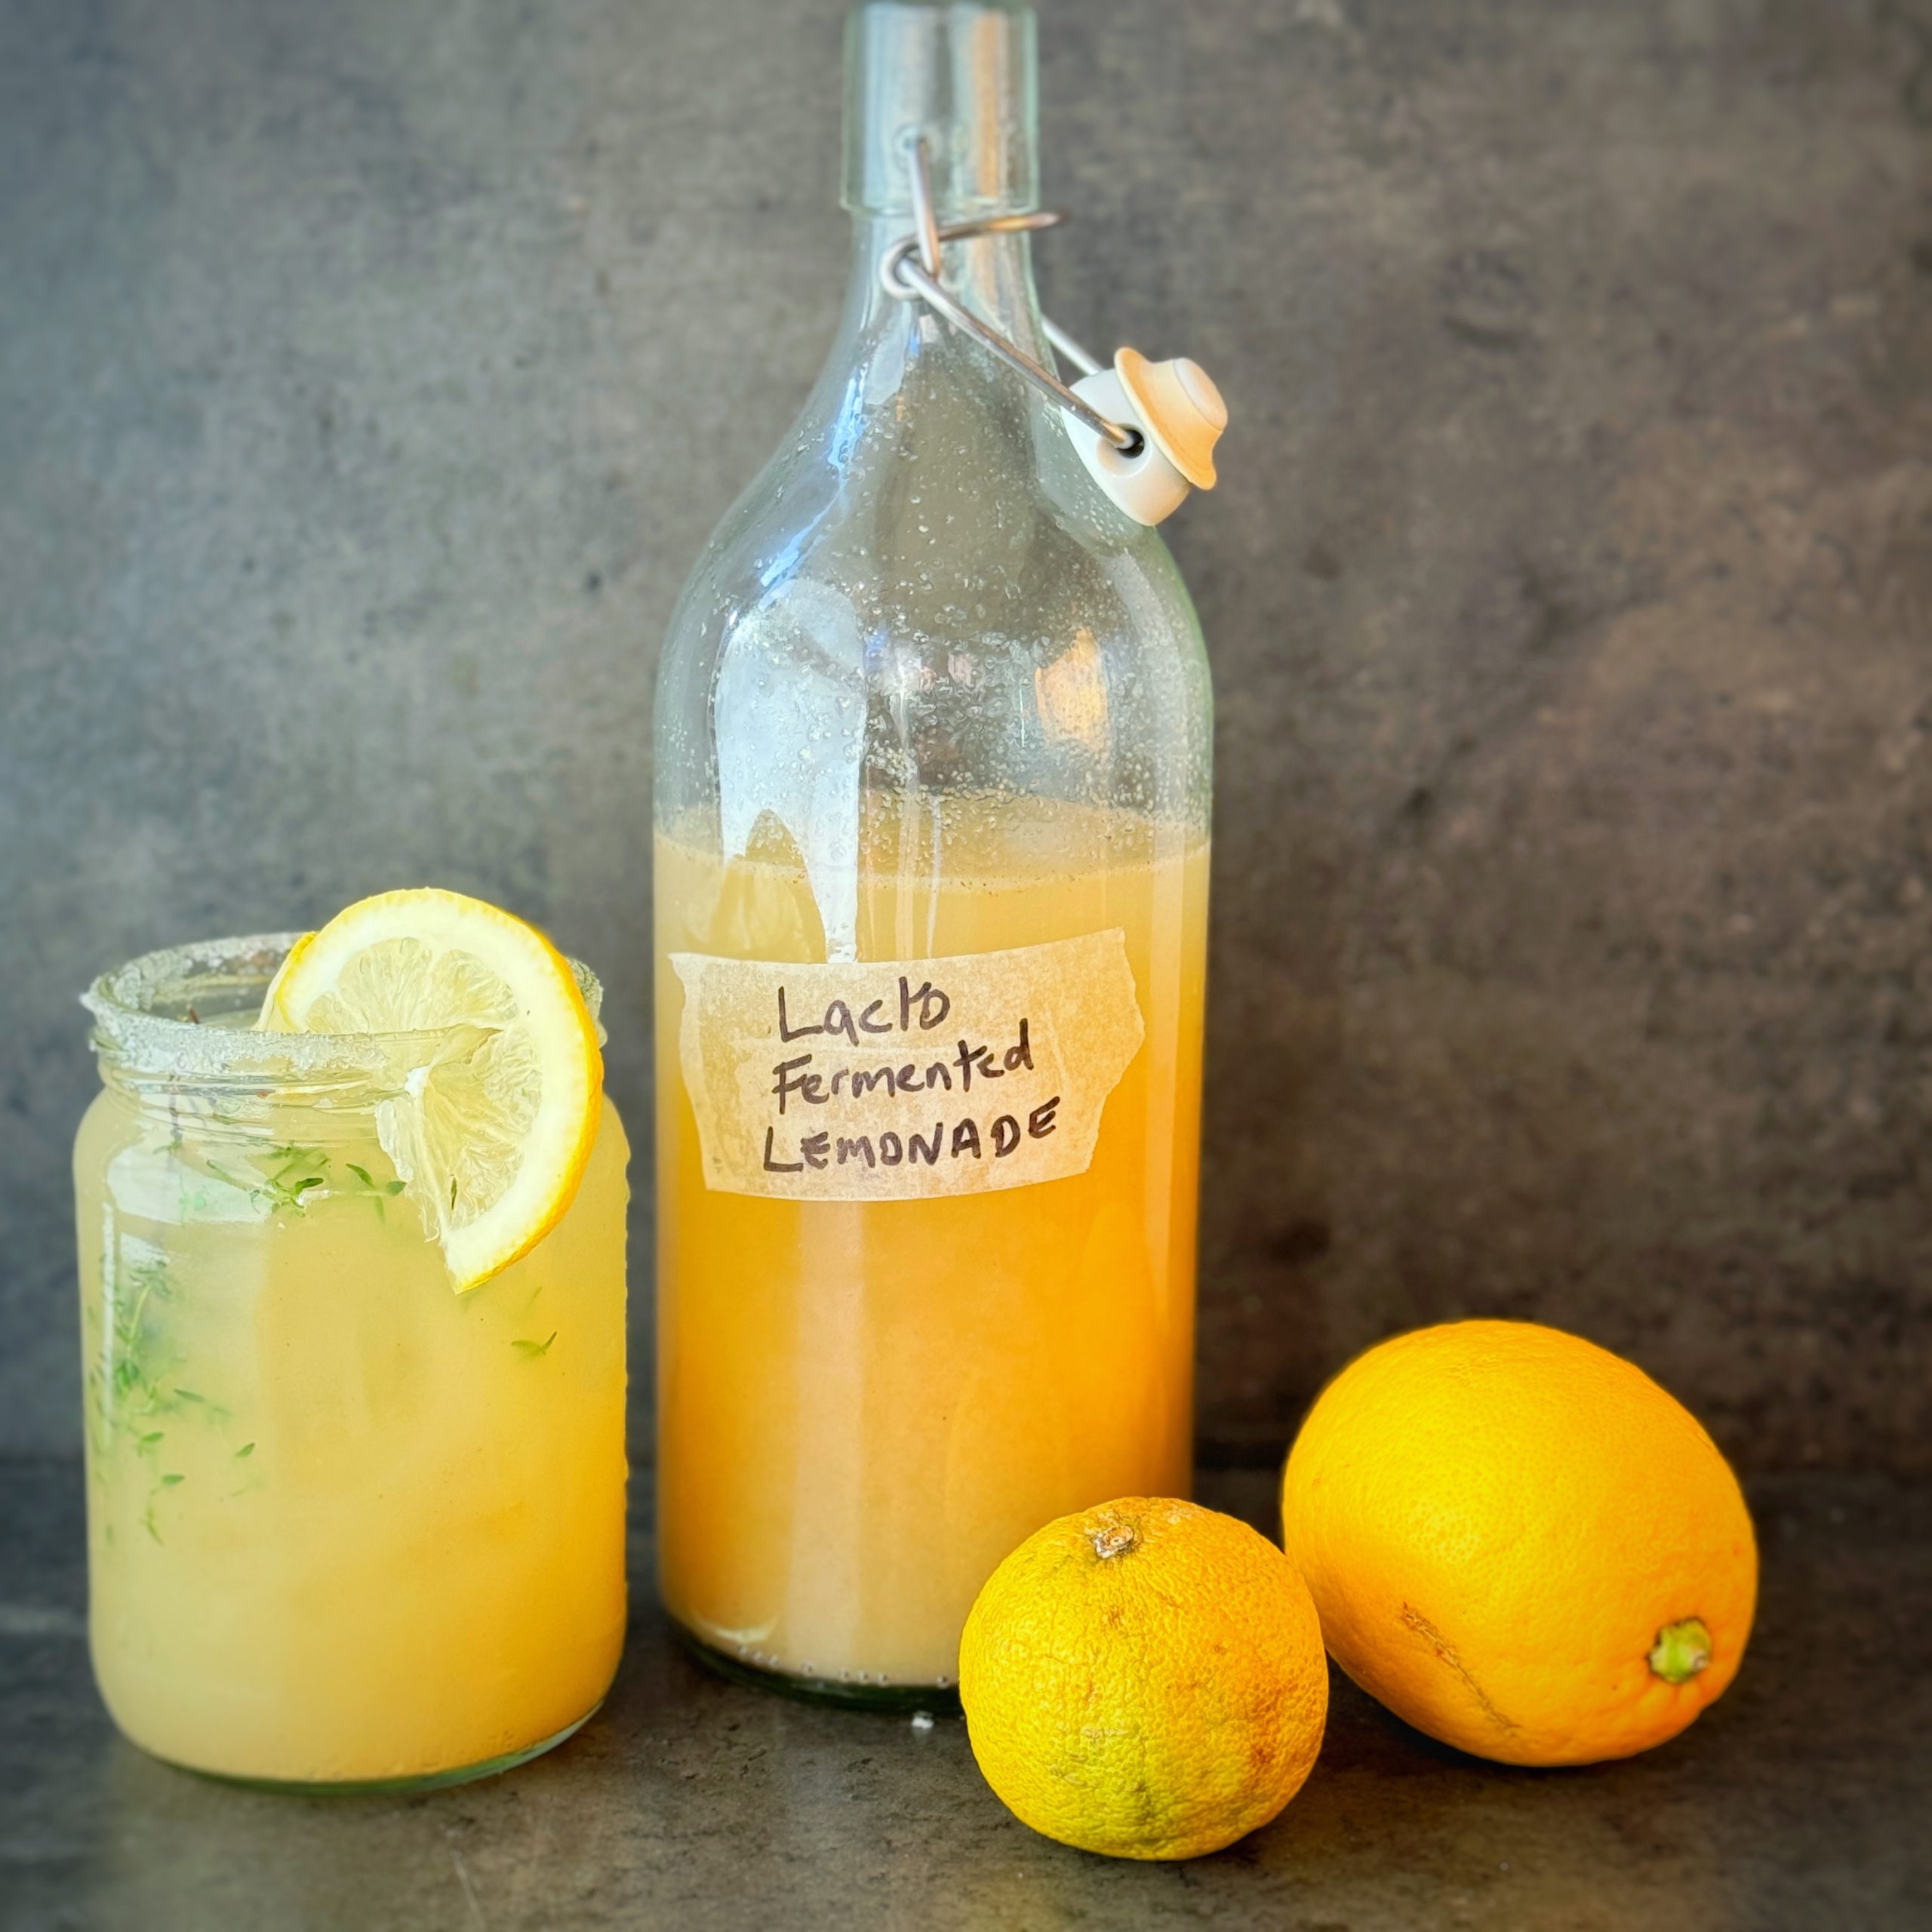
Fermented lemonade
Takes 20 minutes
Serves 10
Ingredients
For the Lemonade:
- 50 g (1.8 oz) Preserved lemons
- 50 ml (1.7 fl oz) Preserved lemon juice/brine from the jar
- 100 ml (3.4 fl oz) Maple syrup
- 750 ml (25.4 fl oz) Soda water
To Serve:
- 50 g (1.8 oz) Caster sugar
- 1/2 Lemon
- 3 sprigs of Thyme
- Ice
Instructions
Instructions:
- Blend the Lemonade Mixture:
- Add 50 g preserved lemons, 50 ml preserved lemon juice/brine, 100 ml maple syrup, and 375 ml (half of the soda water) to a blender.
- Blend until the mixture is smooth.
- Adjust Sweetness:
- Taste and adjust the sweetness of the lemonade to your preference.
- Pour the sieved mixture back into the blender.
- Add the remaining soda water and mix well.
- Taste the lemonade and adjust the sweetness by adding more soda water if it’s too sweet or more maple syrup if not sweet enough.
- Prepare Serving Glasses by coating in lemon sugar
- Squeeze the juice of half a lemon into 50g of caster sugar.
- Dip the rim of each glass into the lemon sugar to coat evenly.
Serve:
- Pour the prepared lemonade into the sugar-coated glasses.
- Garnish each glass with a slice of lemon, a sprig of fresh thyme, and add ice.
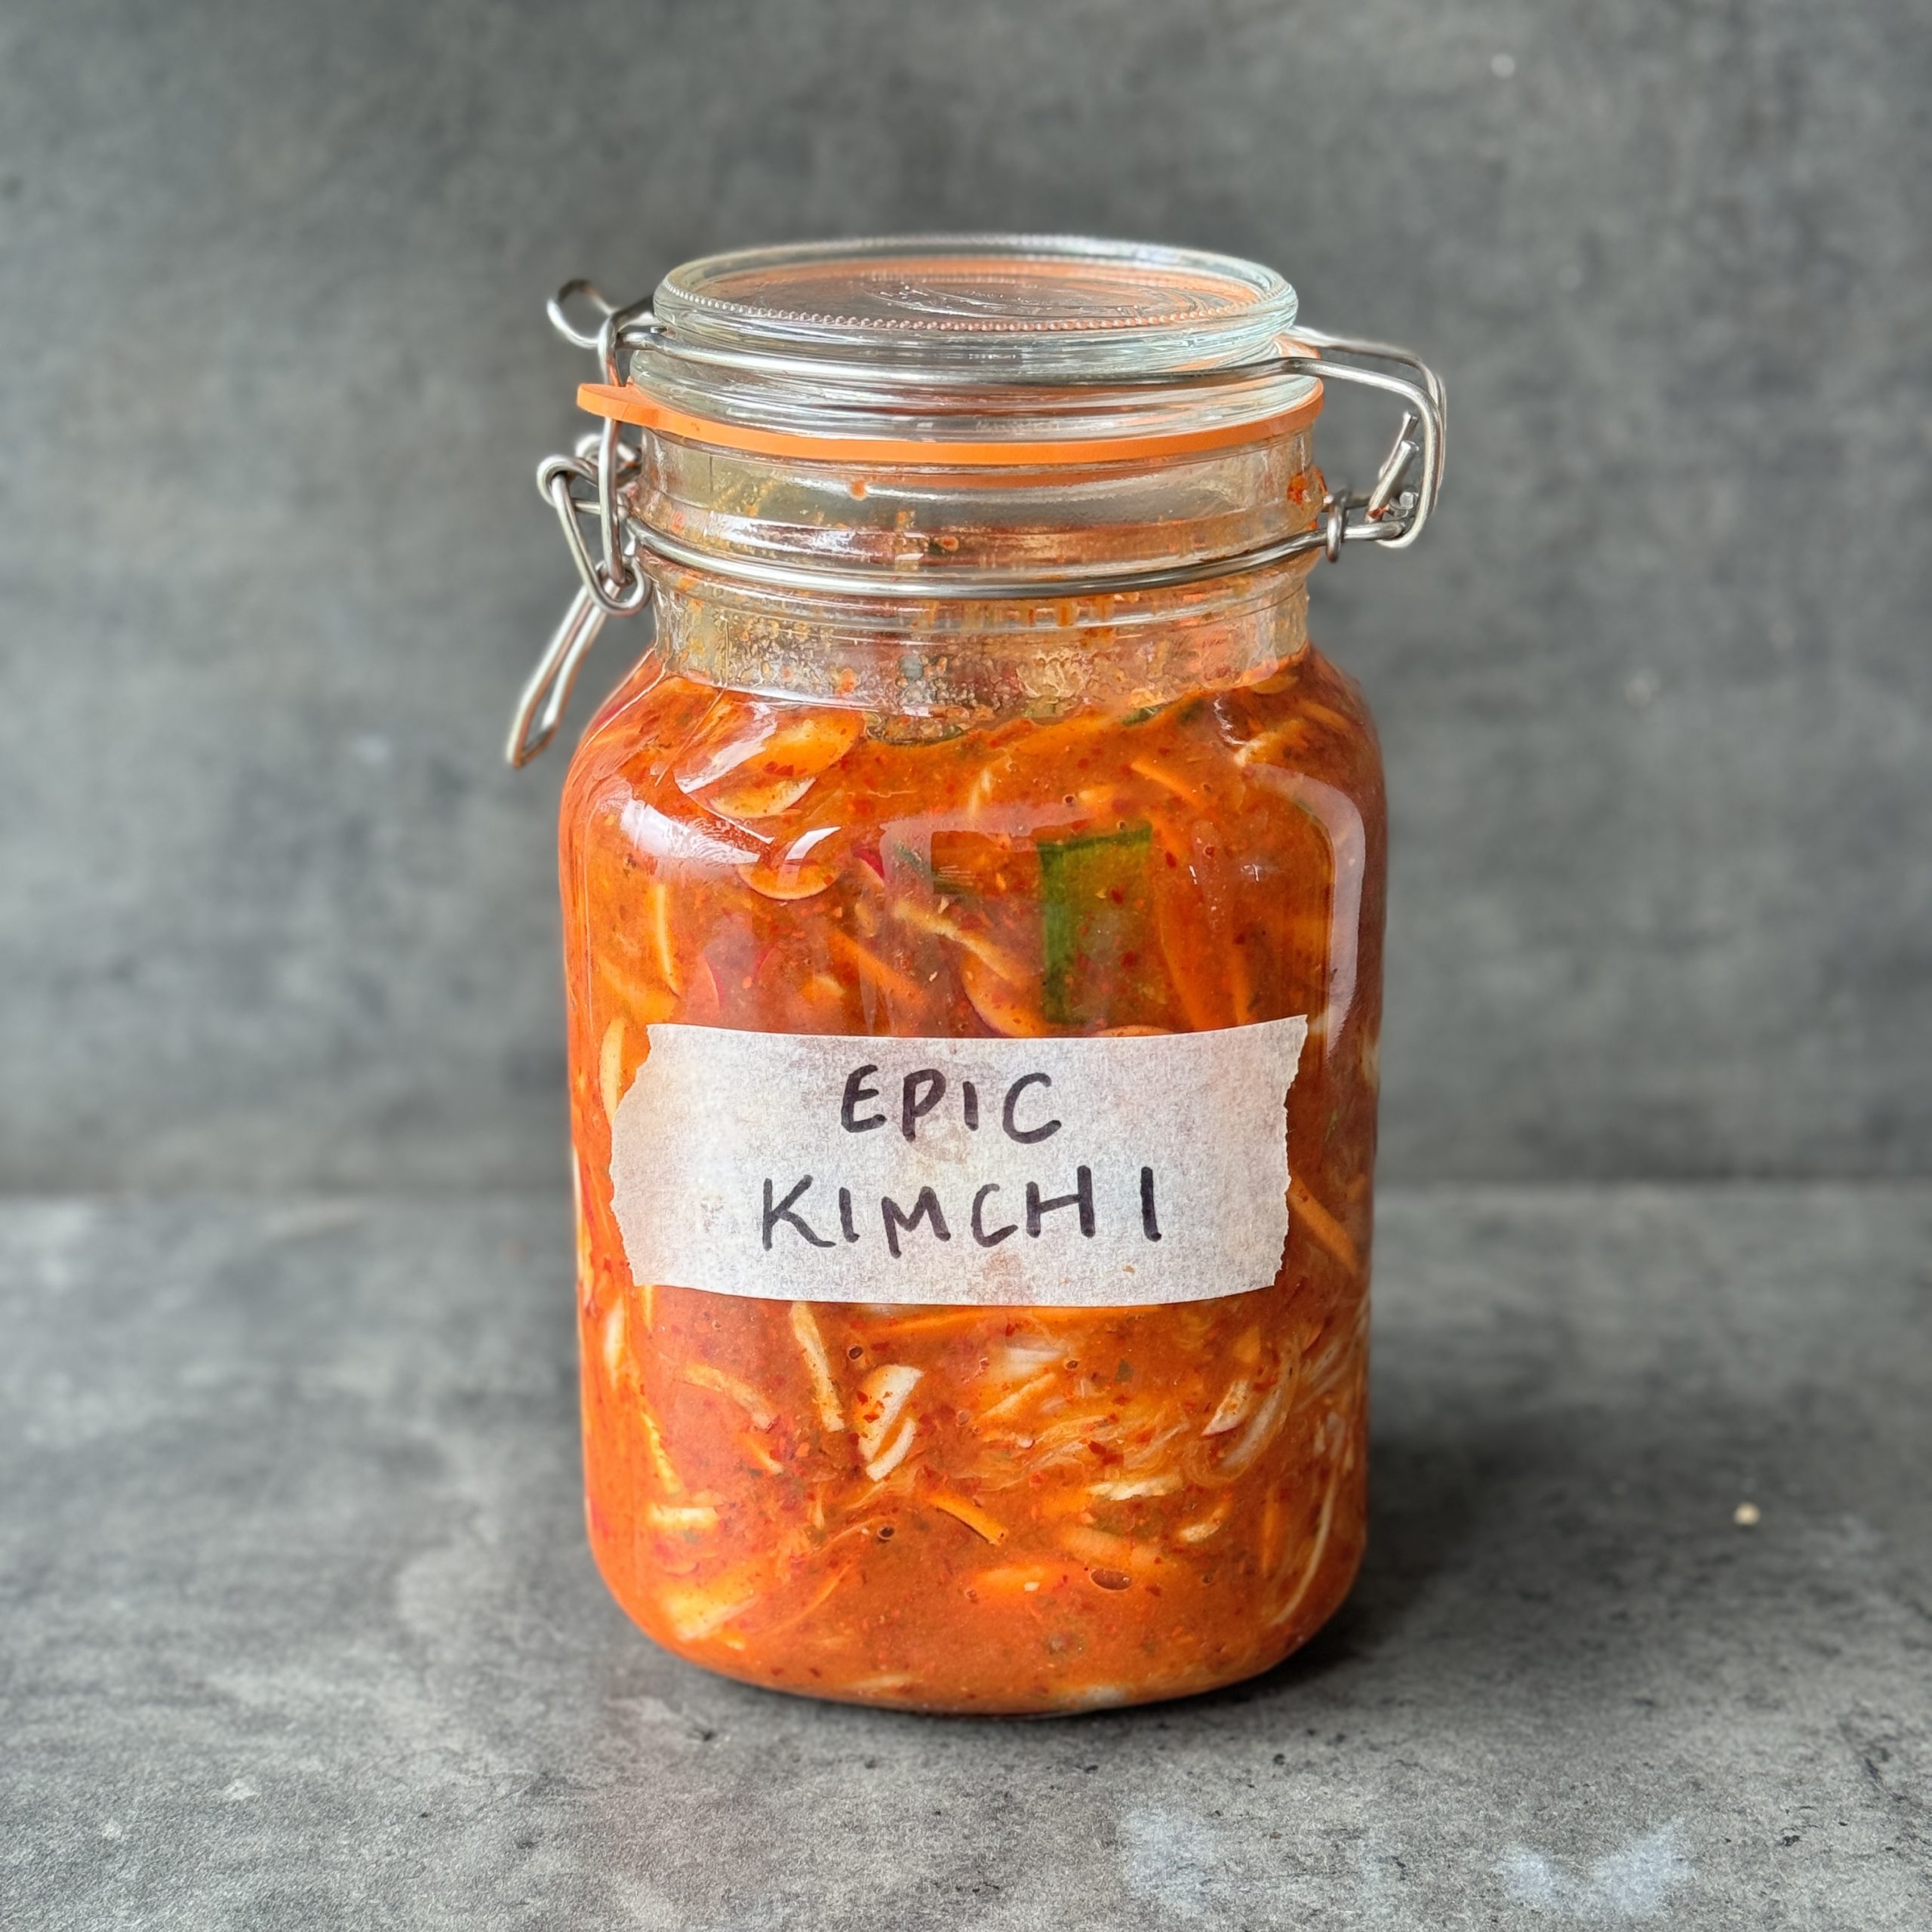
Traditional Style Kimchi
Takes 2 hours
Serves 50
Ingredients
Ingredients
- 1 medium Chinese leaf cabbage or Napa cabbage (approx 1 kg or 2.2 lbs)
- 70 g (2.5 oz) salt
- 500 ml (2 cups) water
- 2 tbsp rice flour
- 200 g (7oz) radish
- 200 g (7oz) carrots
- 4 scallions/ spring onions
- 5 cloves garlic
- 1 thumb sized piece of ginger
- 3-8 tbsp gochugaru depending on how spicy you like it
- 2 tbsp tamari
- 1 tsp ground seaweed
- 2 tbsp maple syrup
Instructions
Instructions:
- Prepare Cabbage: Cut the Napa cabbage lengthwise into quarters. Remove the core and remove the leaves, keeping them long. We prefer them long but chop them into bite sized pieces if you prefer. Place the chopped cabbage in a large bowl and sprinkle with 70g of salt. Mix well to ensure the cabbage is coated with salt. Let it sit for about 2 hours, turning occasionally.
- Prepare rice porridge: In a saucepan, combine 500ml of water and 2 tbsp of rice flour. Bring to a boil and simmer for 5 minutes until thickened, stirring continuously. Remove from heat and let it cool completely.
- Prepare Vegetables: Julienne the daikon radish and carrots into thin matchsticks. Cut the spring onions into 1-inch pieces. Finely grate the ginger and garlic.
- Make Kimchi Paste: In a large mixing bowl, combine the minced garlic, grated ginger, Korean chilli powder, tamari, maple syrup, and seaweed powder (if using). Mix well to form a thick paste. Add this to the cooled rice porridge to form the sauce. Taste and adjust the level of spice to your liking. If you prefer it spicier add more gochugaru.
- Rinse and Drain the cabbage: After 2 hours, rinse the salted cabbage under cold water to remove excess salt. Drain well and set aside.
- Combine Ingredients: Add the drained cabbage, julienned daikon radish, carrots, and spring onions to the kimchi paste. Using gloves, massage the paste into the vegetables until they are evenly coated.
- Pack in Jars: Pack the kimchi tightly into clean glass jars, pressing down firmly to remove any air pockets. You want them submerged under water as this is anaerobic fermentation (meaning in the absence of oxygen). Leave about 1-inch of space at the top of each jar.
- Fermentation: Seal the jars tightly and let them ferment at room temperature for 1 to 5 days, depending on your desired level of fermentation. Check the kimchi daily and press it down with a clean spoon to keep the vegetables submerged in their juices. The longer you ferment it the more acidic it will become. Also the warmer the room temperature the quicker it will become acidic too.
- Refrigerate: Once the kimchi reaches your preferred level of fermentation or desired level of acidity, transfer the jars to the refrigerator to slow down the fermentation process. Kimchi can be enjoyed immediately but develops more complex flavours over time and will last for months in your fridge.

‘Happier’ With Dave Flynn
‘Happier’
The constructive side of failure
What does failure have to do with feeling happier?
As I sit on a plane travelling home after a busy couple of days in London I reflect on the subtle opportunity within failure. Failure is an interesting thing, perceived as a destination of sorts yet I see it more like feedback and information on a journey toward anything worthwhile. It is a core part of the human experience. Failure has taught me more than success. At times, it is a cruel teacher. One that dents pride and ego. I have found that failure has helped me strip away, leaving a more authentic and aligned version of who I am.
FAILURE CAN BE A HELPFUL GUIDE
Failure is an essential step on the journey to accomplish anything of meaning. In 2008, we had a sprout farm as part of The Happy Pear that grew wheatgrass and sprouts like alfalfa. At the time, there was a highly publicized E. coli outbreak linked to sprouts in Germany (which later turned out to be unfounded). As a result, our entire sprout business collapsed virtually overnight. We were devastated and unsure of what to do next.
At the time, Steve had a great sundried tomato recipe that mom used to make 10 tubs of a week that we sold in our veg shop. With the sprout business stagnant, our brother Darragh, who was running that operation, decided to try selling the pesto to local shops instead. The pesto turned out to be a lifeline and the rest, as they say, is history. This failure ultimately led to the birth of our thriving food products business, which has since sold over 15 million products. This experience taught us the invaluable lesson that failure, while painful in the moment, can sometimes be the catalyst for unexpected success and growth.
FAILURE IS ONLY FAILURE WHEN YOU STOP
Thomas Edison, on his journey to inventing the lightbulb, said: “I have not failed. I’ve just found 10,000 ways that won’t work.” James Dyson’s journey to creating his iconic Dyson vacuum exemplifies the power of this perspective. Over 15 years, he created 5,127 unsuccessful prototypes, amassing a whopping £15m in personal debt before landing on the final breakthrough model. But Dyson’s willingness to learn from each “dead end”, reframing them as essential steps, ultimately paid off in 1993 when he launched the first Dyson vacuum, a huge commercial success.

This year,I reflect on our 20 year long journey of The Happy Pear and it has not been linear – While it might appear so looking back over 20 years, our perspective from the driver’s seat is that it has been a squiggly path of two steps forward and one or two steps back.
Cultivating persistence and becoming comfortable in the face of setbacks has been critical. True failure only occurs when you stop trying and cease learning from your experiences.
Reframing failure as feedback and an opportunity to grow, rather than a dead end, is a mindset that Steve and I do our very best to embody. This perspective has ensured we’ve been able to stay the course for over 20 years since starting The Happy Pear, even through the often tough and challenging times.
THE SILVER LINING OF FAILURE
There is a silver lining in Failure. However, one must be open-minded and willing to see past the initial perception of failure. Failure offers the same opportunity for metamorphosis as the transformation of a caterpillar into a butterfly which inevitably is painful. Like Dyson and Edisson, some of the greatest inventions and most successful endeavours are usually built upon the foundations of past failures. It is frequently these stumbles along the way that put pioneers on a different, yet more meaningful path than they had initially anticipated.
Let’s come back to The Happy Pear: The very impetus for our business only came after Steve and I had lost our way. We were 21 and went through a really challenging metamorphosis, a period of rediscovery that shook us to our core. We both gave up alcohol (which at the time was only for 2 weeks, a habit that has now lasted over 20 years). At the same time, we adopted a plant based diet, got interested in yoga and meditation and let go of our old identity of self proclaimed meat eating jocks and in the process, we lost what we had in common with our old friend group.
It was only on our journey to support our new lifestyle and find a new tribe that we found the inspiration and impetus to create The Happy Pear. It emerged out of necessity in a sense. We needed support to continue on our new lifestyle. It was a total identity crisis in which even our parents and community thought we had lost our way. However it became the greatest catalyst for purposeful work and fulfilment that we could have imagined.
To me, the silver lining in failure lies in its power to propel us towards our truest selves and most fulfilling ventures, if we have the courage to sit with the discomfort and face it head-on. It is a crucible from which the phoenix of our dreams can rise anew.
Let me know your thoughts on failure? It is often a tough teacher. What is your relationship with it? Apologies if this is a sensitive topic, I am sharing my experience and views on it. I would love to hear from you in the comments if you feel like sharing. Also thanks for reading this Happier Column, I greatly appreciate your support.
Thanks,
Dave
More ‘Happier’ Articles
More ‘Happier’ Articles
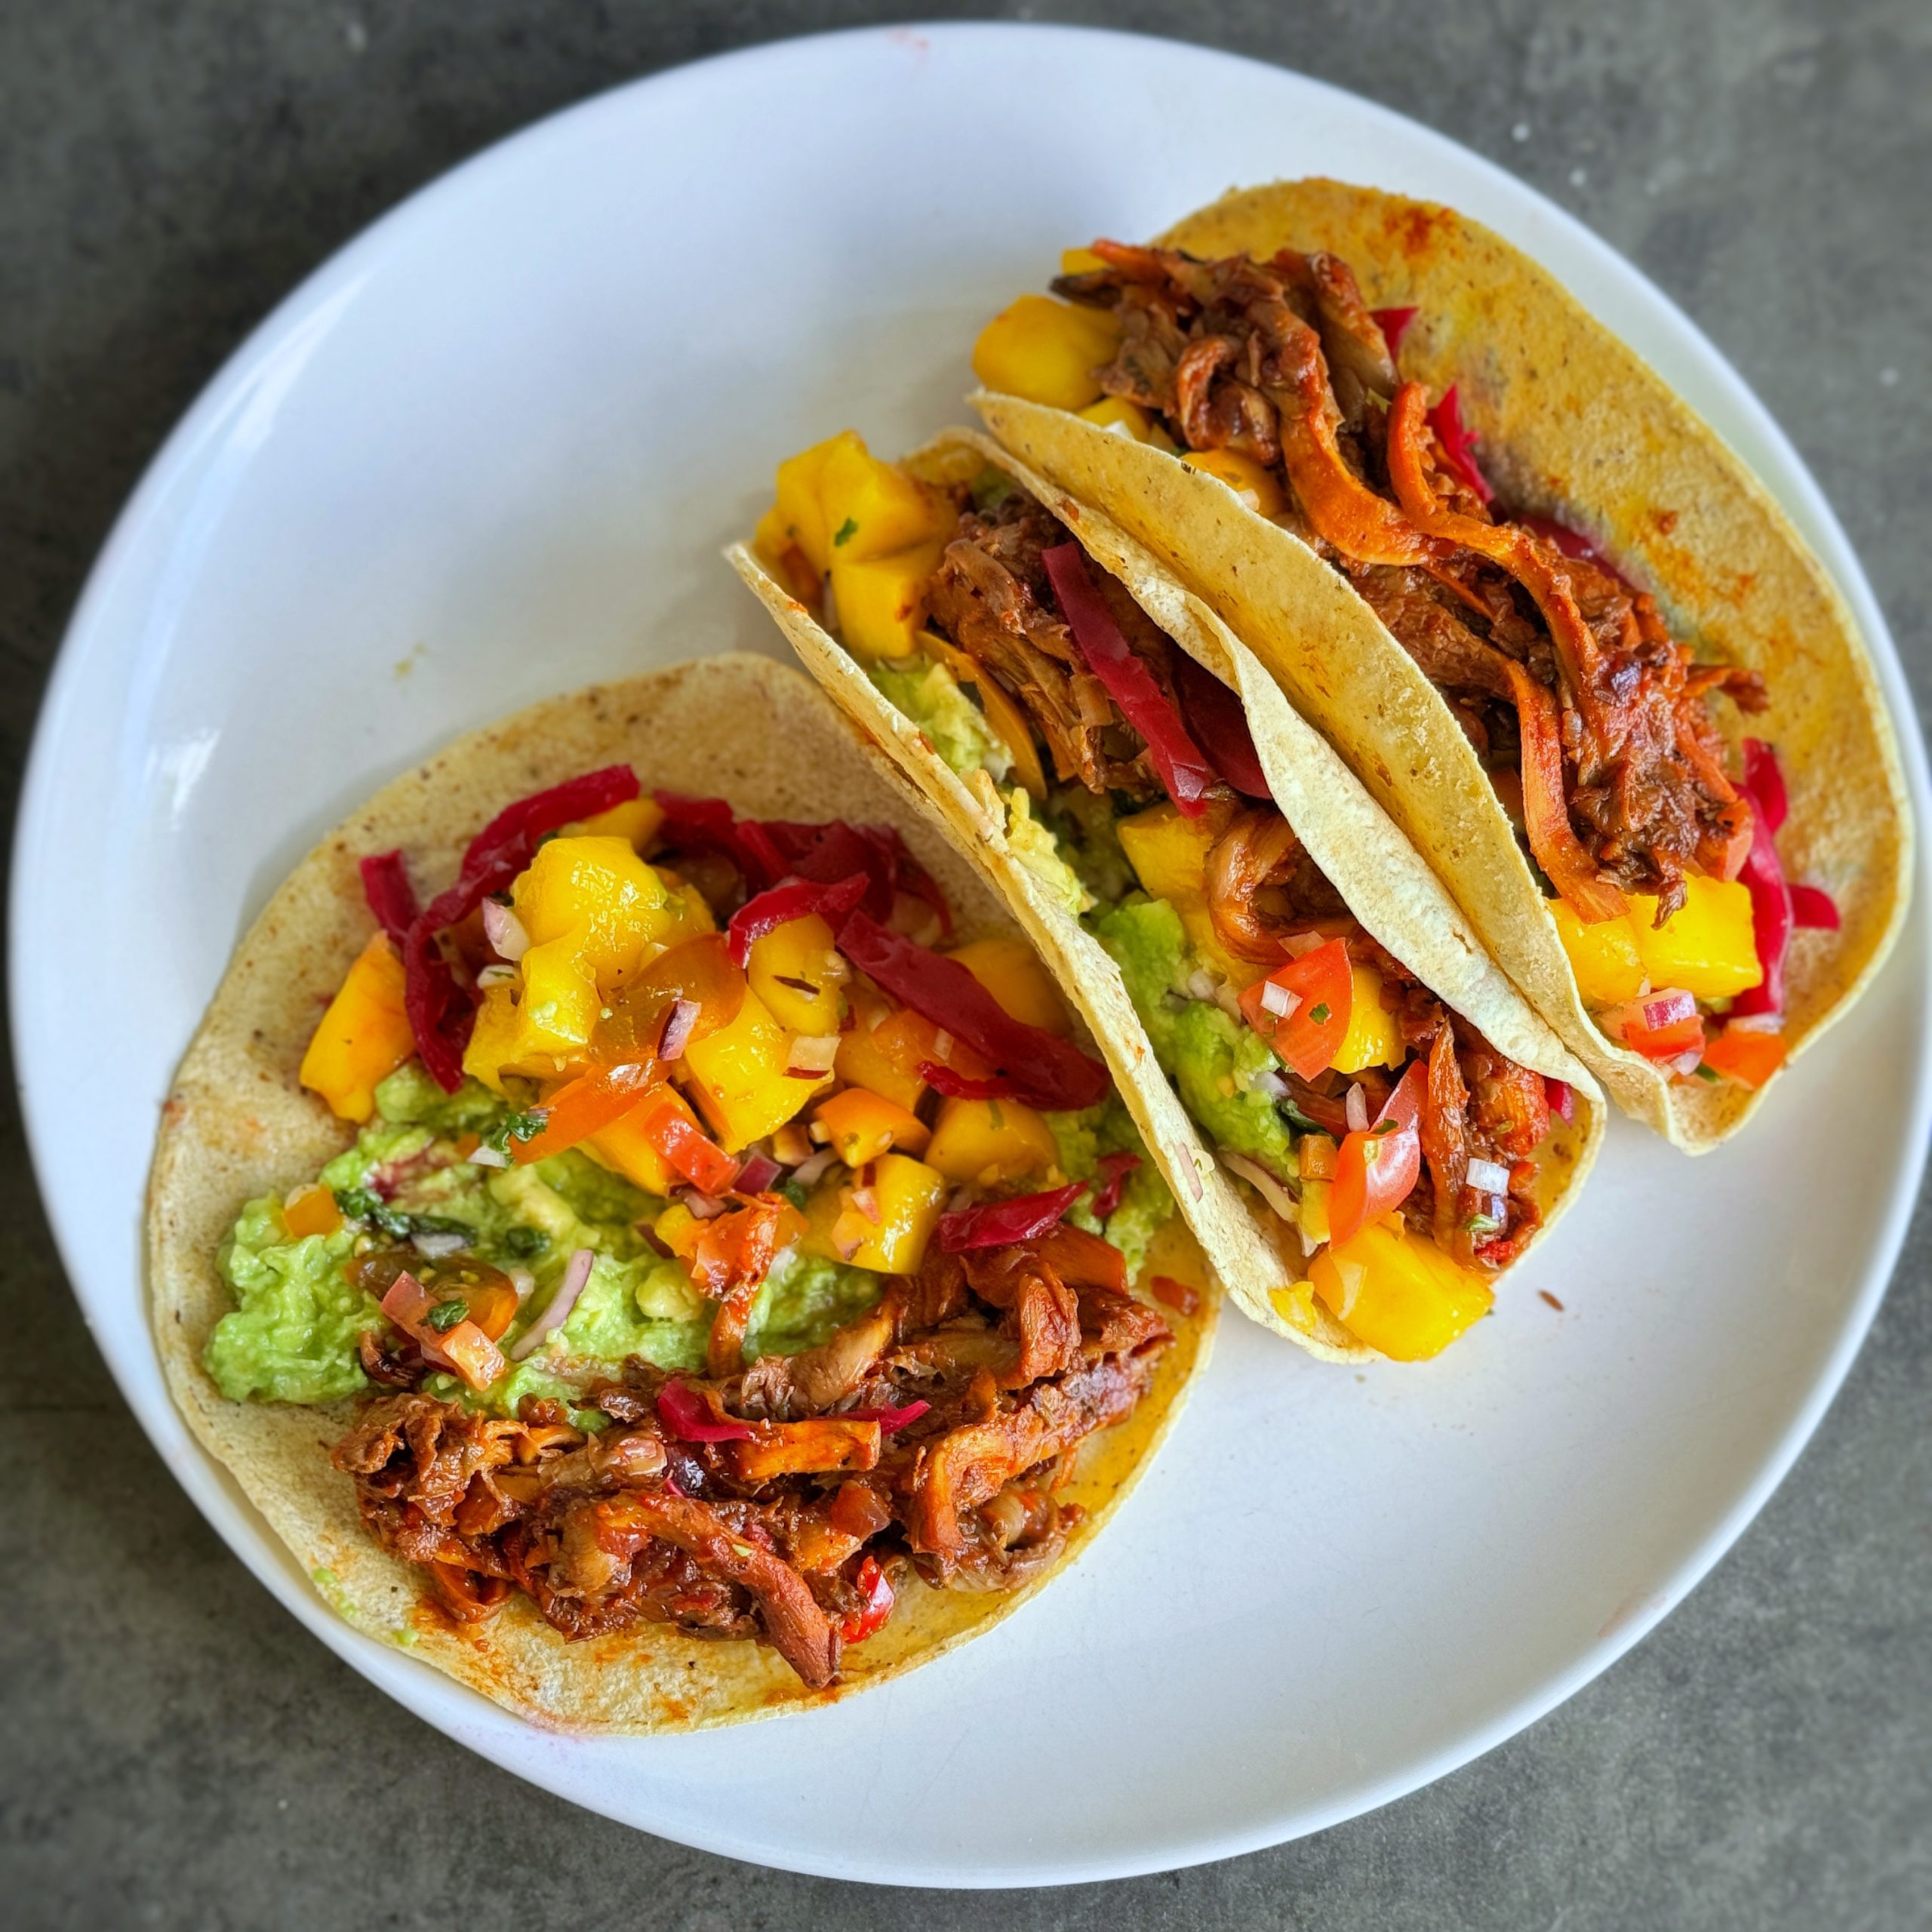
Carnitas – Mexican “meat” tacos
Takes 30 minutes
Serves 2
Ingredients
Ingredients
Mushroom Carne:
- 1 small red onion
- 1 clove garlic
- ½ fresh red chilli
- 250 g (8.8 oz) oyster mushrooms
- 1 tbsp cumin seeds
- 1 tbsp dried oregano
- 2 bay leaves
- 2 tbsp tamari soy sauce
- 1 tsp salt
- 3 tbsp tomato puree
Smashed Avocado:
- 1 ripe avocado
- Pinch of salt
- ½ lime
Charred Mango Salsa:
- 1 ripe mango
- 200 g (7.1 oz) cherry tomatoes (ideally assorted colours)
- ½ red onion
- 15 g (0.5 oz) fresh coriander
- ½ lime
Other Ingredients:
- 50 g (1.8 oz) pickled cabbage (sauerkraut)
- 6 corn tacos or wheat tacos
Instructions
Instructions
- Prepare the Jackfruit/Mushroom Carne:Heat a wide-bottomed pan over high heat and add 1 tsp of oil. Once hot, add the cumin seeds, diced onion, and chilli. Sauté for 3-4 minutes until softened and fragrant.Add the diced garlic and the jackfruit (or mushrooms). Cook for another 3-4 minutes, stirring occasionally.Stir in the dried oregano, bay leaves, tamari, tomato purée, and salt. Mix well.Add 2 tbsp of water and allow the mixture to braise for 5 minutes, stirring to deglaze the pan. Taste and adjust seasoning as needed. Remove from heat and set aside.
- Make the Charred Mango Salsa:Heat a dry pan over medium-high heat. Place the mango cheeks flesh-side down on the hot pan and char until golden (about 2-3 minutes).Remove the mango from the skin and cut into small pieces.In a bowl, combine the charred mango, cherry tomatoes, red onion, and chopped coriander. Add the juice of ½ lime and season with salt and black pepper. Stir well and set aside.Add garlic and mushrooms/ jackfruit: Add the diced garlic and chopped mushrooms/ jackfruit to the pan. Fry for an additional 3-4 minutes.
- Prepare the Smashed Avocado:Scoop the flesh from the avocado into a small bowl. Add the juice of ½ lime and a pinch of salt. Mash with a fork until smooth, adjusting seasoning to taste.
- Char the Tortillas:Slightly char the tortillas on a dry pan over medium heat until warm and slightly crispy, about 30 seconds per side.
- Assemble the Tacos:Spread a layer of smashed avocado onto each tortilla.Add a spoonful of the mango salsa, followed by the pickled cabbage or sauerkraut.Top with the jackfruit/mushroom carne. Garnish with fresh coriander, if desired.Serve immediately and enjoy!
The Happy Pear Podcast
This week we speak to Nicholas Carr, an esteemed American journalist and author known for his profound insights into technology, business, and culture. Nicholas Carr’s acclaimed book, The Shallows: What the Internet Is Doing to Our Brains, was a finalist for the 2011 Pulitzer Prize in General Nonfiction, cementing his reputation as a leading thinker on the cognitive and societal impacts of digital technology.
Episode 166
Throughout the episode, Nicholas shares his expert perspective on how the internet and digital technologies are reshaping our brains, behaviors, and societies. The conversation delves deep into the implications of our increasing reliance on digital media and how it affects our attention spans, memory, and overall cognitive function.
Main Topics Covered:
- The Impact of the Internet on Cognitive Function: Nicholas discusses the central thesis of The Shallows, exploring how the internet is changing the way we think, read, and process information.
- Attention and Memory in the Digital Age: An analysis of how constant connectivity and information overload are impacting our ability to focus and retain information.
- The Role of Social Media: Insights into how social media platforms are designed to capture and hold our attention, and the psychological effects of this on individuals and society.
- Digital Minimalism: Practical advice on how to manage digital consumption to preserve mental well-being and cognitive health.
- Future Trends in Technology: Predictions and reflections on the future trajectory of digital technologies and their potential long-term effects on humanity.
Nicholas Carr’s deep understanding of the intersection between technology and human cognition provides a thought-provoking discussion that challenges listeners to reflect on their own digital habits and consider the broader societal implications of our evolving relationship with technology. Tune in to this episode for an enlightening conversation that bridges the gap between technological advancements and their profound effects on our minds and lives.
Lots of love,
Dave & Steve
SPONSORS & DISCOUNT CODES:
Namawell Juicers are AMAZING! They have absolutely revolutionised the juicing game. We have an exclusive 10%
Enter the code HAPPYPEAR10
LINK: https://namawell.com/collections/juicers/products/nama-j2-cold-press-juicer?ref=thehappypear
VIVOBAREFOOT: Vivobarefoot Footwear have given our listeners an exclusive 20% discount and if you buy now you also get free access to their incredible course showcasing some of the biggest names in the health and wellness space.
Enter the code HAPPYPEAR20
LINK: https://www.vivobarefoot.com/uk/the-happy-pear
THE HAPPY PEAR RECIPE CLUB – Blending health and happiness through a range of over 500 delicious plant-based recipes.
LINK: https://eu1.hubs.ly/H06JvgK0
Sign up to our Newsletter, for updates on our latest recipes, events, and news.
LINK: https://share-eu1.hsforms.com/1hKXaawjoQOONmJe4EXkCdwf92py
Produced by Sean Cahill & Sara Fawsitt
https://embed.acast.com/6061eea8ca2fec15c01206ed/65c2cc5f73ba2f0016f45d2c
Available now from all good podcast providers:
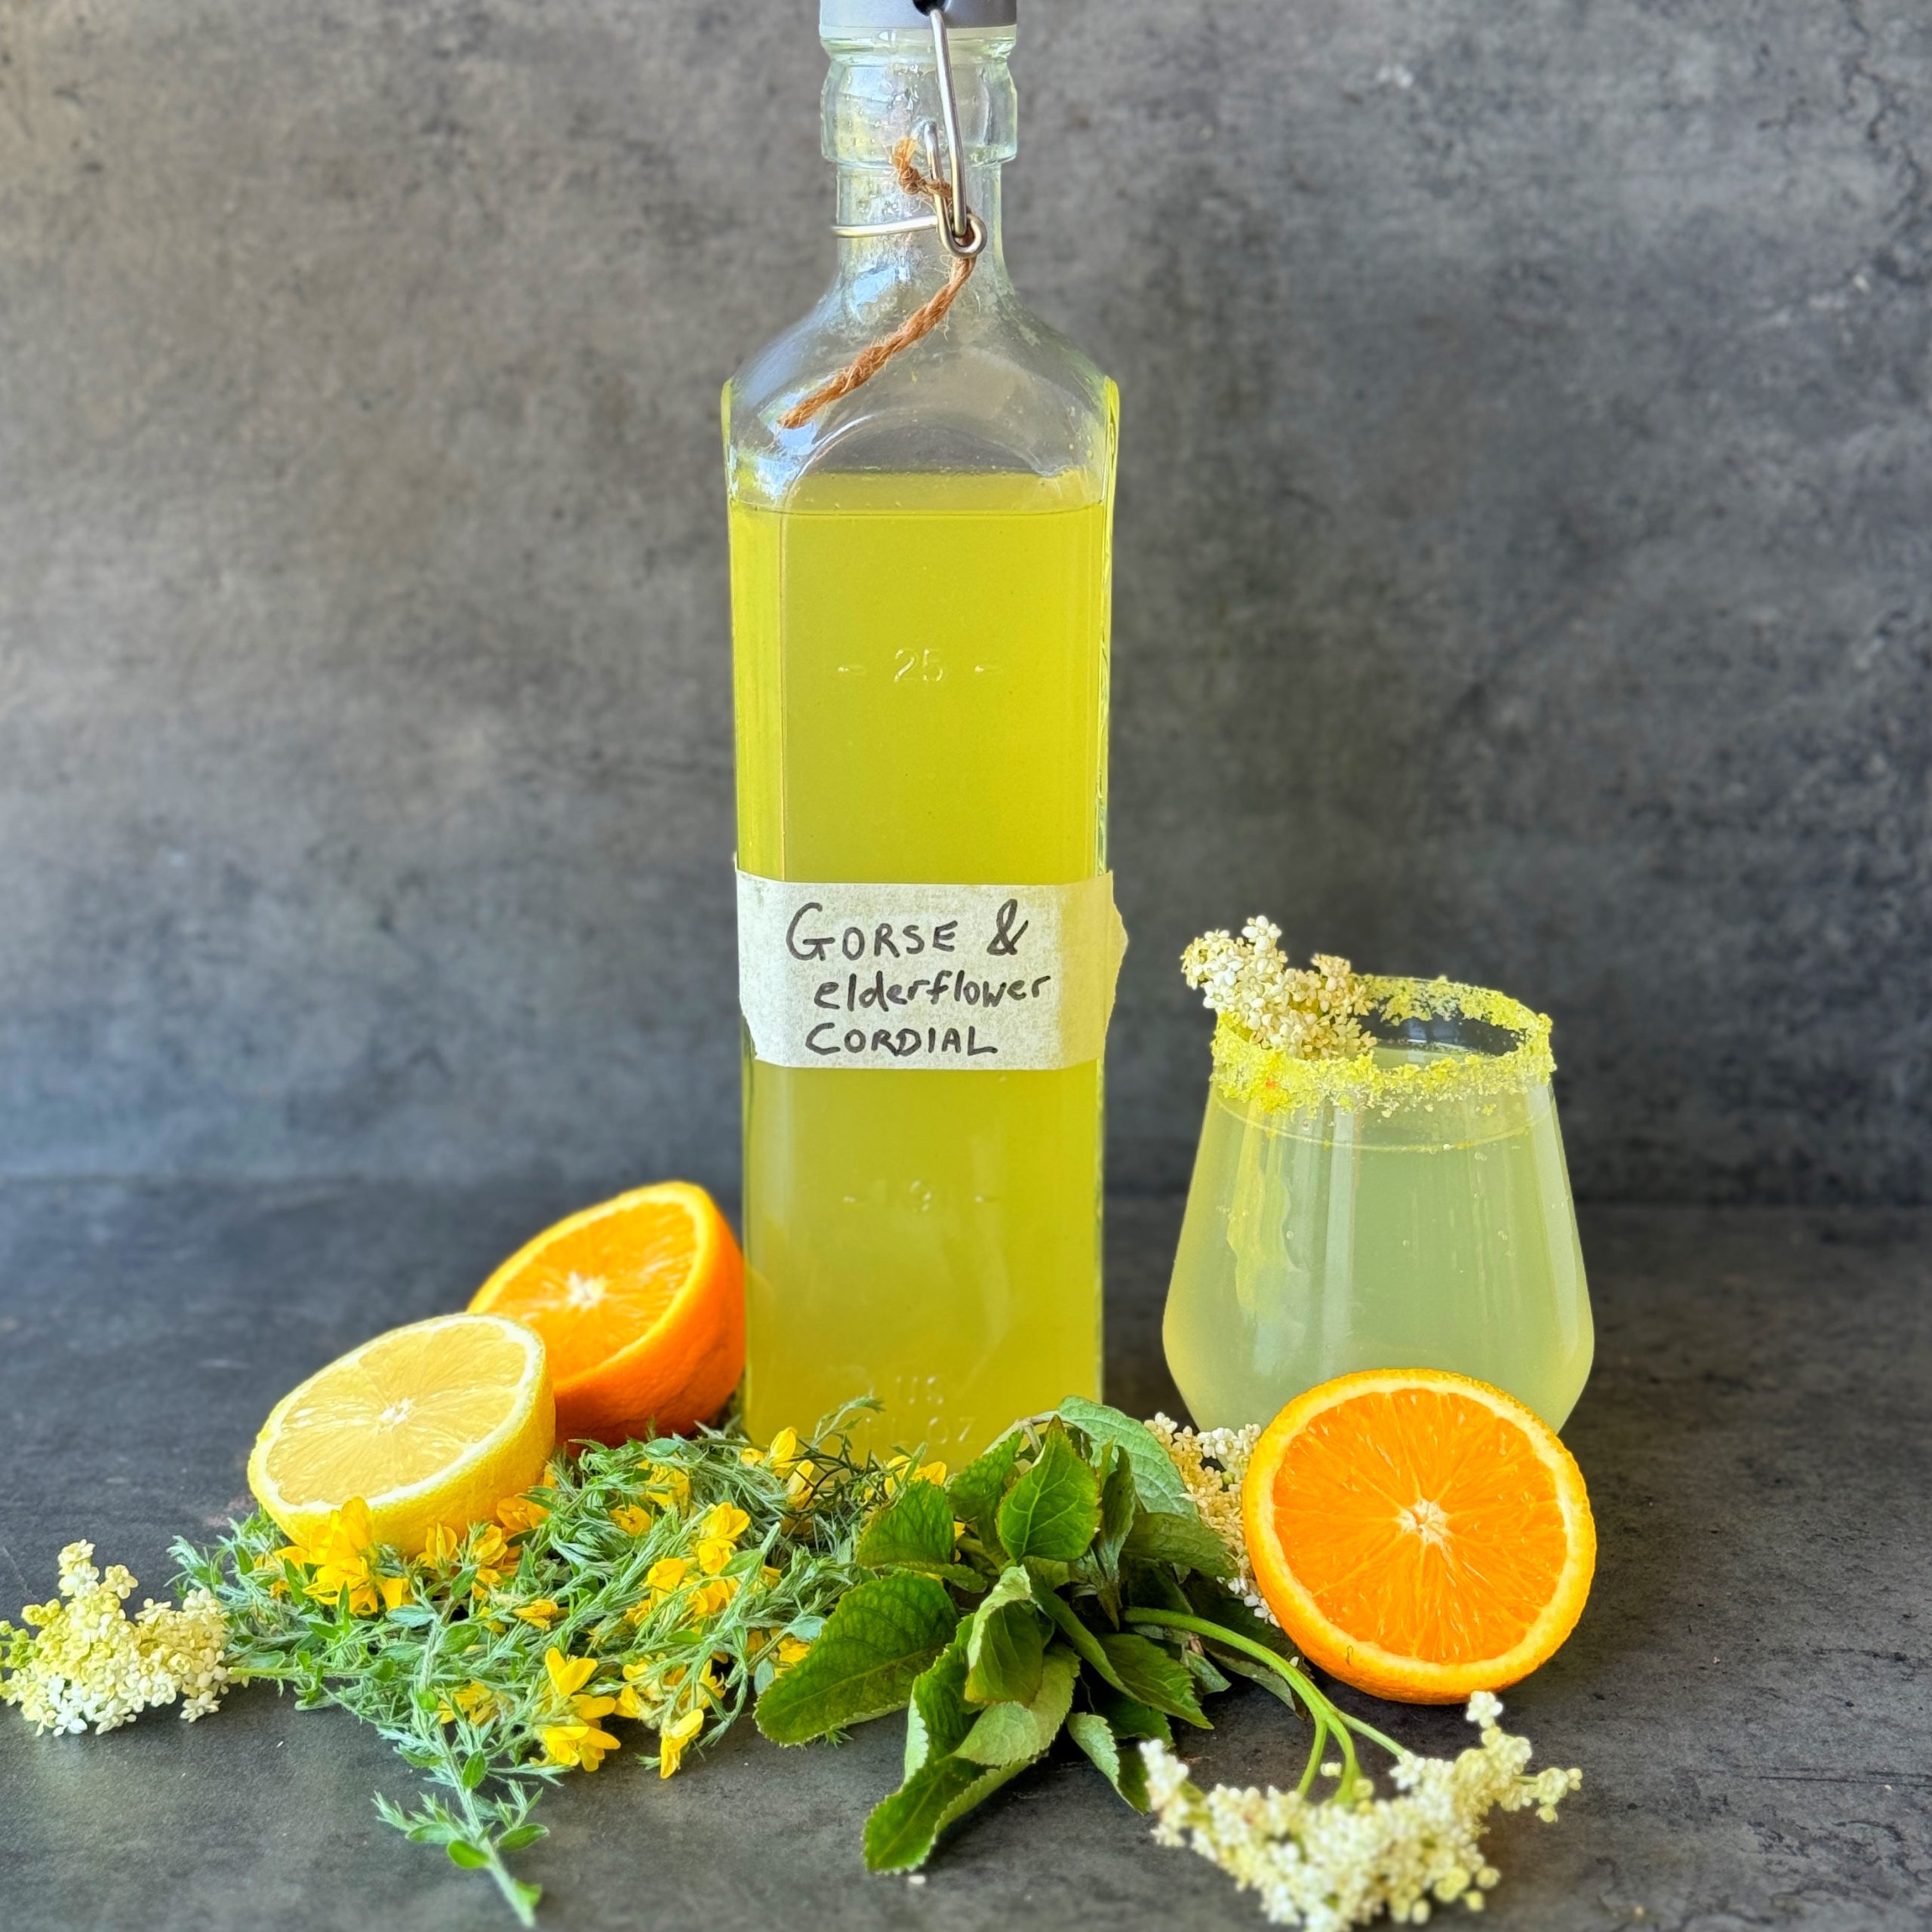
Gorse and Elderflower Cordial
Takes 20 minutes
Serves 20
Ingredients
- 20 elderflower heads
- 20 g (0.7oz) gorse flowers
- 1.5 litres (6.3 cups) water
- 1 kg (2.2 lbs) caster sugar
- Zest and juice of 2 lemons
- Zest and juice of 2 oranges
Instructions
Prepare the Flowers:
- Shake the elderflower heads to remove any insects and gently rinse them under cold water. Pat them dry with a clean kitchen towel.
- Ensure the gorse flowers are clean and free from insects. Rinse them briefly if needed.
Make the Cordial Base:
- In a large saucepan, combine the water and sugar over medium heat.
- Stir until the sugar has completely dissolved, creating a simple syrup base.
Add the Flowers:
- Once the sugar has dissolved, add the elderflower heads and gorse flowers to the saucepan.
- Stir gently to submerge the flowers in the syrup.
Infuse the Flavours:
- Add the lemon zest, lemon juice, orange zest, and orange juice to the saucepan.
- Stir to combine, ensuring all ingredients are well incorporated.
Simmer and Steep:
- Bring the mixture to a gentle simmer over medium-low heat. Let it simmer for 10-15 minutes, allowing the flavours to infuse.
Strain the Cordial:
- After simmering, remove the saucepan from the heat and let the mixture cool slightly.
- Strain the cordial through a fine-mesh sieve or muslin cloth into a clean jug or bowl.
Bottle and Store:
- Pour the strained cordial into sterilised glass bottles or jars.
- Seal the bottles tightly and store them in the refrigerator for up to 2 weeks.
Serve and Enjoy:
- To enjoy, dilute the cordial with still or sparkling water, adjusting the ratio to your preference.
- Garnish with a slice of lemon or a sprig of fresh elderflowers for an elegant touch.
- We ground some gorse flowers with some caster sugar for a beautiful yellow coating to coat the rim of our glasses.
- Sip and savour the floral flavours of your homemade gorse and elderflower cordial on a sunny afternoon!
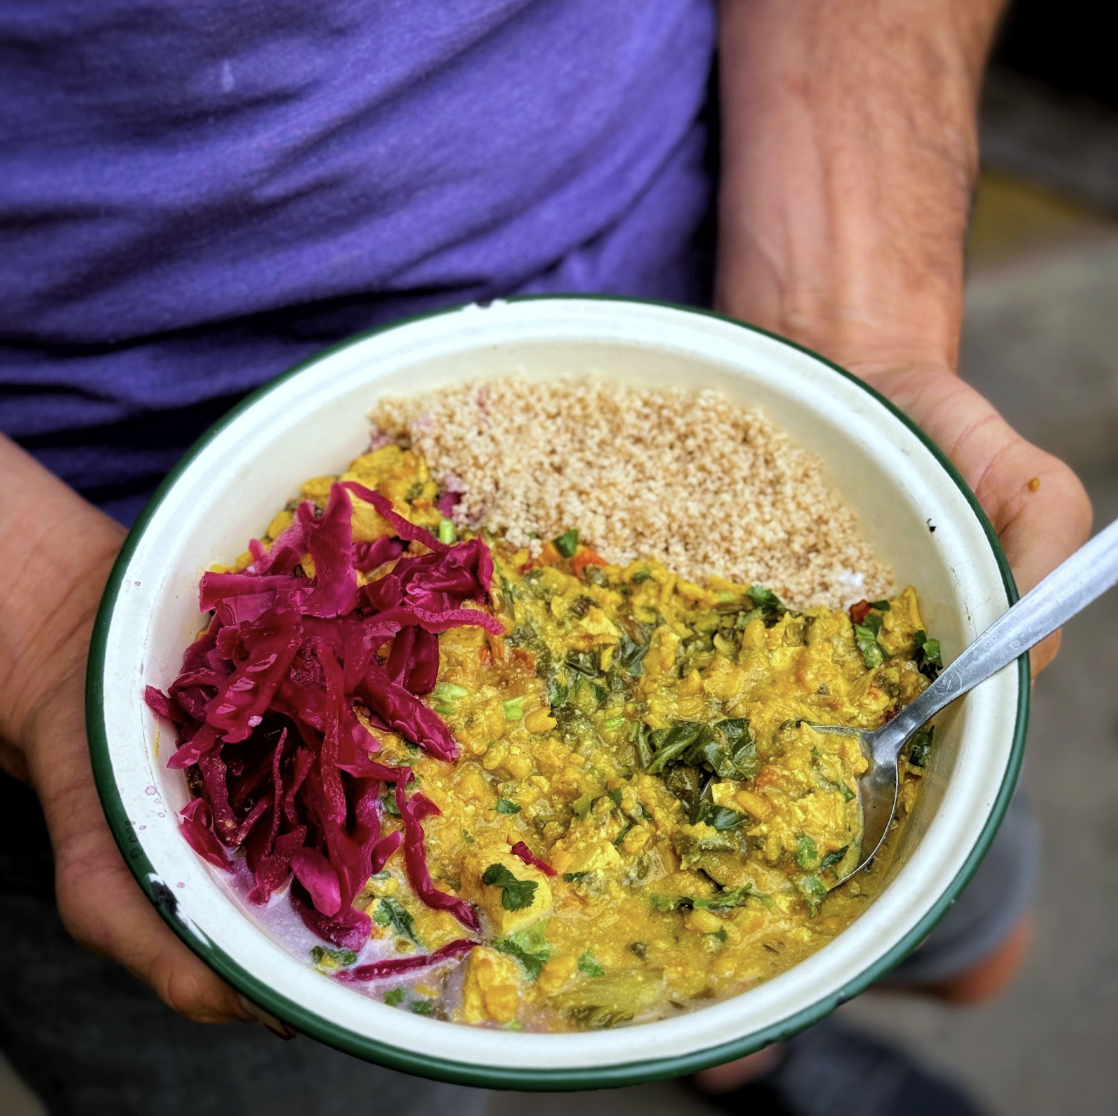
Hormone Balancing Yellow Split Pea Curry
Takes 1 hour 10 minutes
Serves 6
Ingredients
Base Ingredients
- 1 onion
- 1 thumb-sized piece of ginger
- ½ thumb-sized piece of turmeric
- 1 tbsp olive oil
- 1 tbsp cumin seeds
- 2 tbsp curry powder
- 200 g firm tofu (7 oz)
- 2 tbsp tamari (soy sauce)
- 300 g yellow split peas (10.5 oz)
- 1 tbsp kombu or seaweed of choice (3.5 oz)
- 1.5 L water (6.5 cups)
- 400 ml natural soy yoghurt (13.5 oz)
- 100 g chard, kale, or baby spinach (3.5 oz)
- 100 g cherry tomatoes (3.5 oz)
- Juice of 1 lime
- 15 g fresh coriander (0.5 oz)
To Serve
- 200 g wholemeal couscous (7 oz)
- 50 g sauerkraut (1.75 oz)
Instructions
- Prep the veg and tofu: Peel and finely dice the onion, ginger, and turmeric. Slice the tofu into 1.5cm cubes. Cut the cherry tomatoes into quarters. Finely dice the fresh coriander. If using chard or kale remove the centre stalks and finely dice, roughly chop the leaves.
- Cook the base flavours: Heat a wide-bottomed large frying pan on high heat and add olive oil. Once hot, add the diced onions, ginger, and turmeric. Fry for 3-4 mins. Add the cumin seeds and curry powder, then the tofu cubes. Cook for a further 3-4 mins, stirring regularly. Add tamari and mix well to infuse with the tofu.
- Cook the split peas: Add the split peas and stir them in along with the base flavours. Cook for 1-2 mins. Add the water, soy yoghurt, and salt. Using scissors, finely slice the kombu into the curry. Bring to a boil with the lid on. Reduce to a simmer, set the lid slightly ajar, and cook for 45 mins, stirring occasionally to avoid burning.
- Taste and season: Taste to check if the split peas are soft and well-cooked. If not, add more water, approximately 200 ml and cook until soft. Add the chard, kale, or spinach, and cherry tomatoes. Cook for a further 5 mins. Taste and adjust the seasoning with salt, black pepper, and lime juice to your liking.
- To Serve: If you like it spicy, add some ground chilli powder. Serve with some cooked wholemeal couscous. Garnish with chopped coriander and some red sauerkraut for a hearty and delicious dinner or lunch.

Real Falafel
Takes 45 minutes
Serves 6
Ingredients
Falafel
- 250 g dried chickpeas
- 1 tsp baking soda
- 3 cloves garlic
- 25 g flat parsley
- 50 g fresh coriander
- 1 small onion
- 3/4 tsp Salt
- 1/2 black pepper
- 1 tbsp ground cumin
- 1 tbsp ground coriander
- 1/2 tsp cayenne powder
- 1/2 tsp baking powder
- 3 tbsp sesame seeds
Tahini cream
- 500 g natural soy yogurt
- 8 tbsp light tahini
- 1 tsp garlic powder
- Juice of 1 lemon
- Pinch of salt
Tomato, cucumber, onion
- 2 ripe tomatoes
- ½ cucumber
- ½ red onion
- Pinch salt
To serve
- 6-8 flat breads
- 100 g pickled chillies
- 100 g pickled red cabbage/ sauerkraut
- 100 g chilli sauce
- 100 g pickled red cabbage
Instructions
- Add the chickpeas to a large bowl with the baking soda and cover with twice the amount of water. The chickpeas will at least double in size, from 250g to approximately 525g after soaking for 12–24 hours.
- Peel the garlic cloves and onion.
- Drain and rinse the chickpeas, then add them to a food processor along with the other ingredients for the falafel. Blend on pulse speed for 2–3 minutes, until the mixture comes together but retains some texture. If you prefer smoother falafel, blend until smooth, though traditional falafel should have some chunkiness.
- Heat the oil in a deep fryer or saucepan until it reaches 170°C, or until bubbles start to rise from the bottom.
- While the oil heats, line a baking tray and shape the falafel mixture into small balls, about 3–4 cm in diameter. Compress them to hold their shape; they can be round balls or flattened like thick coins.
- Once the oil is hot, carefully fry the falafels in 2–3 batches. Fry for approximately 4 minutes until golden and crispy. Transfer the falafel to a tray lined with kitchen paper to drain excess oil.
- For the tahini cream, mix the tahini, yoghurt, lemon juice, garlic powder, and salt together until well combined and creamy.
- Peel and finely dice the red onion, and finely dice the cucumber and tomatoes. Combine them in a bowl with a pinch of salt.
To serve
- Spread two generous dollops of tahini cream across each flatbread, add 3 tbsp of the cucumber, tomato, and onion mix, followed by 3–4 falafels.
- Layer with pickled chillies, pickled red cabbage, and finish with chilli sauce.
- Mix and match the toppings to your liking. Enjoy!
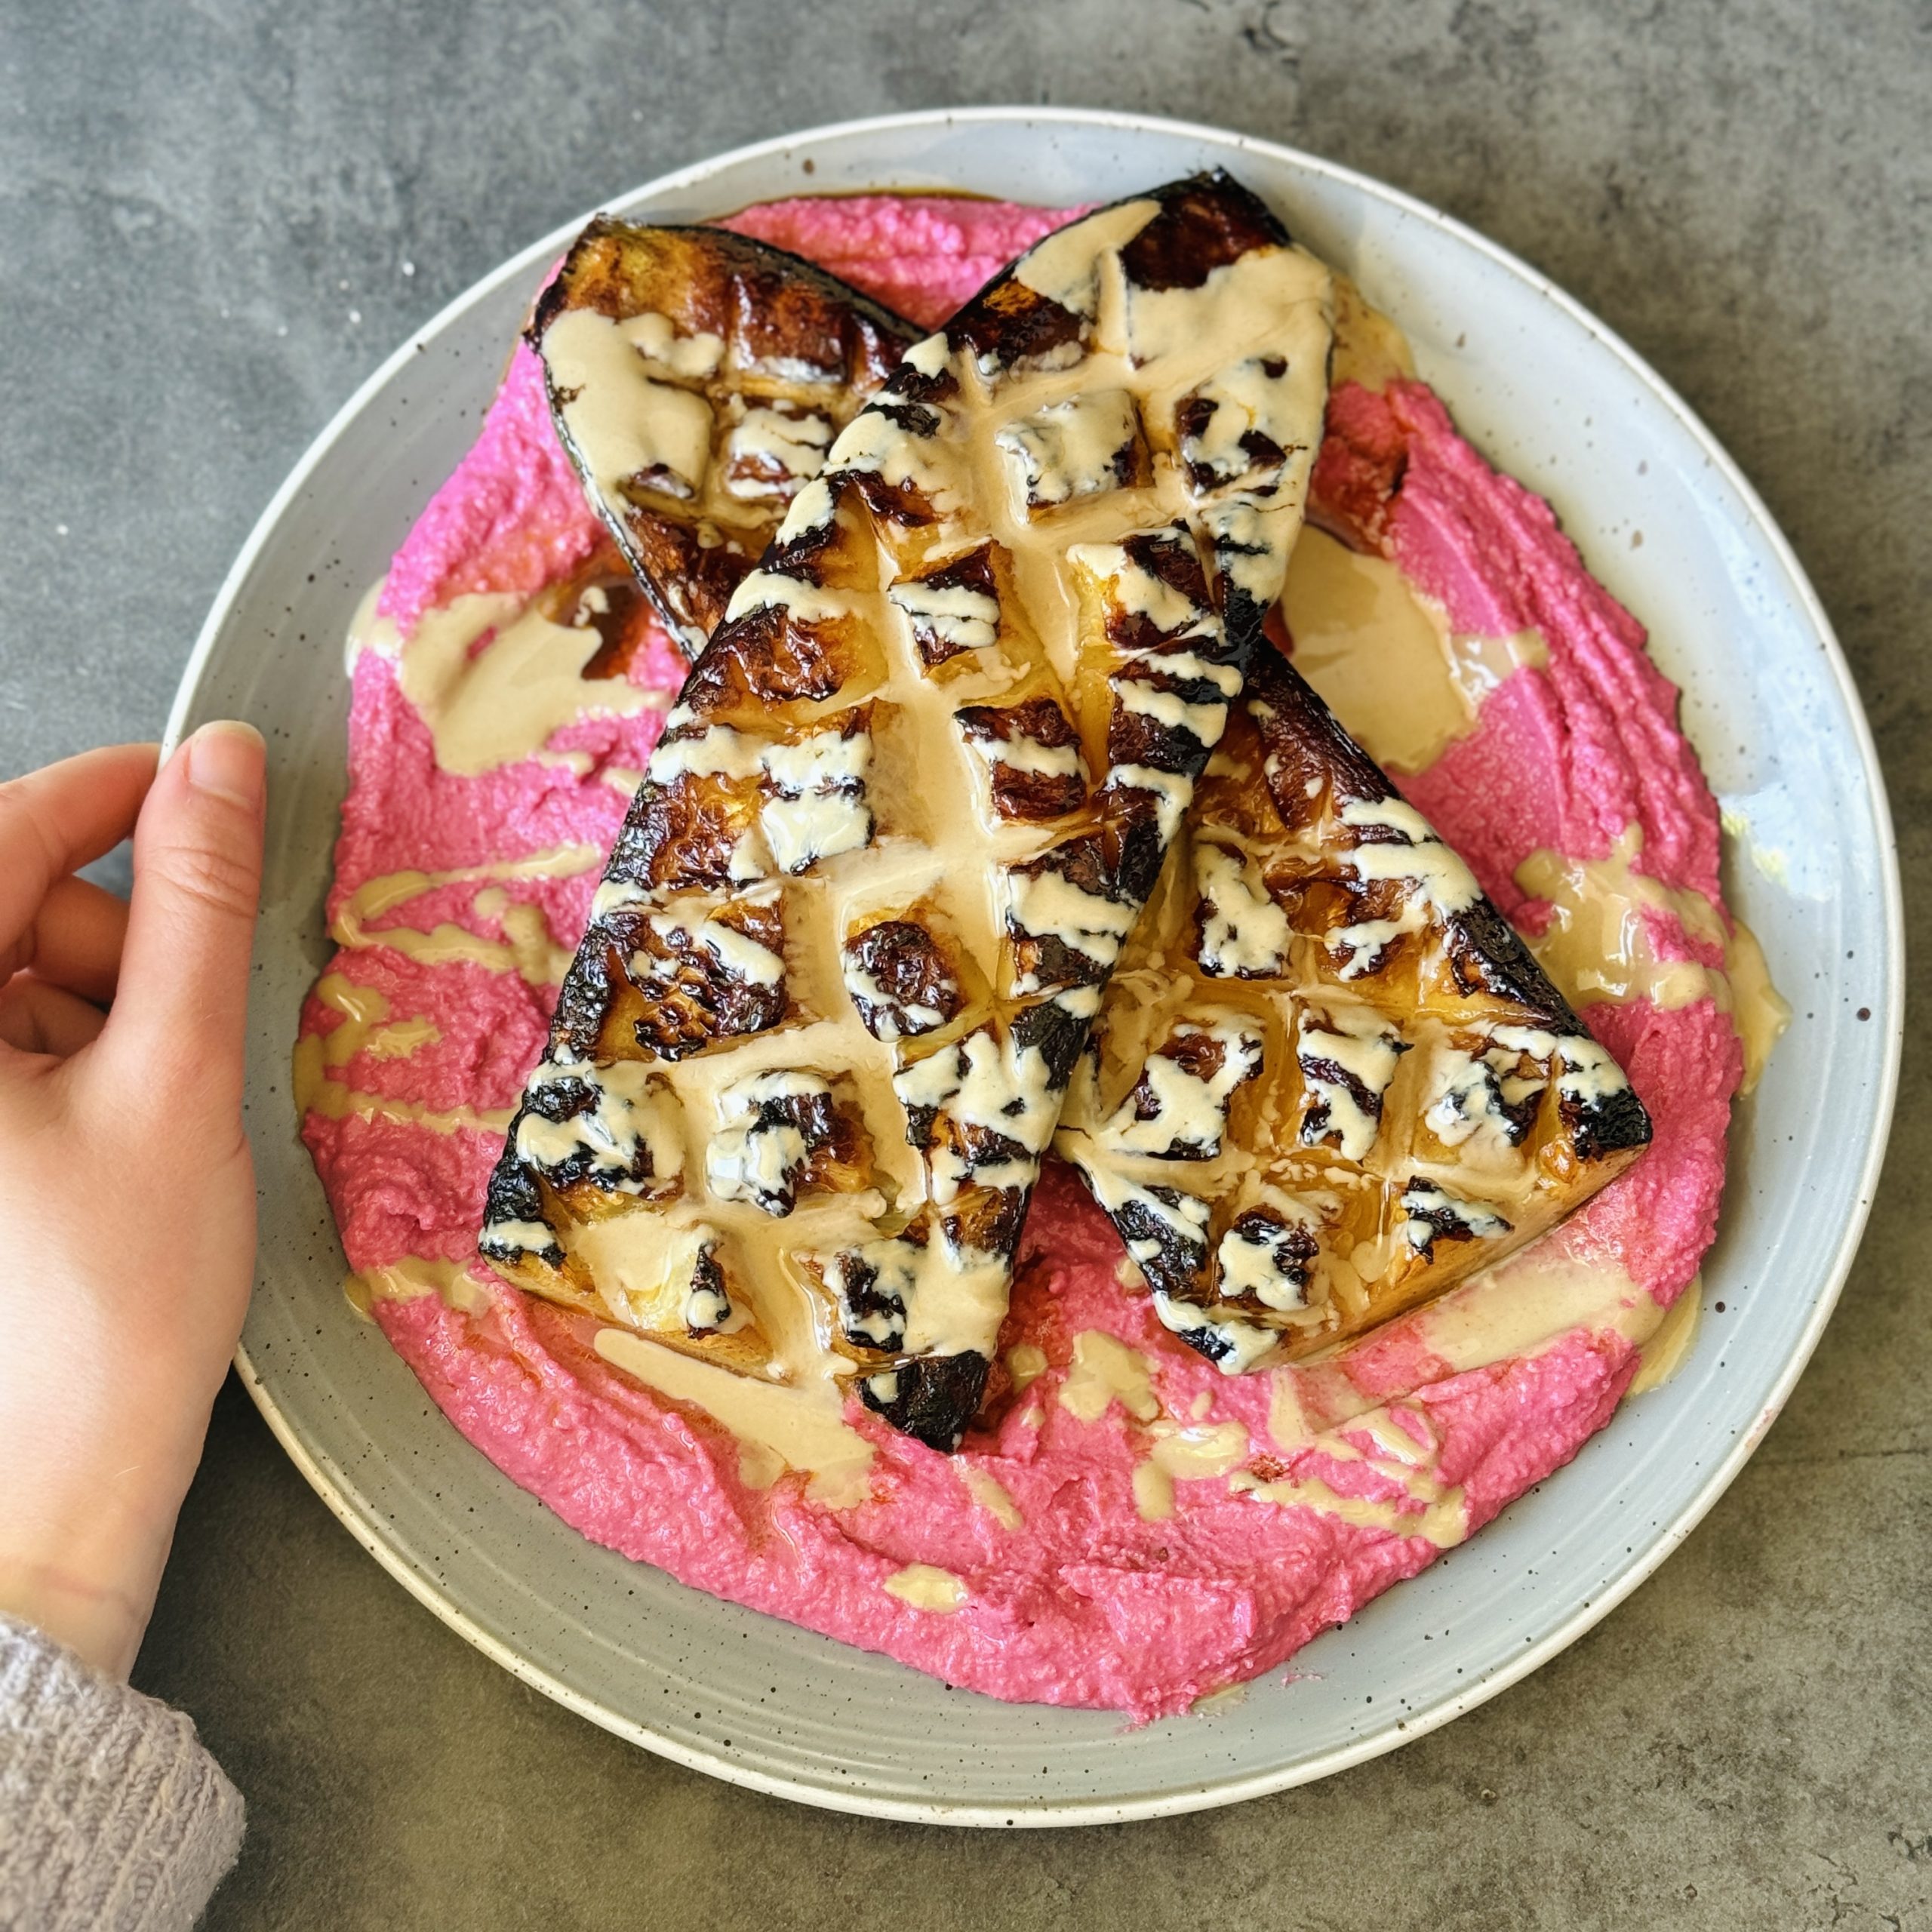
Charred Courgette with Beet Hummus
Takes 20 minutes
Serves 2
Ingredients
Main Ingredients
- 1 large courgette or 2 small
Dressing
- 1 tbsp maple syrup
- 1 tbsp tamari soy sauce
- 1 tbsp sesame oil
- Pinch of salt
- 1 tsp smoked paprika
Other Ingredients
- 1 tub of beetroot hummus 150ml / 5 fl oz
- 2 tbsp tahini drizzle
Instructions
- Prepare the courgette: Cut 1 large courgette (or 2 small) in half lengthwise and score each half in a criss-cross pattern so the heat can penetrate into the centre of the courgette. Sprinkle over a pinch of salt and brush into the cuts.
- Make the dressing: Mix together 1 tbsp maple syrup, 1 tbsp tamari (soy sauce), 1 tbsp sesame oil, a pinch of salt, and 1 tsp smoked paprika. Using a pastry brush, brush the open side of the courgette halves with the dressing.
- Char the courgettes: Heat a large frying pan on high heat and add the courgettes facing down. Cook for 2-3 minutes. Flip them back open side up and carefully add 50ml (1.7 fl oz) of water. Put the lid on top of the pan to go from frying to steaming. Leave the courgettes to steam for 3-4 minutes.
- Finish cooking the courgettes: Remove the lid and allow the water to evaporate. Brush the open side of the courgettes with more of the dressing and flip them over. Cook on medium heat for another 2-3 minutes face side down. Turn them, apply more of the dressing, and flip again to cook face side down for a further 2 minutes. Cook until they are golden and look amazing.
- Prepare the plates: Divide 1 tub of beetroot hummus (150ml / 5 fl oz) between 2 plates. Spread the hummus out to create an even layer. Add a charred courgette on top of the beet hummus.
- Drizzle with tahini: Ensure 2 tbsp of tahini drizzle is runny and drizzle lightly over the courgettes. Tuck in and enjoy!

‘Happier’ With Dave Flynn
‘Happier’
Breathe
The greatest tool you have to destress is right under your nose
I was truly amazed to learn that each of us takes between 18,000 to 25,000 breaths each day—that’s a staggering number! Imagine what would happen if you could optimise these breaths to help you to feel more relaxed, at ease and in alignment with life? Well you can!!

Like you, I’ve noticed how my breathing changes with my mood. Picture a relaxing evening unwinding with a hot shower or enjoying a lazy Sunday brunch with loved ones—our breaths naturally deepen, slow down, and elongate. This shift signals that our nervous system has entered the ‘rest and restore’ mode (part of the sympathetic nervous system), where our bodies relax and rejuvenate. In contrast, when stress or anxiety hits and we feel swamped, our breathing patterns shift dramatically—it becomes quick, short, and shallow. This is a clear sign that we’ve flipped into the ‘fight or flight’ mode, fueled by adrenaline and driven by the parasympathetic nervous system, often fixating our minds on worries about the past or the future.
This intricate dance between our breathing and our emotions underscores just how powerful our breath can be. It not only keeps us alive but also plays a critical role in helping us feel more at ease, relaxed, and in tune with the present moment—essentially, it helps us to flow through life with greater happiness. Isn’t it amazing that something as simple as breathing, which we usually do without even thinking, can have such a profound impact on our well-being? 😊
HOW ARE YOU BREATHING NOW?
Let me invite you to a little experiment:, While you are reading this, slowly become aware of your breathing, and start to lengthen and deepen it with every inhale. You might have to straighten up slightly to do so. As you start to breathe more consciously, I invite you to think about the last time you felt wound up and overwhelmed —perhaps after a long tough day where nothing seemed to go your way. Chances are, your breath was shallow in that moment, short and quick mirroring your inner turmoil.
Now, imagine shifting that anxiety and tension by simply changing the way you breathe, to slow it down, to deepen your breath and signal to your body and your nervous system that all is ok, that you are safe to relax. How you and I breath is such a useful tool to have that’s always with you. It just requires your attention and conscious focus. By taking a few moments to focus on deepening your breathing, you can guide your body back into a state of calm, telling your brain that it’s time to relax.
AN EASY WAY I MAKE IT PART OF MY LIFE
When I feel overwhelmed and stressed I often end up doing 5 to10 minutes of deep breathing on a free ios app called ‘Breathing app’. I generally do this while driving on the days that I feel overwhelmed (and ironically need it most!) I rarely can justify the time thus I end up doing it in the car which seems to be the only option! I set it it to a 5:7 breathing ratio, which means that I breathe in for 5 seconds and breathe out for 7 seconds.This helps relax my nervous system and signals to my nervous system that I am safe and it’s ok to relax, I literally feel my shoulders drop and heart rate slow down and the tension that holds me loosens its grip.
This simple act of taking a few deep breaths for a few minutes whenever you need it can be a lifeline in stressful situations, helping you regain composure and approach challenging situations with a clearer mind. I invite you to give it a try next time you’re feeling overwhelmed and watch how it can transform not just your moment, but potentially your entire day.
IT SEEMS SO SIMPLE YET IS FUNDAMENTAL
To me, this simple yet profound technique of conscious breathing isn’t just about managing moments of anxiety—it’s about transforming our everyday life into a more joyful and relaxed experience. If you’re intrigued by the potential of breathwork and want to explore further, I can recommend engaging in activities like yoga, meditation, or even specialized breathwork classes. These practices integrate deep breathing as a fundamental aspect, helping you harness its benefits more fully.
Remember, the powerful tool of conscious relaxed breathing is free and available to you at any moment—whether you’re sitting in traffic, preparing for a meeting, or just winding down at the end of the day.

I craft each ‘Happier’ column with the goal of offering you practical insights and useful tips. My aim is to explore simple changes we can make in our daily lives that might just make us a bit happier. It’s easy to cruise through life on autopilot, adhering to societal norms without questioning whether they truly serve us. Yet, I believe that both you and I have untapped potential to inspire each other and create a positive ripple effect in our communities. While this might sound a bit lofty, I’m genuinely enjoying this journey and am truly grateful for your time and attention to my writing.
Thank you so much for reading, engaging with, and commenting on my work—your interaction means a lot to me. Through my weekly ‘Happier’ column, I hope to inspire you to feel a little more content and in command of your emotional health. Remember, the most potent tool you have to reduce stress is always right under your nose. Here’s to breathing easier and living a happier life! Please let me know your thoughts in the comments below. Thanks a mill. Dave.
More ‘Happier’ Articles
More ‘Happier’ Articles
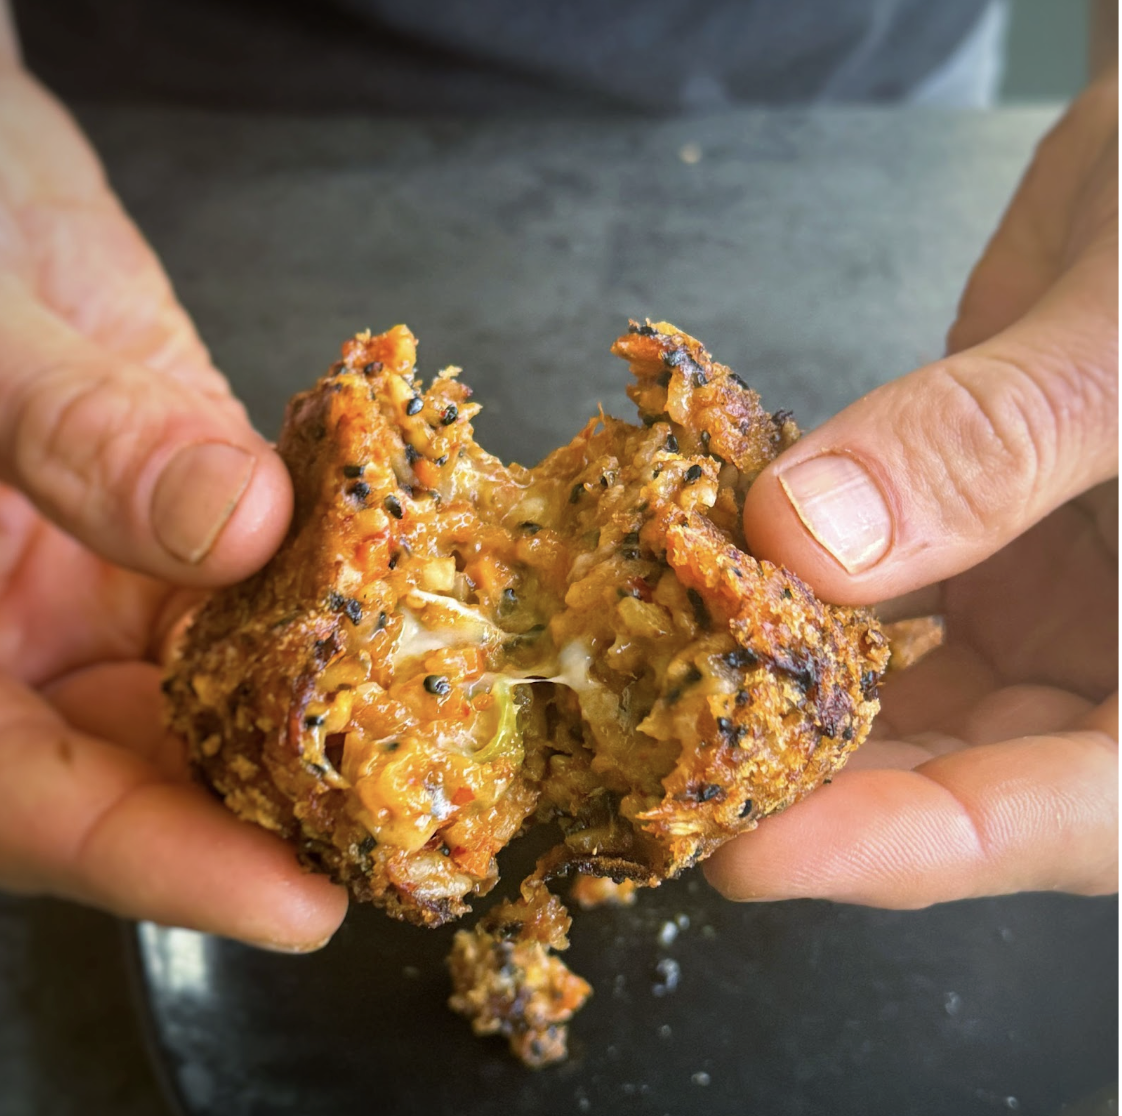
Kimchi Arancini Rice Balls
Takes 20 minutes
Serves 3
Ingredients
- 300 g 10.6 oz cooked white rice or sushi rice
- 120 g 4.2 oz kimchi
- 1 tbsp sesame oil
- 1 tbsp gochujang
- 1 tbsp maple syrup
- 1 tbsp tamari
- 65 g 2.3 oz vegan mozzarella or similar cheese
- 2 tbsp sesame seeds
- 3 tbsp rice flour not needed if using sushi rice
- 50 g 1.8 oz Panko breadcrumbs
- 200 ml 6.8 fl oz vegetable oil for frying (not needed if baking)
Instructions
- Prepare the Filling: Finely dice the kimchi and mix it with the cooked rice, sesame oil, gochujang, maple syrup, rice flour (if using), sesame seeds and tamari. Taste and adjust seasoning if needed.
- Add Mozzarella: Take a heaped tablespoon of the filling and spread it on a chopping board. Place a teaspoon of vegan mozzarella in the centre and roll the rice around it, forming a ball shape. Ensure the cheese is in the middle and the rice is well compacted so that it will hold its shape
- Coat with Breadcrumbs: Roll each rice ball in the Panko breadcrumbs until evenly coated.
- Heat the Oil: Heat the vegetable oil in a saucepan over high heat. To test if the oil is hot enough, drop in a breadcrumb; it should turn golden brown within 30 seconds.
- Fry the Rice Balls: Carefully add the rice balls to the hot oil and fry until they turn golden brown, about 3-4 minutes.
- Remove and Serve: Remove the rice balls from the oil and place them on kitchen paper to absorb excess oil. Serve hot with your favourite dipping sauce.
The Happy Pear Podcast
“I think the fitness industry took a wrong turn when it adopted a top down model of fitness education. I also feel there is too much emphasis on working out alone and the collection of arbitrary data. WildStrong is the opportunity to embed movement in a community setting, with tangible benefits, creating a peer-lead, distributed model of health practice.”
Episode 165
In this week’s episode, we delve into the world of community-based health and fitness with guests Andrew Telfer and Gill Erskine, co-founders of WildStrong. Andrew, a public health professional with over 15 years of experience in strength and conditioning coaching, brings a wealth of knowledge about health promotion and achievable exercise for longevity. Gill, with a background in environmental politics and a passion for community building, co-founded WildStrong to create space for people to move more and get stronger, regardless of their gym-going habits. Together, they discuss the intersection of public health and local, community-based physical activity, sharing insights on building connections, fostering community engagement, and promoting holistic well-being.
Main Topics Covered:
- The journey of WildStrong: From concept to community movement
- The importance of community-based physical activity for health and longevity
- Strategies for bridging the gap between public health and local fitness initiatives
- Creating inclusive spaces for movement and strength-building outside traditional gym settings
- Nurturing connections and fostering a sense of belonging within communities
- Overcoming barriers to participation in physical activity and promoting accessibility for all
Tune in to explore how WildStrong is revolutionising the approach to health and fitness, one community at a time, and discover practical insights for incorporating movement and strength-building into your daily life.
Lots of love,
Dave & Steve
SPONSORS & DISCOUNT CODES:
Namawell Juicers are AMAZING! They have absolutely revolutionised the juicing game. We have an exclusive 10%
Enter the code HAPPYPEAR10
LINK: https://namawell.com/collections/juicers/products/nama-j2-cold-press-juicer?ref=thehappypear
VIVOBAREFOOT: Vivobarefoot Footwear have given our listeners an exclusive 20% discount and if you buy now you also get free access to their incredible course showcasing some of the biggest names in the health and wellness space.
Enter the code HAPPYPEAR20
LINK: https://www.vivobarefoot.com/uk/the-happy-pear
THE HAPPY PEAR RECIPE CLUB – Blending health and happiness through a range of over 500 delicious plant-based recipes.
LINK: https://eu1.hubs.ly/H06JvgK0
Sign up to our Newsletter, for updates on our latest recipes, events, and news.
LINK: https://share-eu1.hsforms.com/1hKXaawjoQOONmJe4EXkCdwf92py
Produced by Sean Cahill & Sara Fawsitt
https://embed.acast.com/6061eea8ca2fec15c01206ed/65c2cc5f73ba2f0016f45d2c
Available now from all good podcast providers:
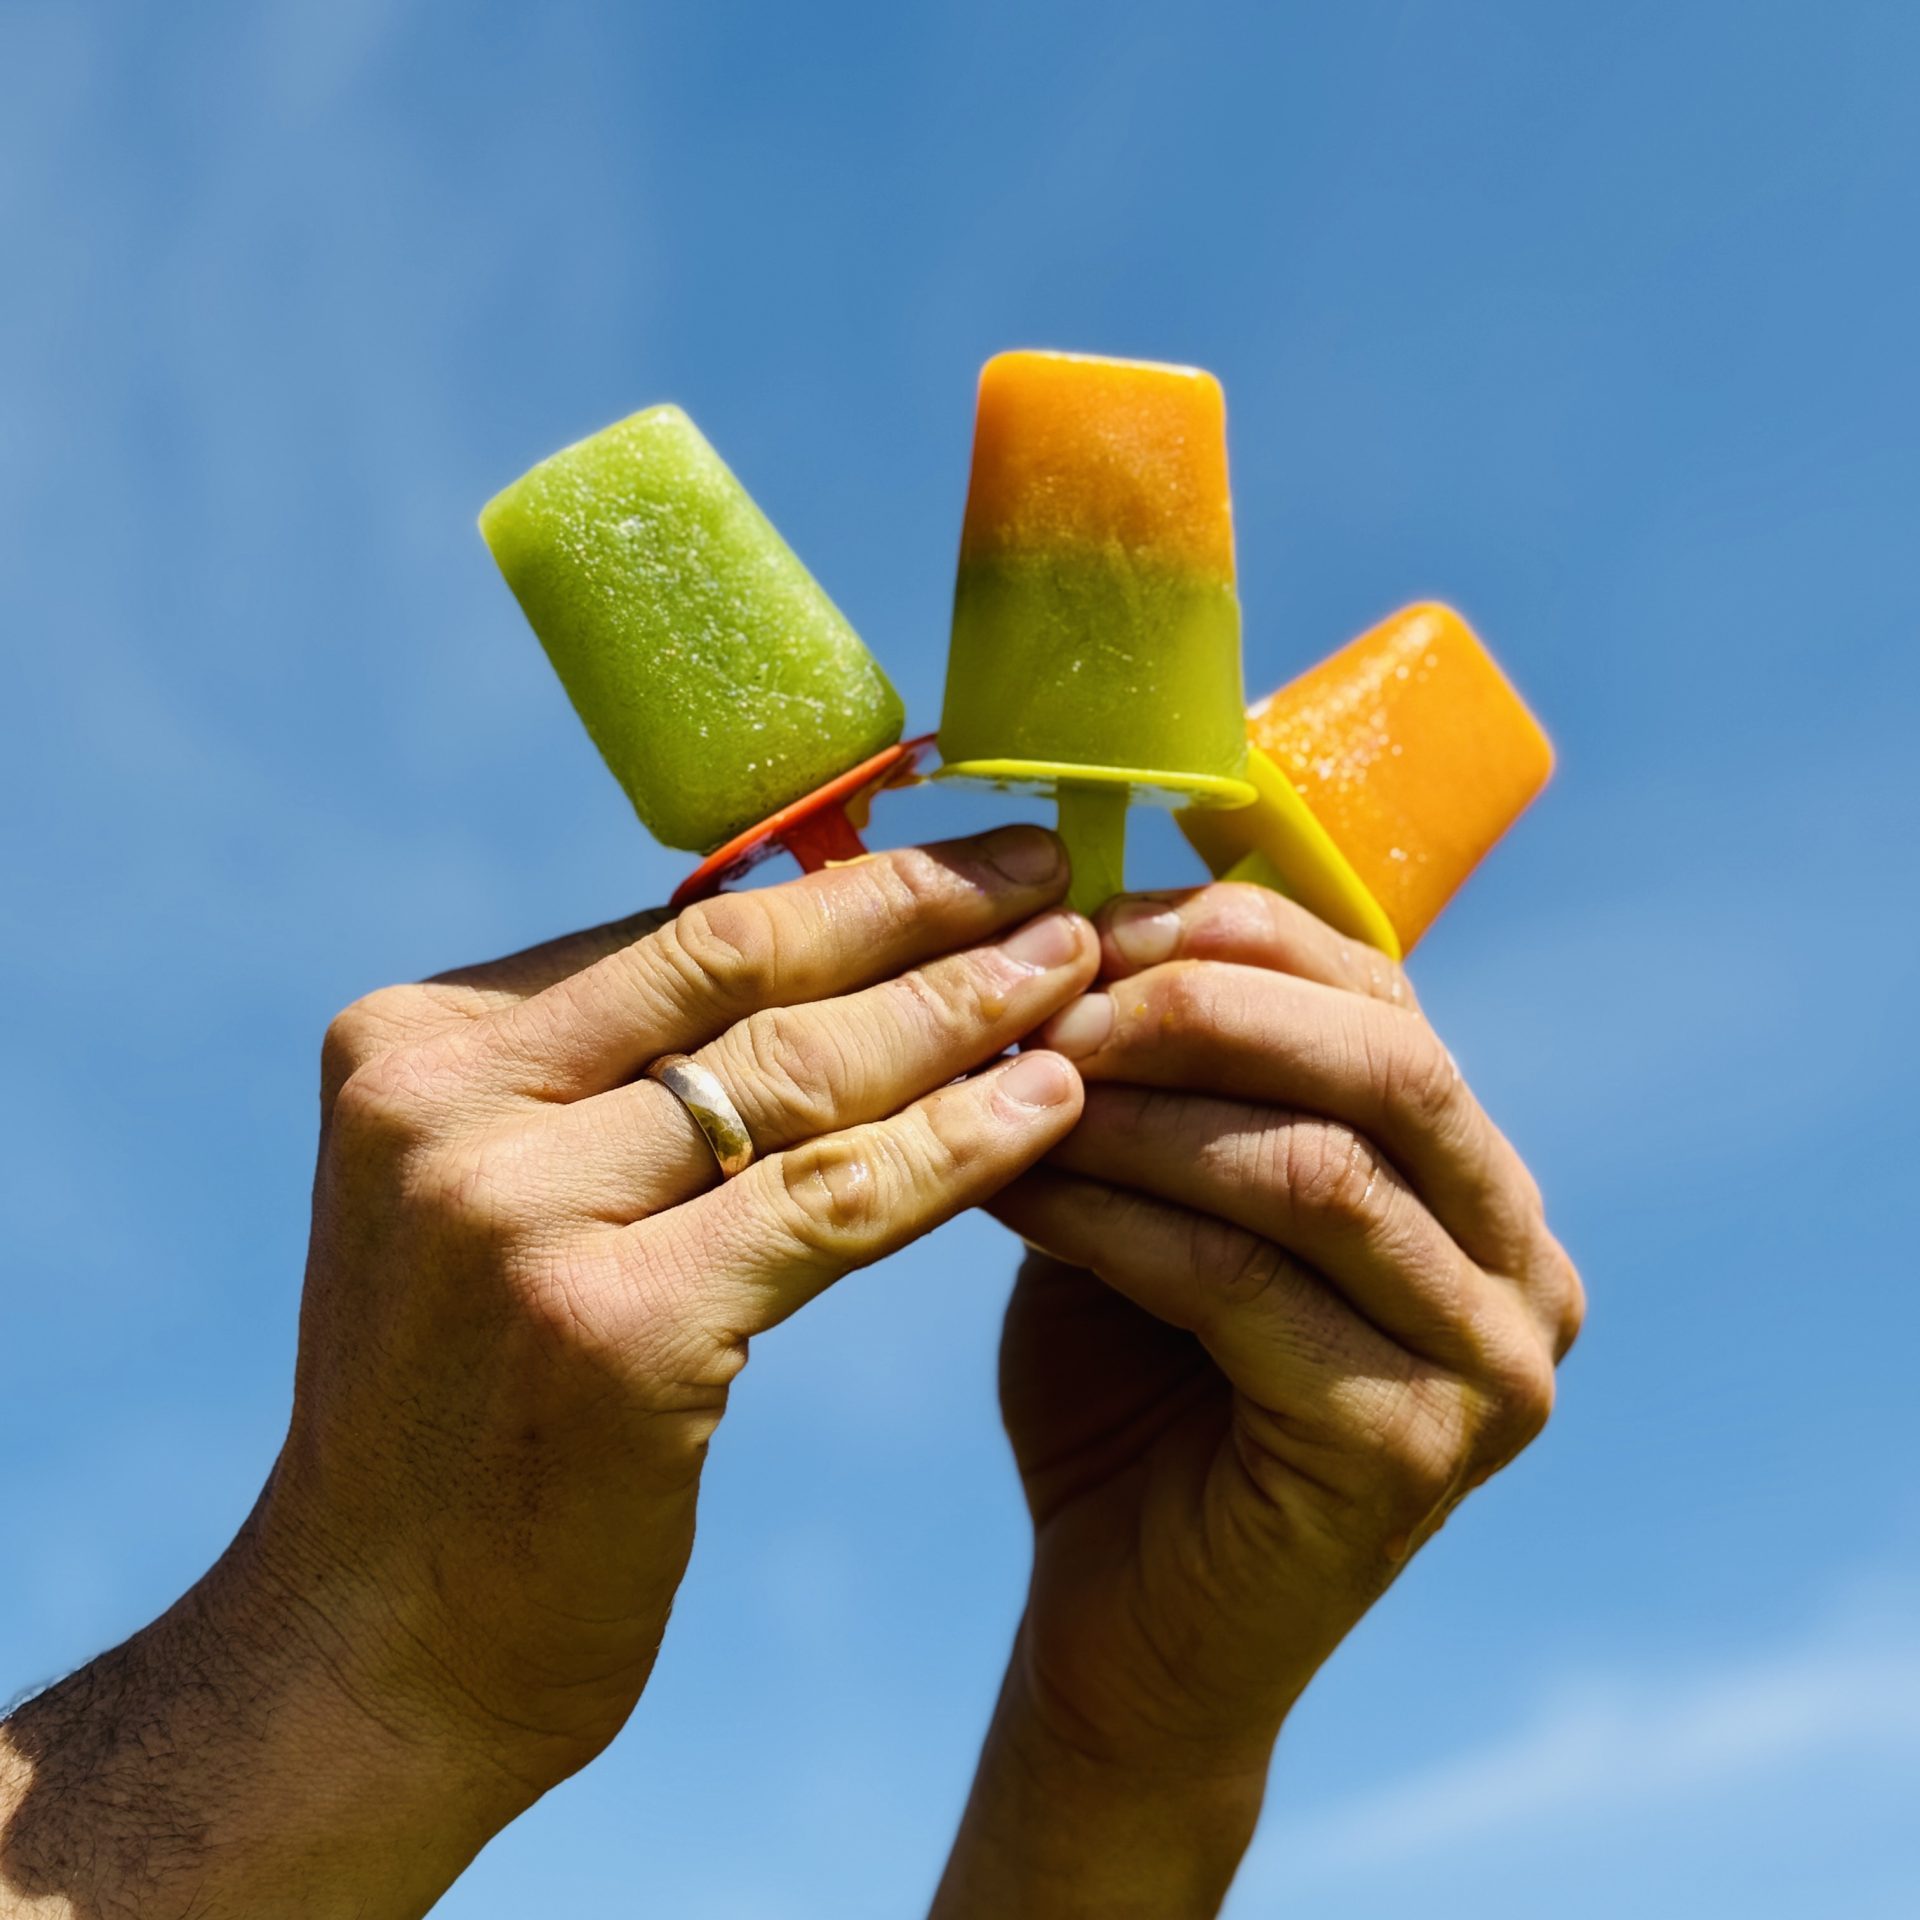
Hayfever Ice Pops
Takes 8 hours 10 minutes
Serves 12
Ingredients
Yellow Juice Later
- 2 medium Oranges
- 4 Carrots
- ½ thumb-sized piece of Turmeric 6g
- ½ thumb-sized piece of Ginger 6g
- ½ Lemon
- 1 Yellow pepper
Green Juice Layer
- 1 Cucumber
- 1 handful of wild Nettles or kale
- ½ a head of Celery
- 2 Green apples
Instructions
- First make the yellow juice by peeling the oranges and half of the lemon. Add the ingredients to the hopper and juice. Pour the juice into the ice pop moulds.
- For the green juice cut the apples in half and add all ingredients to the hopper and juice. Pour the juice into the ice pop moulds.
- If you want a two-tone or double layered ice pop you will have to fill the ice pop moulds half full with the yellow juice and leave to freeze for 2 hours. Remove and top up with the green juice and leave to freeze overnight.
- Remove and enjoy!

‘Happier’ With Dave Flynn
‘Happier’
Relearning To Live With Lightness
As I sit in the bath, unwinding after a busy day, contemplating life, I come back to the question: is there any proof that life has to be serious? And if it doesn’t, could it be that joy, much like seriousness, is something we can cultivate as a habit?
Personally, I believe that seriousness can be a habit, a learned behaviour that we unconsciously pick up from society at large. ‘Stop laughing, stop messing – this is a serious matter!’ was a line I remember being told to me countless times growing up . Obviously being serious has its place and there are moments when it is required, however, I wonder if we have gone too far and is it time to re habituate ourselves with how to experience a little more joy on a daily basis?
I observe one of my greatest teachers daily—my 8-month-old daughter, baby Fia. Her eagerness to participate in household chores, from washing the dishes to filling the dishwasher and even mopping the floor, is a lesson in itself. For Fia, there is no distinction between work and play; every activity is approached with an open, curious attitude. Each moment is an adventure, an opportunity for exploration and joy. This seamless integration of curiosity and play into daily tasks reminds me that perhaps, the boundaries we place between ‘work’ and ‘play’ are artificial constructs rather than absolute truths.
From Human Being into Human doing?
I worry if we are becoming more machine-like in our relentless quest for efficiency? In our drive to optimise every minute of our day, I am asking myself if we are losing the essence of what it means to be human? It seems like we may be evolving from being human beings—creatures of experience and emotion—to human doings, where our worth is measured by our productivity and output. This shift seems to strip us of our humanity, reducing our lives to a checklist of tasks rather than a rich tapestry of experiences.
Why is work typically associated with toil and hardship? This view, which sees work solely as a burdensome necessity for livelihood, is ripe for reimagining. What if we could approach work with the same curiosity and joy that children like baby Fia bring to their explorations?

By shifting our perspective, work can transform from a series of mundane duties into a canvas for creativity and a source of deep satisfaction. Understanding the true worth of our tasks and seeing them as chances for personal growth and contributions to greater causes can transform work from merely a way to make ends meet into a fulfilling aspect of our lives. I know this might sound very grandiose but I believe our perspective and how we approach work can be the pivotal point.
I wrote about turning routines into rituals in one of my earlier Happier Columns, about approaching mundane everyday tasks with an attitude of presence and imbuing it with a sprinkle of sacredness can transform the experience. By shifting our mindset from just getting through each day to actively seeking out meaning and joy, we can improve both our work satisfaction and our overall well-being.
Lessons from 1000 elderly Americans
In his book 30 lessons for living gerontologist Karl Pilemer interviewed 1000 elderly Americans looking for the most important lessons they learnt from decades of life experience. Here is what they said:
- No-one, not a single person out of a thousand, said that to be happy you should try to work as hard as you can to make money in order to buy the things you want
- No-one, not a single person out of a thousand, said that it is important to be at least as wealthy as those around you and if you have more than them then it’s real success.
- No-one not a single person, said you should decide your work based on your desired future earning power
- What they did value was things like quality friendships, being part of something bigger than themselves
- Spending quality unstructured time with their children. “Your kids don’t want your money or what your money buys anywhere near as much as they want you, specifically they want you with them”, Pilemer writes.
Karl Pilemer’s findings lead me to a cheeky realisation: are many of us just being busy fools? Many of us hustle hard for more stuff, adopting a serious, all-go-no-stop attitude that can actually make us miss out on what’s truly valuable—like laughing with friends or lazy Sunday mornings with the kids. Maybe it is time we ease up on the gas pedal a bit, swap some of that efficiency for reflection, and sprinkle a little more fun and play into our days. After all, it seems that the best parts of life might just be the moments we aren’t working so hard to accomplish a goal.

A theme that I often journal on is, “How can I infuse today’s responsibilities and duties with more joy and ease?” This inquiry not only challenges the seriousness and heaviness commonly associated with my daily tasks but also steers me towards a more fulfilling engagement with life.
So, what do you think? Do you find yourself caught up in the hustle for more, sometimes missing the moments that truly matter? I’d love to hear if this strikes a chord with you. How do you balance the daily grind with making time for joy and play? Let’s chat about ways we can inject a bit more lightheartedness and creativity into our routines, and maybe, just maybe, let go of what might be some of that habitual seriousness. Share your thoughts in the comments below and let’s inspire each other to live a little lighter every day!
More ‘Happier’ Articles
More ‘Happier’ Articles
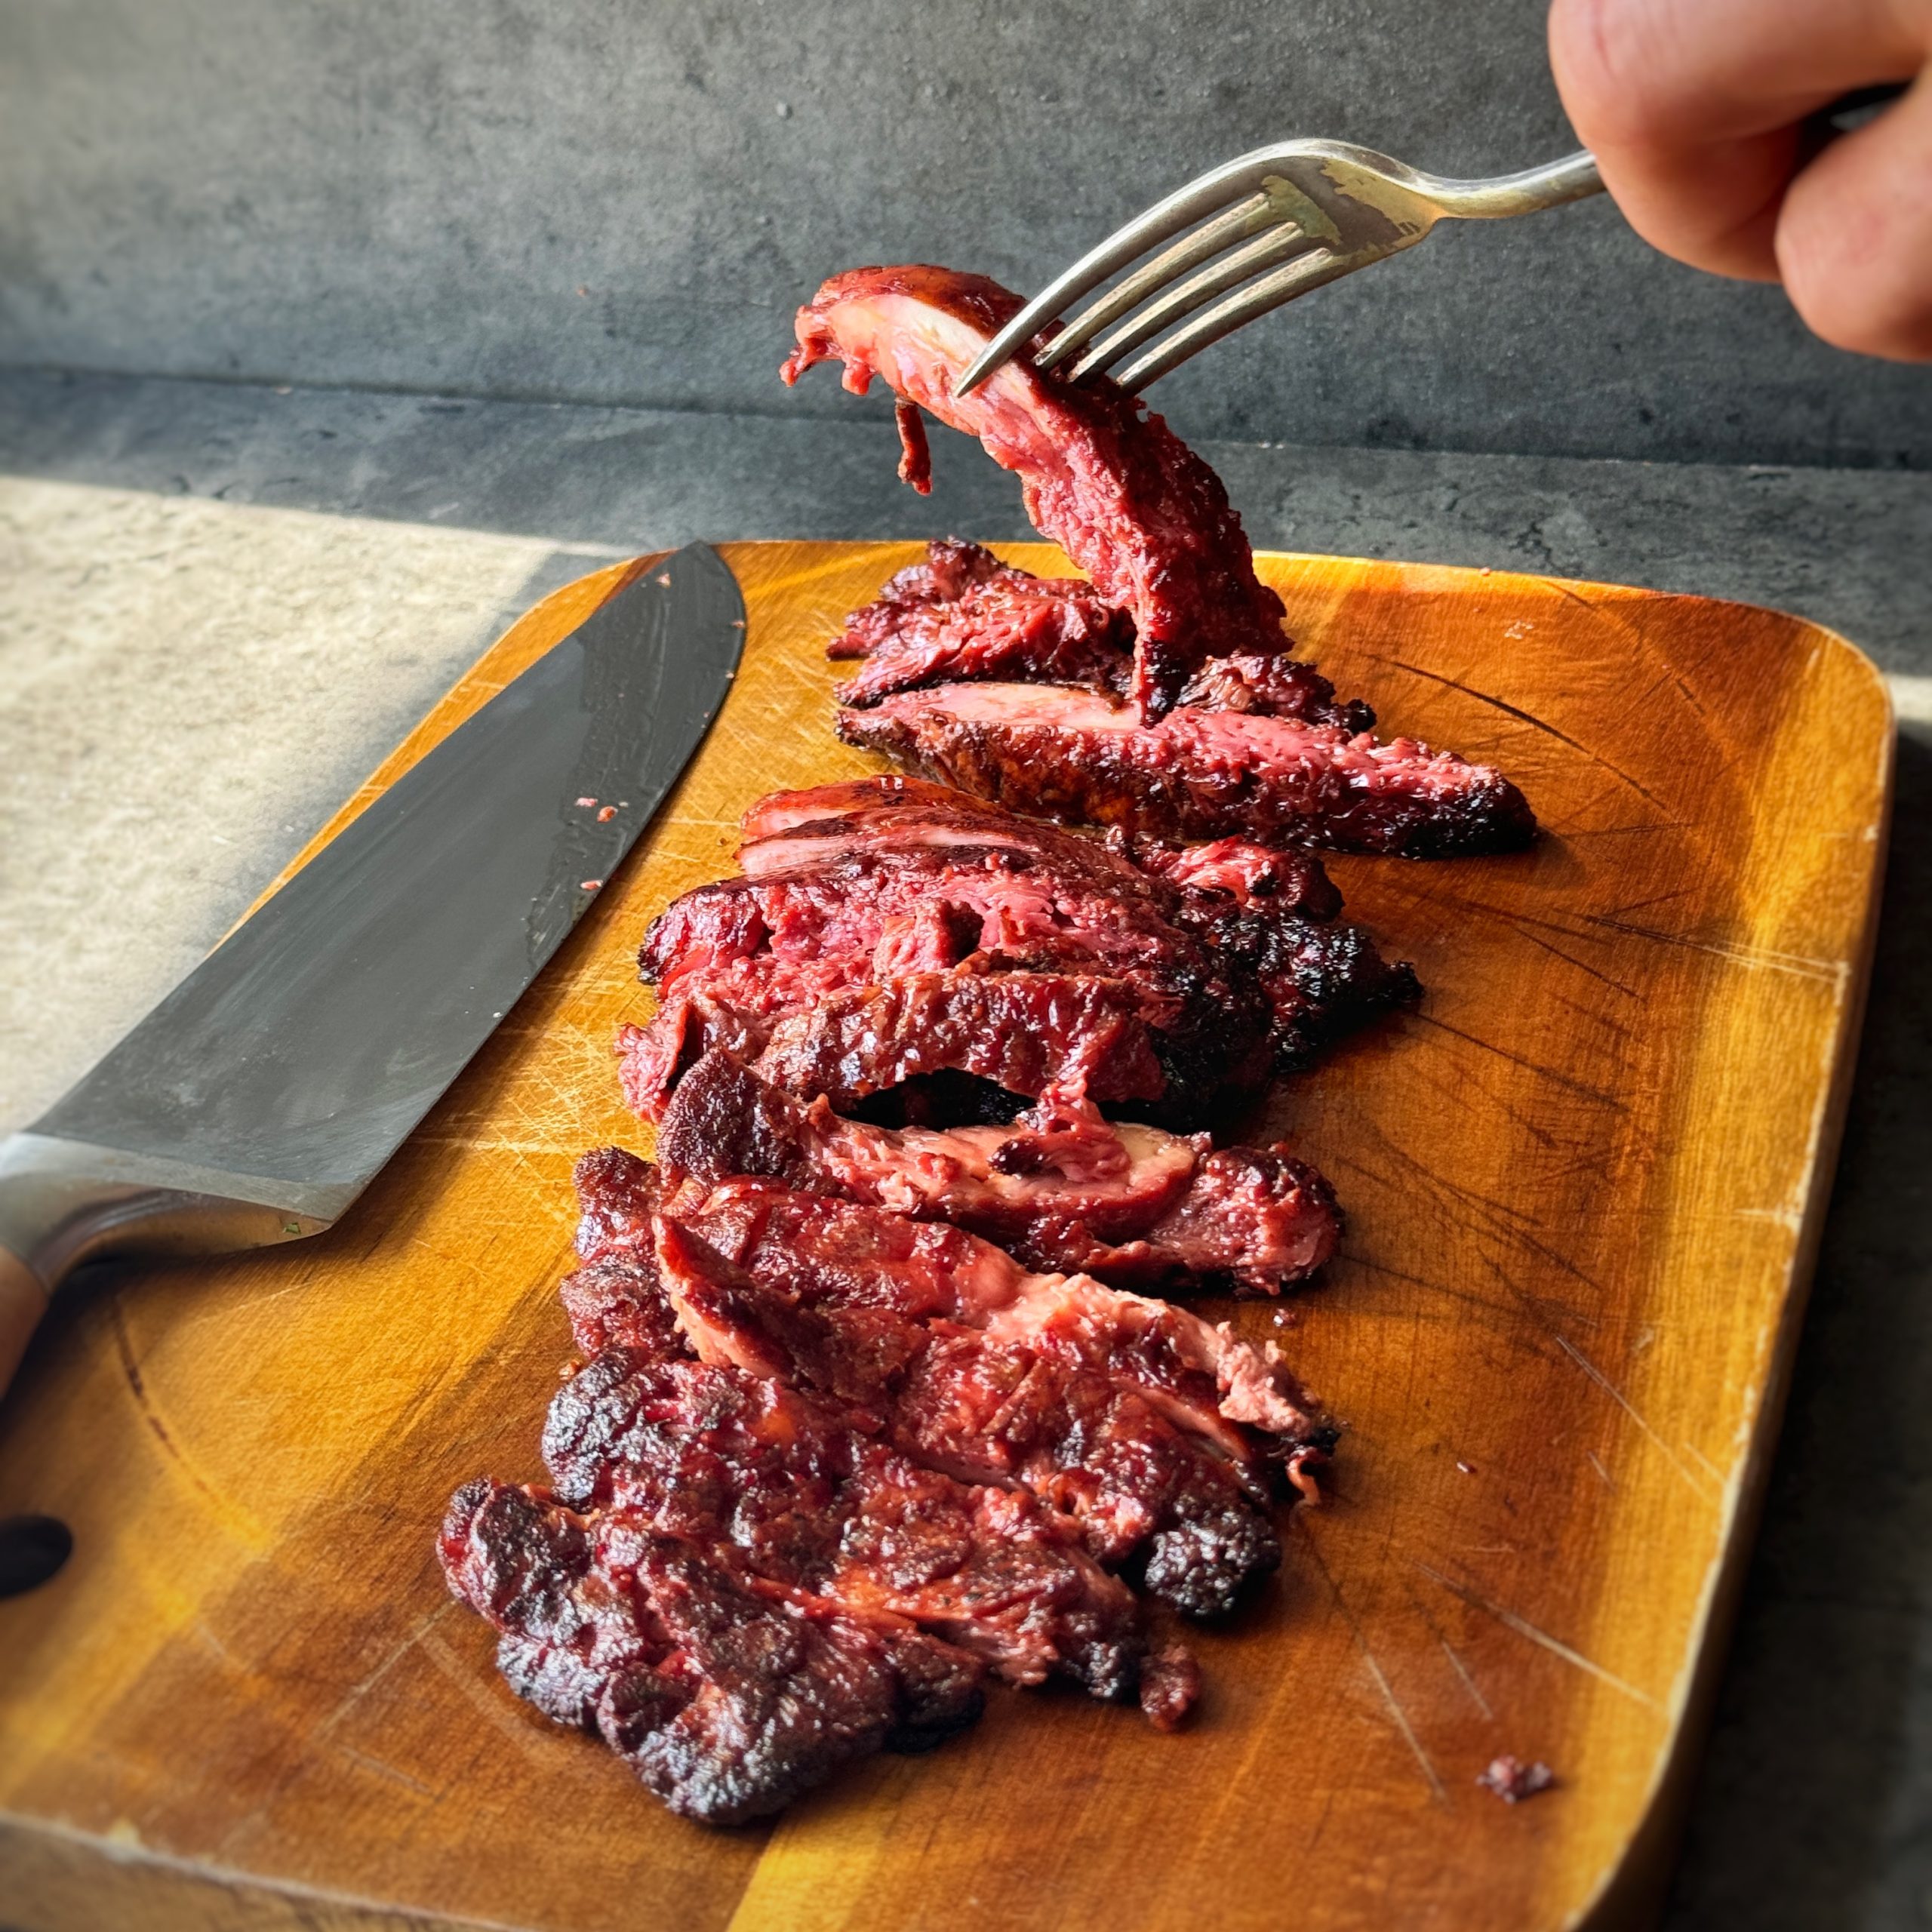
Mushroom steak sandwich
Takes 35 minutes
Serves 2
Ingredients
- Ingredients:
- 300 g 10.5 oz lion’s mane mushrooms
- 1 x large Baguette
- 50 g 1.75 oz lettuce of choice
- 4 tbsp vegan mayonnaise
- 4 tbsp lovely basil pesto or pesto of choice
- 3 small gherkins
- Marinade
- 100 ml beetroot juice
- 4 tbsp tamari/ soy sauce
- 1 tbsp smoked paprika
- 2 tbsp maple syrup
- 3 tbsp olive oil
- 1 tbsp apple cider vinegar
- pinch salt
- 1 tsp ground garlic powder
- Pinch black pepper
Instructions
- Method:
- Cook the mushrooms down
- Heat a wide bottomed non-stick pan on high heat and once hot add 1 tbsp of oil.
- Add the mushrooms, along with a good pinch of salt and fry them on each side for 5 mins. Use a smaller lid to press them down until they are approximately 2cm thick. There will be a bit of sizzle as the water from the mushrooms reacts with the oil so just be careful here. Once the mushrooms are slightly golden on each side remove them from the pan and turn the heat off.
- Marinate the mushrooms
- Mix together the ingredients for the marinade. In a bowl or baking tray, marinate the mushrooms in the marinade ensuring that all the mushrooms are well coated. You can leave them to marinate overnight or for 20 mins. The longer you leave them soak the pinker and more flavourful they will be.
- Cook the marinated mushrooms and slice
- Heat the frying pan on high heat and add 1 tbsp of oil, remove the mushrooms from the marinade and fry them until they go a lovely charred colour on each side. This should take approx 2 mins on each side. See the picture below as a reference.
- Remove the cooked mushrooms from the pan and slice them into 1cm thick slices.
- Build your sandwich
- Cut the baguette in half lengthwise. Add the mayo to the bottom and the pesto to the top. Slice the tomatoes and the gherkins. Add the lettuce on top of the mayo, followed by the tomatoes and the gherkins. Finally, add a generous amount of the mushrooms steak. Put the top on and cut in half for 2 amazing sandwiches!
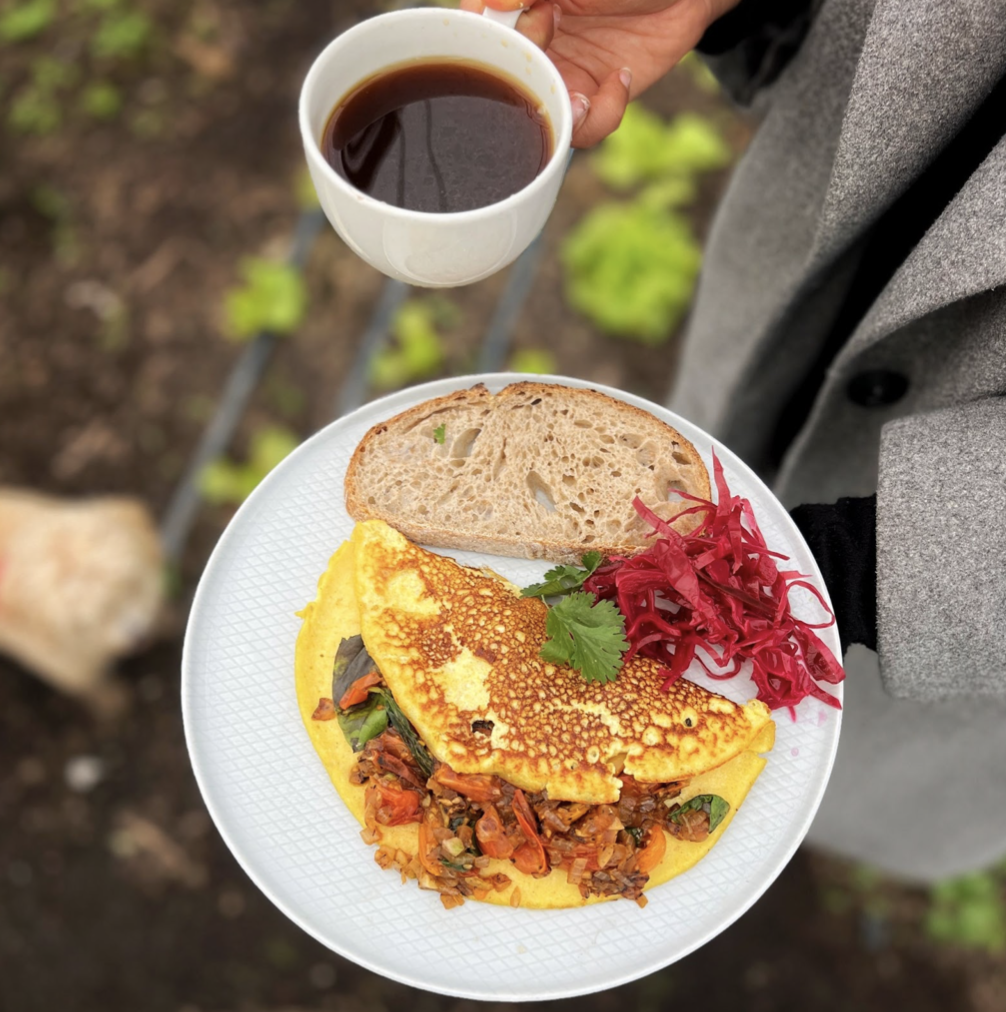
Plant Based Omelette
Takes 15 minutes
Serves 1
Ingredients
Omelette
- 150 g silken tofu
- 30 g gram flour
- 2 tbsp nutritional yeast
- 10 tbsp oat milk
- 1/4 tsp turmeric
- good pinch sulphur salt
Filling
- 6-8 cherry tomatoes
- 10 g fresh basil leaves
- 1/2 onion
- 2 cloves garlic
Instructions
- Add all the base ingredients to a bowl and whisk till super smooth, the texture should be not too thick and not too thin, alternatively you could use a food processor or blender and mix until fully blended and smooth.
- Peel and finely dice the onion and garlic
- Slice the cherry tomatoes in half. Remove the basil leaves off the stalks
- Add 1 tsp of oil to the pan on high heat and once hot add in the onion and fry to 4 mins until lightly golden, next add in the garlic, basil and cherry tomatoes and a pinch of salt and cook for 2-3 mins until the tomatoes are cooked down. Taste and adjust the seasoning to your liking.
- To cook your omelette; Heat a teaspoon of olive oil in a non-stick pan over a low heat, this will give your omelette bottom a lovely golden base while not cooking too quickly. When the pan is hot pour your batter into the pan and allow it to spread covering the entire pan, by tilting the pan left to right, using a spatula to spread if necessary. Allow to cook on a low heat for five minutes without stirring, then using a small silicone spatula gently lift up an edge and check if the bottom of your omelette is golden brown.
- Now add your cooked tomatoes and basil filling to one half of the omelette, spoon on and carefully spread it out. Gently fold over the other half, by tilting the pan to seal in your fillings.
- Season with sulphur salt to taste – if you don’t have sulphur salt just use normal salt – the sulphur salt will add an egg like flavour which tends to diminish when cooked so best to add just before serving to maintain flavour. Garnish with any pickles you like – we served ours with some red sauerkraut and some toasted sourdough.Enjoy!!

‘Happier’ With Dave Flynn
‘Happier’
The 1 Hour Holiday
A dear friend of mine, Andrea has a knack for finding joy in the simplest moments, he always seems to have time to be present with people and is very rarely in a rush. He’s a special man. A few years ago, over a morning coffee, the sounds of our laughter and the clinking of coffee cups, he shared a concept that I adore: the ‘1 Hour Holiday.’
‘You see, Dave,’ he began in his melodious Italian accent, ‘why should we wait for a special occasion to feel free and joyful?’ His question struck a chord. Here was a man who is very skilled at the art of savouring life’s daily pleasures, no matter what the situation or weather.
When I’m on holiday, I always notice a shift in my perspective. I feel lighter, my shoulders drop and the usual daily worries are left at home. Suddenly, the small concerns that can occupy my mind seem trivial. I find myself savouring the warmth of the sun against my skin, engaging in long, unhurried conversations with locals or fellow travellers, reconnecting, remembering the joy in simply being.

Reflecting on this, it strikes me how starkly different the holiday perspective is from most of our day-to-day lives back home. My days are pretty packed – with a bustling family life having my three daughters including baby Fia, who is just 8 months old, and my responsibilities at The Happy Pear, it’s safe to say my days are full! My day to day life is led by my diary and my task list seems to grow and expand by the hour! Finding space to reflect can be a coveted commodity. Often, I feel like a piece of driftwood at sea, tossed around by the relentless waves of daily life!
Andrea’s ‘1 Hour Holiday’ concept deeply resonated with me, posing a compelling question: Why should we wait for a special occasion or a holiday to feel free and joyful? His idea is remarkably achievable and straightforward. Imagine integrating that holiday perspective – the lightness of spirit, the presence, the appreciation – into your everyday life, even if just for an hour. This hour doesn’t even need to be continuous; it can be divided into two thirty-minute segments or maybe you start with a daily 30 minute holiday.
The main point is how can we infuse our daily lives with the same attitude and spirit we embrace during holidays? Despite the undeniable increase in responsibilities, deadlines, and stress in our regular routines, opportunities still exist to infuse our days with a slice of that holiday spirit. How can we capture that sense of freedom and light-heartedness and weave it into the fabric of our everyday lives? Small acts, such as enjoying a quiet coffee, stepping outside to bask in the sunlight, or engaging more wholeheartedly in conversations without haste, can significantly help us embody that holiday spirit on a more consistent basis.

My personal ‘1 Hour Holiday’ typically unfolds between 5:30 and 7:00 AM. This early morning slot is when I’m truly a free agent, untouched by the day’s obligations. While it may be an ungodly hour for some, for me, it’s my soul time. It’s a period devoid of commitments, allowing me to indulge in activities that rejuvenate my spirit – be it running, swimming, enjoying coffee with friends, doing yoga, journaling, or even sneaking in a quick nap. Whatever I choose, this time is sacred to me, a true holiday from the daily grind. Just this morning, for instance, I started the day swimming at sunrise around 5:30 AM with Linda, Detty, Steve & Raj. This was followed by coffee and chats with Raj and Steve, and then a run with my brothers, Steve and Darragh, from 6:15 to 7:00 AM. It was sheer bliss, a slice of holiday magic in my everyday life. (You can read more about my morning routine here)
Incorporating the ‘1 Hour Holiday’ into your daily routine isn’t just a pleasant idea – it’s a transformative practice that can significantly enhance the quality of your day to day life. I challenge you to identify a time slot, even if it’s not a full hour, to dedicate solely to activities that bring you joy and relaxation, just like on a holiday. It could be early in the morning, like my sacred 5:30 to 7 AM slot, or a quiet time in the evening. The key is consistency and intentionality. Whether it’s a brisk walk, reading a book, savouring your morning coffee, a lunchtime walk or simply sitting quietly with your thoughts, make this time a non-negotiable date with yourself. Over time, you may find these moments are not just breaks in your routine, but essential components that enrich your entire day.

I deeply appreciate your engagement and comments on these ‘Happier Articles’ that I am writing. I love writing them and I cherish your insights, feedback and comments. If you’ve enjoyed this concept of the ‘1 Hour Holiday’, consider reading some of the other 8 Happier articles I’ve written.
Together, let’s continue to discover and implement small, practical ways to bring more joy and presence into our daily lives. What does your ‘1 Hour Holiday’ look like? Share your thoughts in the comments below and let’s inspire each other to live more fully, every single day.
More ‘Happier’ Articles
More ‘Happier’ Articles

Easy 15-Minute Peanut Satay Noodles
Takes 15 minutes
Serves 3
Ingredients
Ingredients
- 300 g 10.6 oz udon noodles (Japanese style)
For the Peanut Satay Sauce:
- 100 ml 3.4 fl oz coconut cream (the solid part at the top of a can of coconut milk)
- 2 tbsp crunchy peanut butter
- 1 tbsp rice vinegar
- 2 tbsp tamari or soy sauce
- 1 tbsp coconut sugar or brown sugar
- 1 clove garlic
- 1 tsp sesame oil
- Juice of 1/2 lime
- 1/2 thumb-sized piece of ginger
For the Veg
- 1 bunch scallions
- 200 g 7 oz smoked tofu
- 250 g 7 oz of mushrooms of choice, we used oyster mushrooms
- 2 tbsp tamari or soy sauce
- 1 red chilli
For the Garnish
- Handful of roasted peanuts or cashew nuts roughly chopped
Instructions
Instructions
Prepare the noodles:
- Cook the 300g of udon noodles according to the package instructions. Once cooked, drain, rinse and set aside.
Make the satay sauce:
- In a small bowl, combine 100ml coconut cream, 2 tbsp crunchy peanut butter, 1 tbsp rice vinegar, 2 tbsp tamari, 1 tbsp coconut sugar, 1 tsp sesame oil, and the juice of 1/2 lime. Grate 1/2 thumb-sized piece of ginger and the clove of garlic into the sauce and stir well to combine.
Prepare the vegetables:
- Slice 1 bunch of scallions, chop the mushrooms into long strips, and finely dice the red chilli. Cut the tofu into small cubes that are approx 1.5cm cubed. Finely dice the coriander and peanuts for garnish.
Cook the vegetables:
- Add 1 tbsp of oil to a large pan over a high heat, add the mushrooms and cook for 4-5 minutes, stirring regularly, until the mushrooms start to golden and char. Add the scallions, tofu and the red chilli and cook for a further 2 mins. Add the tofu along with 2 tbsp of tamari and cook for another 1 minute.
Mix with noodles:
- Add the drained noodles to the pan along with the sauce and mix well. Toss everything together until the noodles are evenly coated and heated through.
Garnish and serve:
- Serve the noodles garnished with a handful of roughly chopped roasted peanuts or cashew nuts.
- Enjoy this vibrant and nutritious meal that brings a touch of Asia to your dining table with minimal effort and maximum flavour!
Did you know that blood flow can impact pleasure? Poor blood flow can have widespread effects throughout the body, causing digestive issues, poor brain, kidney, heart and skin health, and even affect our sex lives, leading to issues like erectile dysfunction, menstrual irregularities and can affect sensitivity and lubrication. Here we make a beautiful juice to help dilate blood vessels and improve blood flow. We are using our fabulous Nama upright masticating juicer that has a hand free hopper, we have partnered with then as they are so good and you can get a 10% discount with the code: HAPPYPEAR10 AND learn more here
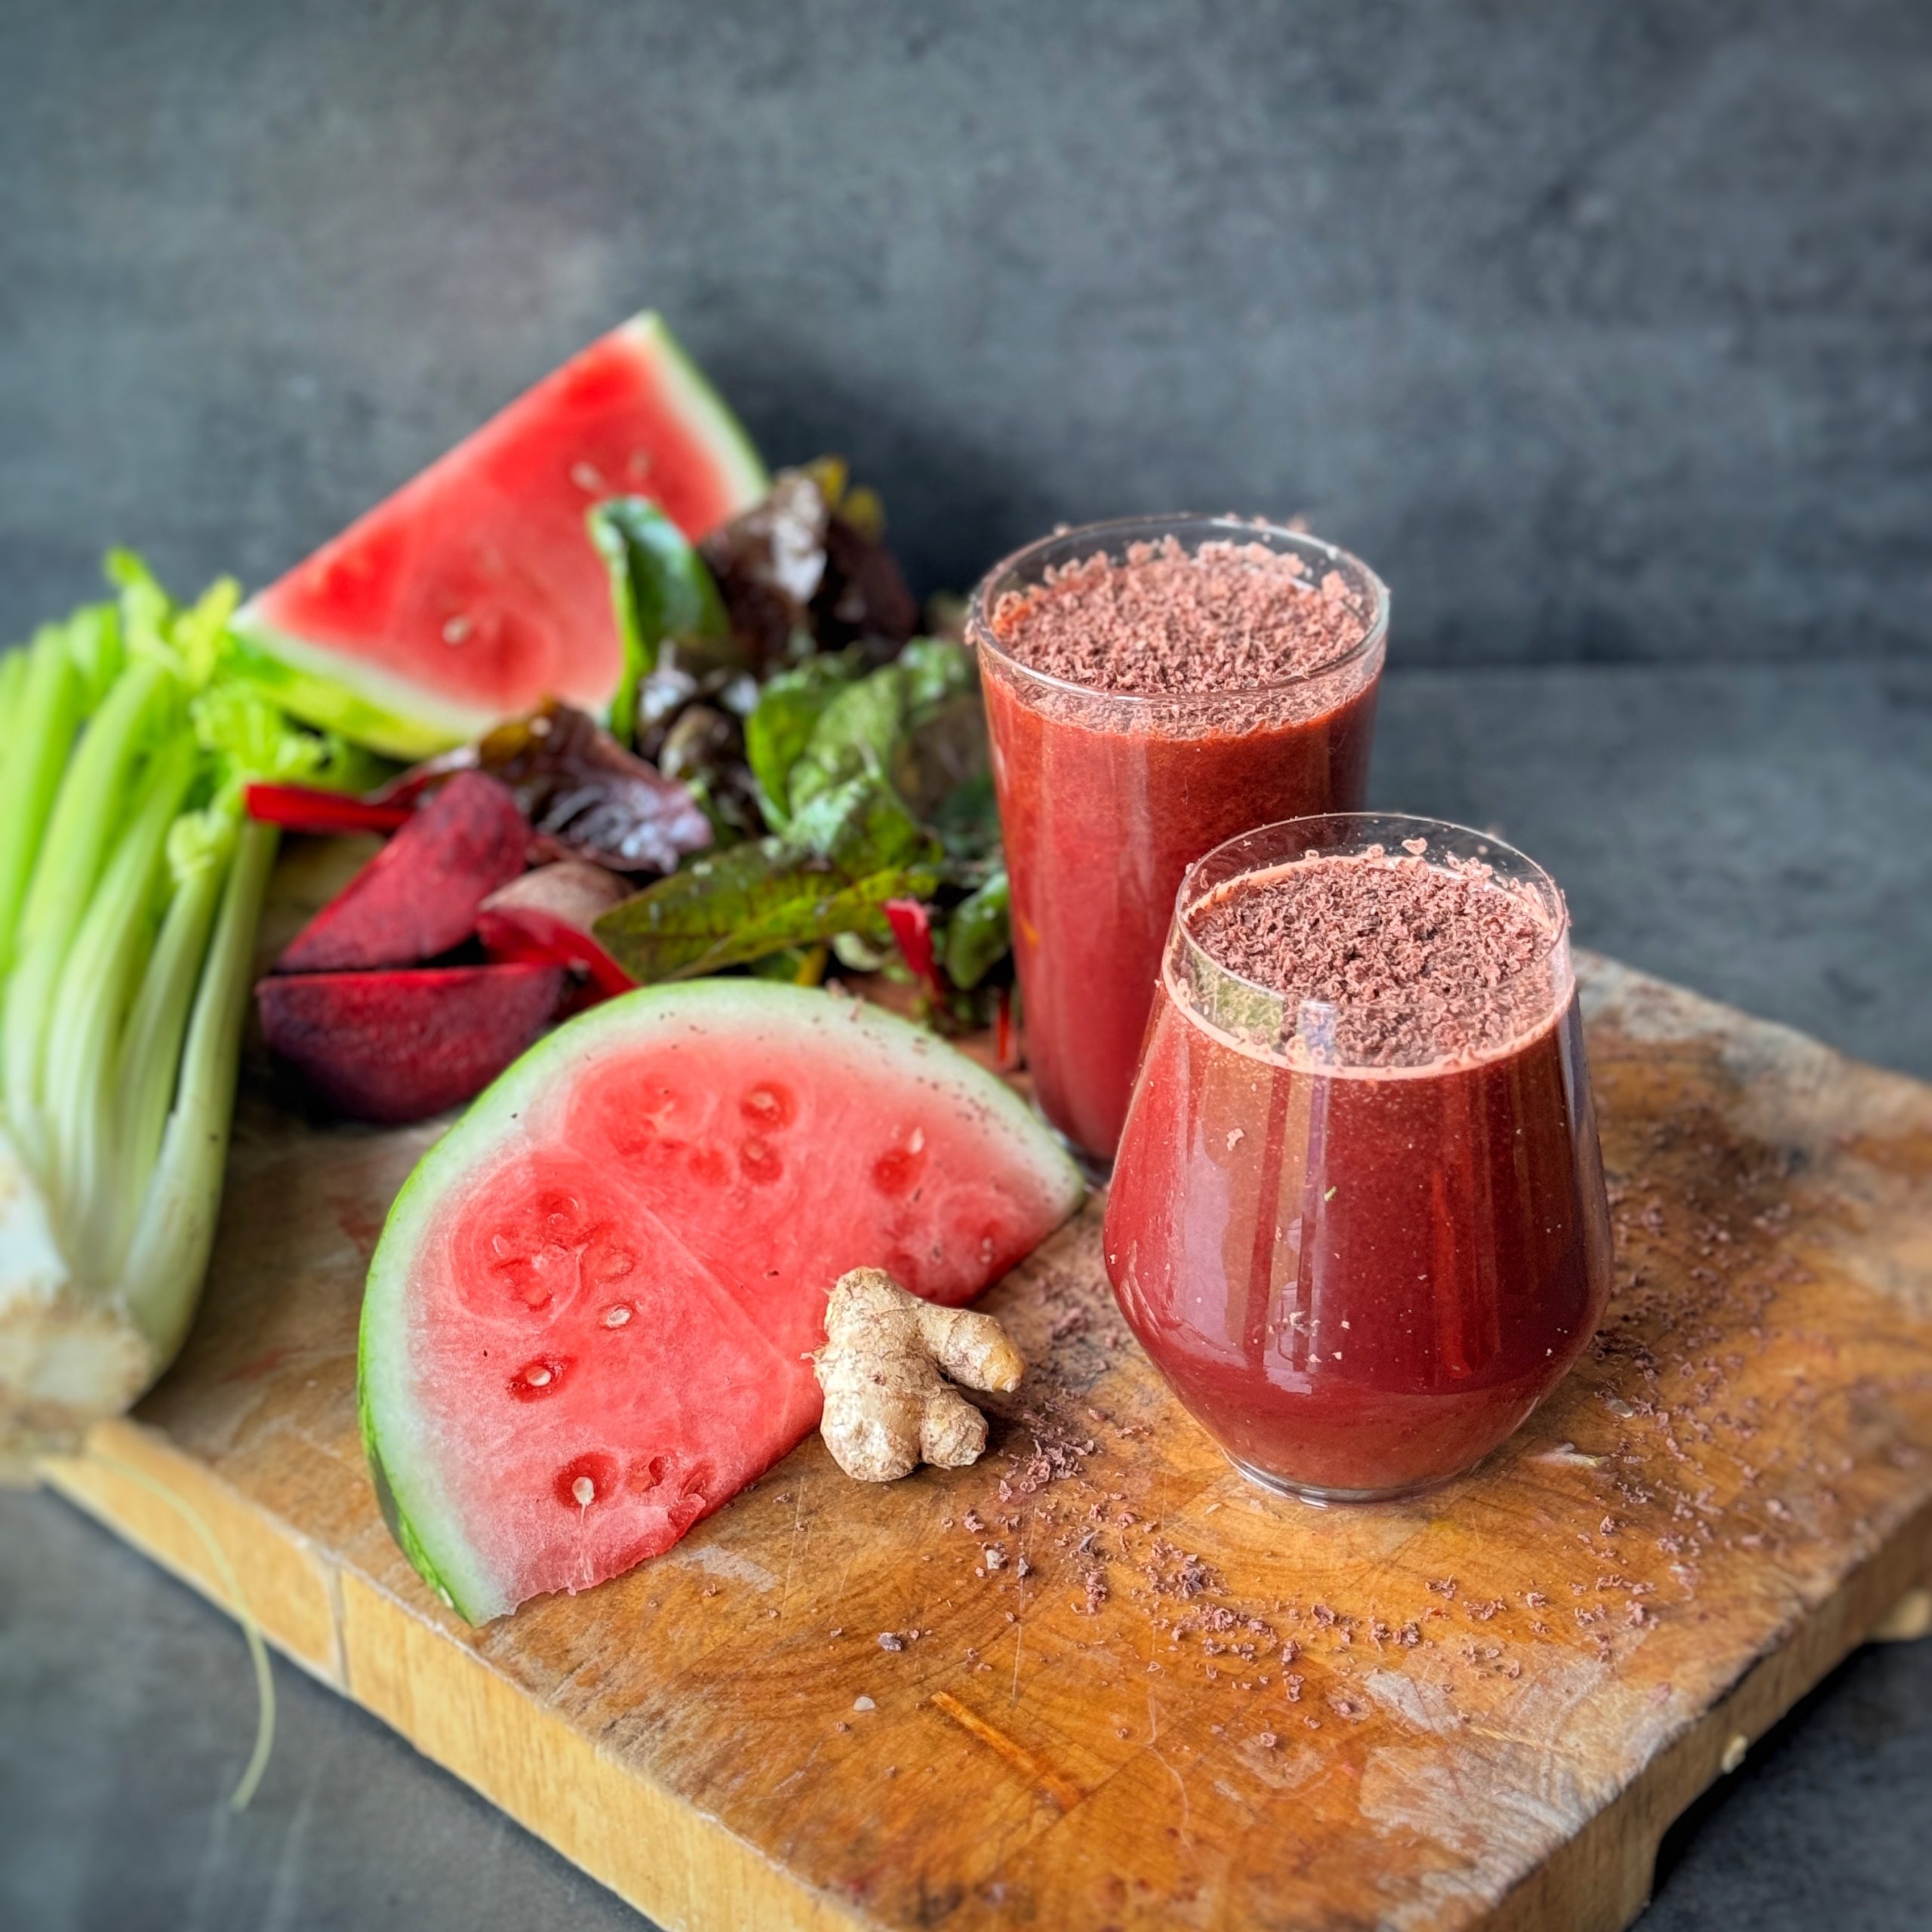
Juice for sexual pleasure
Takes 5 minutes
Serves 4
Ingredients
- 1/2 Watermelon
- Large handful of leafy greens such as chard kale or spinach
- 1 x Grapefruit
- 1 x Orange
- 1 x Lemon
- 8 g 0.28 oz fresh ginger
- 10 g 0.35 oz fresh Turmeric
- 4 stalks of Celery
- 1 medium beetroot
- 20 g 0.7 oz of 100% cocoa chocolate
Instructions
Instructions:
Prepare Ingredients:
- Cut the flesh out of the watermelon and discard the skin.
- Peel the grapefruit, orange, and lemon.
- Cut the beet in half and cut the celery in half lengthwise.
Juicing Process:
- Add all ingredients into the juicer.
Garnish:
- Grate some 100% chocolate on top for a beautiful cacao note that compliments this juice perfectly!
Notes
* Leafy greens like spinach, kale, and Swiss chard are rich in nitrates, which support blood vessel health. We’ve used chard fresh from @thehappypear.farm
* Citrus fruits like oranges, grapefruits, & lemons,have lots of vitamin C and flavonoids, which helps support healthy blood vessels and circulation
* Ginger can help improve blood circulation by stimulating blood flow
* Beets are high in nitrates, which can help dilate blood vessels
* Turmeric helps improve blood flow by reducing inflammation
* Celery contains compounds like phthalides that may help relax blood vessels
The Happy Pear Podcast
Join us as we welcome Dr. Michaeleen Doucleff, an esteemed journalist, and bestselling author renowned for her captivating exploration of parenting practices across cultures.
Episode 164
Dr. Doucleff, author of the New York Times bestseller “Hunt, Gather, Parent,” brings a wealth of expertise to our discussion. With a doctorate in chemistry from the University of Berkeley, California, a master’s degree in viticulture and enology from the University of California, Davis, and a bachelor’s degree in biology from Caltech, her interdisciplinary background informs her unique perspective on parenting. Doucleff has reported for NPR’s global health desk for nearly 14 years, and in 2015, she was part of the team that earned a George Foster Peabody award for its coverage of the Ebola outbreak in West Africa.
Main Topics Covered:
- Embracing traditional parenting practices from diverse cultures
- Insights into the gentle discipline methods of the Inuit community
- Nurturing self-reliance in children, inspired by the Maasai tribe
- Cultivating empathy, resilience, and independence in kids through cross-cultural wisdom
In this enlightening episode, Dr. Doucleff shares profound insights from her latest book, “Hunt, Gather, Parent,” offering transformative wisdom on raising resilient, independent, and empathetic children. Discover the gentle discipline methods of the Inuit community, the Maasai tribe’s approach to nurturing self-reliance, and how embracing traditional wisdom can revolutionise modern parenting. Tune in to unlock invaluable lessons that transcend borders and cultures, empowering parents to foster thriving relationships with their children.
Lots of love,
Dave & Steve
SPONSORS & DISCOUNT CODES:
Namawell Juicers are AMAZING! They have absolutely revolutionised the juicing game. We have an exclusive 10%
Enter the code HAPPYPEAR10
LINK: https://namawell.com/collections/juicers/products/nama-j2-cold-press-juicer?ref=thehappypear
VIVOBAREFOOT: Vivobarefoot Footwear have given our listeners an exclusive 20% discount and if you buy now you also get free access to their incredible course showcasing some of the biggest names in the health and wellness space.
Enter the code HAPPYPEAR20
LINK: https://www.vivobarefoot.com/uk/the-happy-pear
THE HAPPY PEAR RECIPE CLUB – Blending health and happiness through a range of over 500 delicious plant-based recipes.
LINK: https://eu1.hubs.ly/H06JvgK0
Sign up to our Newsletter, for updates on our latest recipes, events, and news.
LINK: https://share-eu1.hsforms.com/1hKXaawjoQOONmJe4EXkCdwf92py
Produced by Sean Cahill & Sara Fawsitt
https://embed.acast.com/6061eea8ca2fec15c01206ed/65c2cc5f73ba2f0016f45d2c
Available now from all good podcast providers:

Cookie Dough Protein Balls
Takes 10 minutes
Serves 12
Ingredients
- 80 g porridge oats or gluten-free oats
- 100 g cashew nuts
- 100 g peanut butter
- pinch of salt
- 1 tsp vanilla extract
- 3 tbsp maple syrup
- 2 tbsp coconut oil melted
- 3 tbsp of chocolate chips
- 100 g chocolate to coat
Instructions
- Blend oats, salt and cashews
- In a food processor blend the oats, salt and cashews for a couple of minutes, until they form fine crumbles
- Add the rest of the ingredients except the chocolate
- Add the remaining ingredients and blend for further 2 minutes. You may need to scrape down the sides of the processor. If it’s too crumbly to form a dough, you can add a couple of tsp water and process again.
- Fold in chocolate chips & roll into balls
- Remove from the food processor and put in a large mixing bowl. Add the cacao nibs/choc chips and fold them right through. It should form a big cookie dough ball!
- Break off pieces and roll into mini balls (or shape into bars if you’d prefer).
- Coat the cookie dough balls in chocolate: Melt the 100g chocolate and drizzle it over the cookie dough balls.
- Store at room temperature for a few days, or refrigerate or freeze for a few weeks.
- Enjoy!
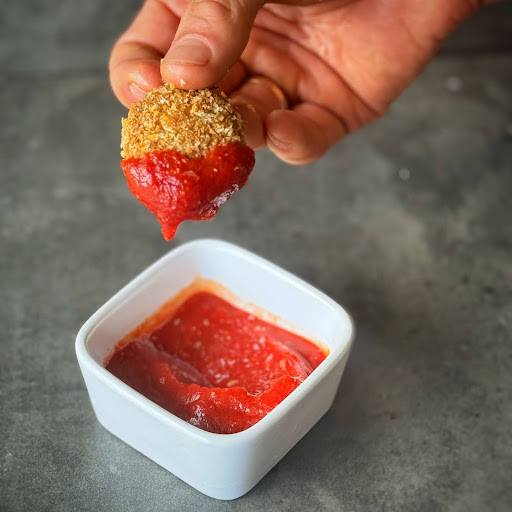
High Protein Nuggets
Takes 25 minutes
Serves 13
Ingredients
- 250 g firm tofu
- 2 tbsp tamari (soy sauce)
- 1 tbsp maple syrup
- 1/2 tbsp clear vinegar (apple cider vinegar)
- 1 tsp garlic powder
- 2 tbsp cornflour (cornstarch)
- 50 g breadcrumbs (panko breadcrumbs)
Sticky Spicy Sauce:
- 4 tbsp chilli sauce
- 1 tbsp tamari
- 1.5 tbsp maple syrup
Easy Quick Ketchup Sauce:
- 2 tbsp tomato concentrate or tomato puree
- 1.5 tbsp maple syrup
- 1 tbsp vinegar
- 1/2 tsp salt
- 1/2 tsp garlic powder
Instructions
Preheat Oven or Air Fryer:
- Preheat air fryer or oven to 200°C (400°F).
Prepare Tofu Mixture:
- Grate the tofu into a bowl using a fine grater.
- Add tamari, maple syrup, vinegar, garlic powder, and corn flour. Mix well until combined.
Shape Nuggets:
- Using clean hands, shape the tofu mixture into nuggets.
- Compress each nugget to squeeze excess moisture to the surface and to help them hold their shape.
- Roll each nugget in breadcrumbs to coat evenly.
Bake Nuggets:
- Spray nuggets with oil to encourage crisping.
- Bake for 8-10 minutes until golden brown.
- Flip nuggets, spray with more oil, and bake for an additional 2-3 minutes until golden brown all over.
- If using an oven you may have to bake for longer, you want them to be golden and crispy.
Prepare Sauces:
- For the sticky sauce, mix all ingredients in a bowl until well combined.
- For the ketchup, mix all ingredients in a bowl until well combined.
Coat Nuggets:
- Take half of the nuggets and coat them in the sticky spicy sauce.
- Bake coated nuggets for an additional 5 minutes.
- Remove from the oven and enjoy.
- Serve the remaining half of the nuggets with the ketchup.
- Enjoy!

‘Happier’ With Dave Flynn
‘Happier’
Managing your expectations

I’ve always been an optimist, seeing the glass as half full—yet, it’s taken me years to understand that sometimes, what fills the glass isn’t as important as appreciating that there’s something in it at all.
Please don’t be mistaken to believe that I am telling you to dream less or have small, limited visions for your life. I very much have dreams and visions myself. However, managing your expectations is a powerful strategy for feeling happier by ‘getting the goal posts to stop moving’. In a world where we are constantly told that you can have it all, learning when enough is enough is one of the greatest gifts you can have. Socrates, the classical Greek philosopher, said “Contentment is natural wealth, luxury is artificial poverty.” This quote captures the idea that true wealth comes from being content with what one has, rather than constantly seeking more, which can lead to a sense of lack or poverty regardless of one’s material possessions.
Think about the friends and family in your life who’ve said things like, “I’ll be happy when I get that new car,” or “Everything will be perfect once we buy our first house.” You’ve probably seen their excitement as they reached those milestones. Yet, it seems like as soon as they achieve these goals they set their sights on something bigger or better — a larger house, a more luxurious car. It’s a cycle that might be all too common, where today’s dream quickly becomes tomorrow’s starting point for the next big chase. Isn’t it interesting how our expectations and markers for happiness tend to shift just as we reach them?
For example, I cherish the period between Christmas Day and New Year’s Day—a time that feels like an endless succession of Sundays. In the past, I used to dedicate this time to reflect and craft extensive lists of goals for every aspect of my life for the year ahead. I was a committed over achiever!! Looking back, the mere thought of that exhaustive process overwhelms me! Over the last five years, I’ve consciously simplified my approach. Now, my goals are much simpler: to slow down, to be kinder, and to become more self-aware. These goals may not fit the conventional SMART criteria (specific, measurable, achievable, relevant and time bound), being more nebulous in nature, but they serve as accessible guiding principles that are firmly within my control, independent of external expectations.
I’ve found that keeping expectations simpler, or even a bit on the low side, can actually make you happier. It might sound odd, especially in a culture that’s all about “you can achieve anything if you work hard enough,” but sometimes, simplicity and contentment bring the most joy.
I find that the real challenge in today’s culture, which promises that you can have it all—from perfect bodies and millionaire status to ideal relationships and a life as a digital nomad basking in the sun half the year—is keeping the goalposts from constantly moving. This relentless shifting of goals can lead to perpetual dissatisfaction, as we chase an ever-evolving standard of success that seems always just out of reach.
The Trap of an Ever-Increasing Monthly Salary

Comedian Bill Hicks once joked, “The greatest drugs are heroin and a monthly salary,” highlighting how people’s spending habits often increase in correlation as they earn more. This pattern, known as lifestyle inflation, means that even with higher salaries, we might not feel richer because we’re always upgrading our spending and lifestyles to reflect our salary. This cycle can prevent us from feeling financially secure or truly satisfied, despite higher earnings.
This links to the idea that lowering your expectations can lead to greater happiness. Just like controlled spending can make you financially happier, keeping your life goals realistic can prevent the constant dissatisfaction of always wanting more. I strive to appreciate what I have instead of always seeking more as I believe it is an easier road to contentment. This applies not just to money, but also to personal goals and lifestyle choices. However I am aware that I struggle with moving goal posts too.
I’ve definitely been a victim of unrealistic expectations myself, only to face the ensuing disappointment. In school I would set very high expectations for exams and was more often than not disappointed by my grades particularly in reference to my twin brother Steve’s who were usually higher!!
Everything is relative
Over 275 years ago, Montesquieu, a French Philosopher, noted that seeking happiness would be simple if we only desired to be happy ourselves. However, our challenge arises because we strive to be happier than those around us, and we often believe others are happier than they truly are.
Everything is relative. Professional tennis player Naomi Osaka said that winning a tournament didn’t make her feel good. “I feel more relieved than anything else,” she stated. The journey felt more fulfilling than reaching my goal, she added. The pressure and expectation it seems took some of the joy out of actually reaching her goal.
I wrote about the importance of embracing your inner child a few weeks ago, highlighting how children are naturally adept at living in the moment with minimal expectations. They find immense joy in simple pleasures and play, effortlessly embodying a mindset many adults strive to regain. This perspective ties into the larger theme of managing expectations. As adults, we often let fancy goals for what we think we need overshadow our appreciation for what we actually have.
Expectations and Money: …
The 1950s in the USA are often remembered as a time of great prosperity. However, by almost every standard of living metric, Americans were less well-off then than they are today. The average household income, adjusted for inflation, was around $29,000, compared to $72,000 today. Additionally, the average home size was one-third smaller and typically housed more people.
Despite this, the era had a much narrower wealth gap. Rich and middle-class families often owned similar types of cars, wore the same kinds of shoes, and both saw camping holidays as socially acceptable. Hand-me-down clothes were commonly worn without stigma. This resulted in less comparison among individuals, as most people enjoyed a similar standard of living and salary differences were less pronounced.
I feel like today, our expectations are heavily shaped by the marketing strategies of large corporations and a consumer-centric culture. The advent of social media and the internet might have intensified our tendency to compare our lives to often unrealistic standards set by others. This shift could have fundamentally altered our perception of success and significantly impacted our overall sense of contentment.

I invite you to reflect on where you were 10 years ago compared to where you are now. It’s likely that you’ve made significant progress, even if it doesn’t always feel that way, especially when you find yourself comparing yourself to those you admire or aspire to be. Looking back at my own dreams from a decade ago, I realise that I am, more or less, living many of those dreams today. For example, I remember visiting a organic food supplier of ours in Holland 10 years ago, outside their massive facility was a space for the two owners cars which were electric and charging. I was very impressed. Roll on 10 years later, Steve and my cars are both electric (Toyota Bz4) and are plugged in most days outside our large food production facility. However, I must admit that I haven’t always taken the time to fully appreciate and savour this reality.
Your input
To manage my own expectation and goals, I find it is crucial to occasionally pause and truly recognise how far I have come. And I invite you also to consider setting aside some quiet time to reflect on the dreams and goals you had 10 years ago and how they align with your life today. Celebrate the milestones you’ve achieved. This isn’t just about patting yourself on the back; it’s an essential practice in grounding your expectations. Recognising your progress helps give perspective on your current life and future aspirations, allowing you to more fully enjoy the present instead of always chasing the next big thing.
In wrapping up, managing expectations is not about limiting our dreams or settling for less, but rather fostering a mindset that appreciates contentment and the simplicity of life. This approach frees us from the relentless pursuit of more, allowing us to enjoy what we already have. Picture the serenity that comes not just from achieving but from being truly satisfied with the present moment.
I invite you to share your thoughts and experiences in the comments below. How do you balance your ambitions with the pursuit of contentment? What practical steps do you take to appreciate your achievements without constantly seeking more? Let’s exchange ideas and learn from each other how to cultivate a life that celebrates both growth and satisfaction. Your insights can inspire and guide us all in redefining success to focus more on personal well-being and less on perpetual striving.
More ‘Happier’ Articles
This juice is absolutely packed with nutrients, and contains foraged weeds that are free and likely growing right on your doorstep and are packed with all kinds of nutrients and minerals. Nettles are nature’s little gems, packed with more iron than your average spinach and boasting some serious detoxifying power. Dandelion leaves are rich in vitamins, minerals, and antioxidants, and can help support digestion, liver health, and radiant skin. Cleaver, also known as stickyback weed or goosegrass, is packed with nutrients and detoxifying properties, helps support skin health, aids digestion, and promotes overall well-being. We came up with this recipe with our friends from Namawell juice company who make amazing juicers, that we love – learn more about them here and use the code: HAPPYPEAR10 for 10% off
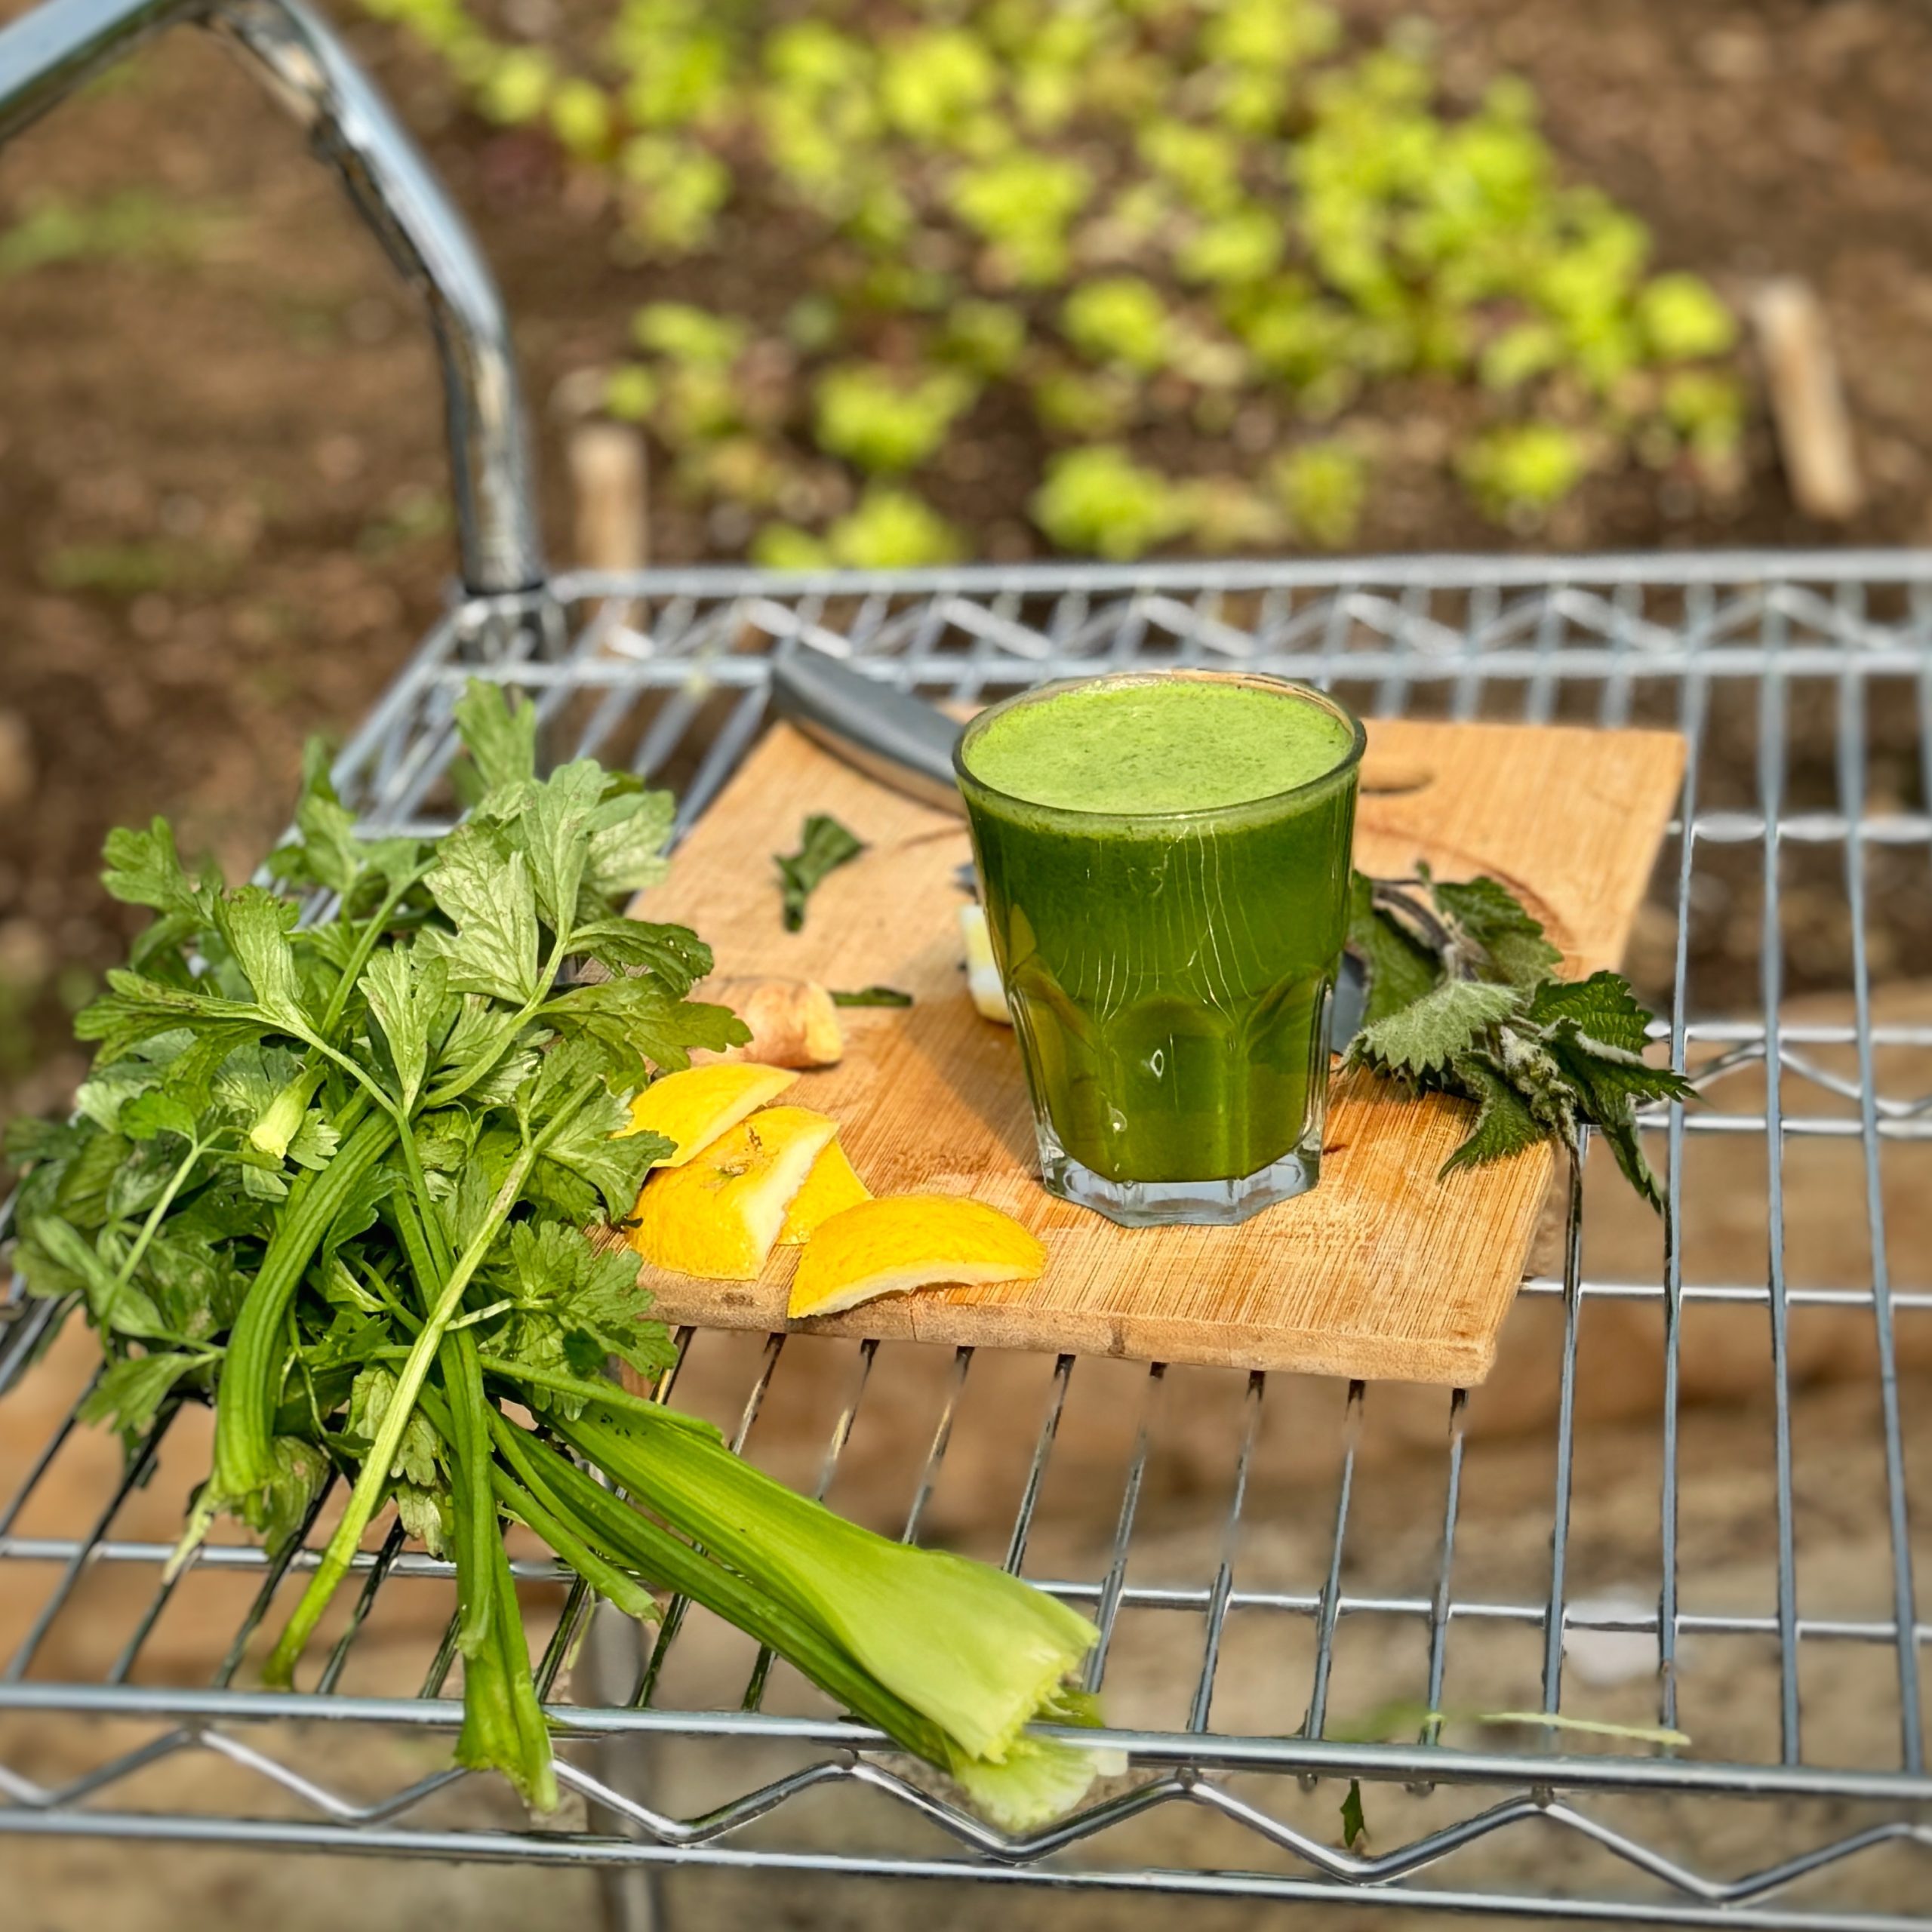
Wild Nettle & Weed Juice
Takes 10 minutes
Serves 3
Ingredients
- 3 large handfuls of weeds of choice we’ve used dandelion leaves, wild stinging nettles & cleaver
- 3 apples
- Juice of ½ lemon
- 4 stalks of celery
Instructions
- Give your foraged greens a good wash and soak.
- Add all ingredients into the hopper of your juicer and juice.
- Add more apples if you want a sweeter juice
- Enjoy this powerhouse of juice!
The Happy Pear Podcast
Join us this week for an insightful conversation on plant-based parenting with guests Alexandra Caspero and Whitney English of Plant-Based Juniors. As Registered Dietitians, mothers, and founders of Plant-Based Juniors, Alex and Whitney bring a wealth of expertise to the table, offering evidence-based guidance on raising healthy, conscious kids.
Episode 163
Alexandra Caspero and Whitney English are Registered Dietitians, mothers, and founders of Plant-Based Juniors, a go-to resource for evidence-based guidance on raising healthy, conscious kids. They are the authors of The Plant-Based Baby and Toddler, the Predominantly Plant-Based Pregnancy Guide, First Bites, and more. Along with Dr. Reshma Shah, they founded the Learning Center to offer professional paediatric nutrition courses, and fun, interactive courses for parents and caregivers.
Main topics covered:
- Navigating picky eating
- Ensuring adequate nutrient intake
- Fostering a positive relationship with food
- Introducing new foods to children
- Debunking common myths surrounding plant-based diets for kids
- Guidance on meal planning and preparation
- Tips for packing nutritious lunches
- Creative ideas for incorporating more fruits and vegetables into family meals
Tune in to discover how you can nourish your family with delicious, plant-based meals and foster a lifelong love of wholesome eating in your children. Whether you’re a seasoned pro or just starting out on your plant-based parenting journey, this episode is sure to leave you feeling inspired and empowered to create nourishing, plant-powered meals for your family.
Lots of love,
Dave & Steve
SPONSORS & DISCOUNT CODES:
Namawell Juicers are AMAZING! They have absolutely revolutionised the juicing game. We have an exclusive 10%
Enter the code HAPPYPEAR10
LINK: https://namawell.com/collections/juicers/products/nama-j2-cold-press-juicer?ref=thehappypear
VIVOBAREFOOT: Vivobarefoot Footwear have given our listeners an exclusive 25% discount and if you buy now you also get free access to their incredible course showcasing some of the biggest names in the health and wellness space.
Enter the code HAPPYPEAR25
LINK: https://www.vivobarefoot.com/uk/the-happy-pear
THE HAPPY PEAR RECIPE CLUB – Blending health and happiness through a range of over 500 delicious plant-based recipes.
LINK: https://eu1.hubs.ly/H06JvgK0
Sign up to our Newsletter, for updates on our latest recipes, events, and news.
LINK: https://share-eu1.hsforms.com/1hKXaawjoQOONmJe4EXkCdwf92py
Produced by Sean Cahill & Sara Fawsitt
https://embed.acast.com/6061eea8ca2fec15c01206ed/65c2cc5f73ba2f0016f45d2c
Available now from all good podcast providers:

‘Happier’ With Dave Flynn
‘Happier’
Self Worth
As I sit here, eating my porridge after a busy morning of school runs, lunch boxes, breakfasts, sea swims and the usual hustle and bustle of a morning. I reflect on where I get my self worth from? Is it intrinsic like my baby daughter Fia or is my self worth more attached to my social standing and my achievements? I think it is likely more externally derived than I would like.
In a world that constantly pushes us toward the next big achievement, it’s easy to fall into the trap of believing that our value is tied to our productivity or success. But what happens when we shift our focus inward and start valuing ourselves for just ‘being’? I find that this shift isn’t just liberating; it’s a fundamental reconnection with the essence of who we truly are.
Last week, we explored the idea of ‘feeling enough’ and how our sense of self-worth often gets tangled with external achievements and comparisons. In this week’s Happier Column, I want to explore practical steps to cultivate this deeper acceptance and learn to live a life defined not by what we do, but by who we are at our core.
I want to share with you some practices that I do to help nurture my sense of self-worth. Pick and choose the ones that resonate with you, there is no one size fits all approach. I’ve found that cultivating a strong sense of intrinsic worth is an active, ongoing process. It’s about making small, intentional choices each day that reinforce the belief that you are enough just as you are.
How can we cultivate more intrinsic self worth?
For me, the process always begins with awareness, being mindful of when I make automatic habitual decisions from a place of fear or insecurity, when I am ‘holding on too tight to life’ and don’t embody that deeper sense of trust. A few of these are actual practices and others are more mindsets and nebulous that help me feel enough:
- Be kind to yourself

It all starts with kindness. You are worthy. You exist for so many reasons and your life is not defined by your external achievements. I am reiterating this to myself as much as to you! Proactively cultivating a more loving relationship with yourself is at the core of it all. Life has its light and dark, each of us has a shadow side. I find the more I can make peace and accept my shadow side the more whole I feel. Kindness can serve as fundamental to every other practice, and can be as big or as small as you like it to be. For example, I am cultivating a mindset of kindness even if I fail to get half of what I plan to in a day.
- Journal to write down your fears and insecurities
Personally, I am a super big fan of journaling! A blank page always accepts my worries and problems without judgement! I do two types of journaling, the first one is a so-called ‘brain dump’ style of journaling, which is basically just emptying all your thoughts on the page with no intention other than to express it. It can be very cathartic.
The second one is a more intentional form of journaling, where you have certain questions/prompts that focus your journaling. In terms of self worth here are some journaling prompts I frequently use:
- When do I feel like an imposter?
- When am I not kind to myself?
- When am I not loving to myself?
- What drives me to achieve?
- Practice gratitude
This is a daily practice! It takes intentionality and awareness to focus on what you have rather than what you don’t have. Humans innately have a ‘negativity bias’, which has helped us survive, it is evolutionarily essential, however thinking negatively does not help us to feel happier. This is why it takes practice to really focus on how abundant your life is.
Everything is relative – to someone in prison your freedom is invaluable, to someone who cannot move, being able to move is the greatest gift of all, to those without food, any food is such a blessing.
I very much practice being grateful on a daily basis. Before dinner every evening, my wife and I have got in the habit of taking a few moments to say thanks for the meal we are about to eat and to think of all the millions of things that had to come into place for this meal to be in front of us, it is simple yet very worthwhile.
- Lower your expectations
Let me share a quick example: Children are generally the personification of free and self loving, their expectations of themselves are also low, as their main goal is to play and be around their friends and parents.
Observing my own expectations, I find that hoping and dreaming for wonderful things but lowering my expectations very much leads to a happier me! If you lower your expectations you are less likely to be disappointed. Lowering your expectations helps you to focus on what you have and to be grateful for it.
- Turn some of your routines into rituals
I wrote about this in my first Happier column. Like me, you likely have lots of mundane routines in your life that you can’t avoid, doing the dishes, cooking dinner, cleaning. I do my best to lean into these infusing them with a little more ritual, a sprinkle of ceremony that reminds me to be ‘here & now’ with the task at hand! This might just be as simple as taking my time and doing my best to find joy in the task at hand!
For those curious to dig deeper, read more in Happier Column 3
- Be aware of your ‘inner child’
In each of us lives an ‘inner child’ with dreams and hopes and a ferocious appetite to play, imagine and create! Adults are grown up children, how can you reconnect to this part of yourself? What activities feed this part of who you are?
For me, running, yoga, swimming in the sea, writing, being in nature and spending time with my kids help me connect with my inner child. Its the activities that help you to feel free when you get lost in the moment and there is no future purpose other than the momentary joy!
Read more in my previous Happier Column here
- Challenge negative self-talk
We all have an inner critic. Yours likely has different ‘tracks’ that it plays on repeat to mine. Becoming aware of your inner critic and actively challenging it is key to taking power from it. When you catch yourself engaging in negative self-talk, I encourage you to counter it with affirmations of your intrinsic worth.
For example, replace thoughts like “I am a failure because x” with “I am valuable just as I am and always have been and always will be”
- Cultivate more presence
Ultimately, the more we can spend time in the “here and now” the more likely do we feel whole and enough. Thoughts of the past might be stressful and thoughts of the future could be anxiety ridden. I find the best gateways for me are using my 5 senses that bring me back into my body. Another reason why cold sea swimming is so effective for me!
- Get lost in the process
A mantra I have been repeating in my own head this year is: “Focus on the process not the result”.
The more I can get lost in the process and not focus on the result, the more likely the result will be better! I know this might sound very basic to most of you, but in a multisensorial external world it is also so easy to be drawn toward external goals to fulfill our internal insecurities. However, the more we can focus on this step, the more likely we are to reach the destination we desire.
- Support relationships & community
Any relationship that you have that accepts you for exactly who you are affirms that you are enough. In our digital age, real world in person relationships really stack up in terms of their benefits on every aspect of our wellbeing. I meet Steve and Raj most mornings and we go for a sunrise swim. I run with my brothers and friends a couple of times a week at 6am and these are like therapy sessions. We chat and share our problems and always feel lighter at the end!

To summarise these 10 tools, I find that an intrinsic sense of self worth is one of life’s real treasures, often more so than many of the coveted social accolades many of us strive for.
As we wrap up this week’s column, I encourage you to reflect on your own journey. What daily rituals could you turn into mindful practices? How can journaling or gratitude reshape your day? Remember, the goal is not to seek perfection but to foster an environment where you can celebrate being authentically you.
I’d love to hear from you about your experiences and insights. What practices have you found effective in nurturing your sense of self-worth? Are there challenges you’ve faced in this journey that you’d like to share? Your stories and questions not only enrich our community but also deepen our collective understanding of what it means to truly feel ‘enough.’
Please feel free to leave your thoughts in the comments below, or reach out via email or social media. Let’s continue this important conversation and support each other in our quests to live more fulfilled and self-accepting lives. Remember, each step you take in embracing yourself enriches not only your own life but also the lives of those around you. Let’s keep learning and growing together, celebrating each moment of our journey towards a deeper self-acceptance.
More ‘Happier’ Articles
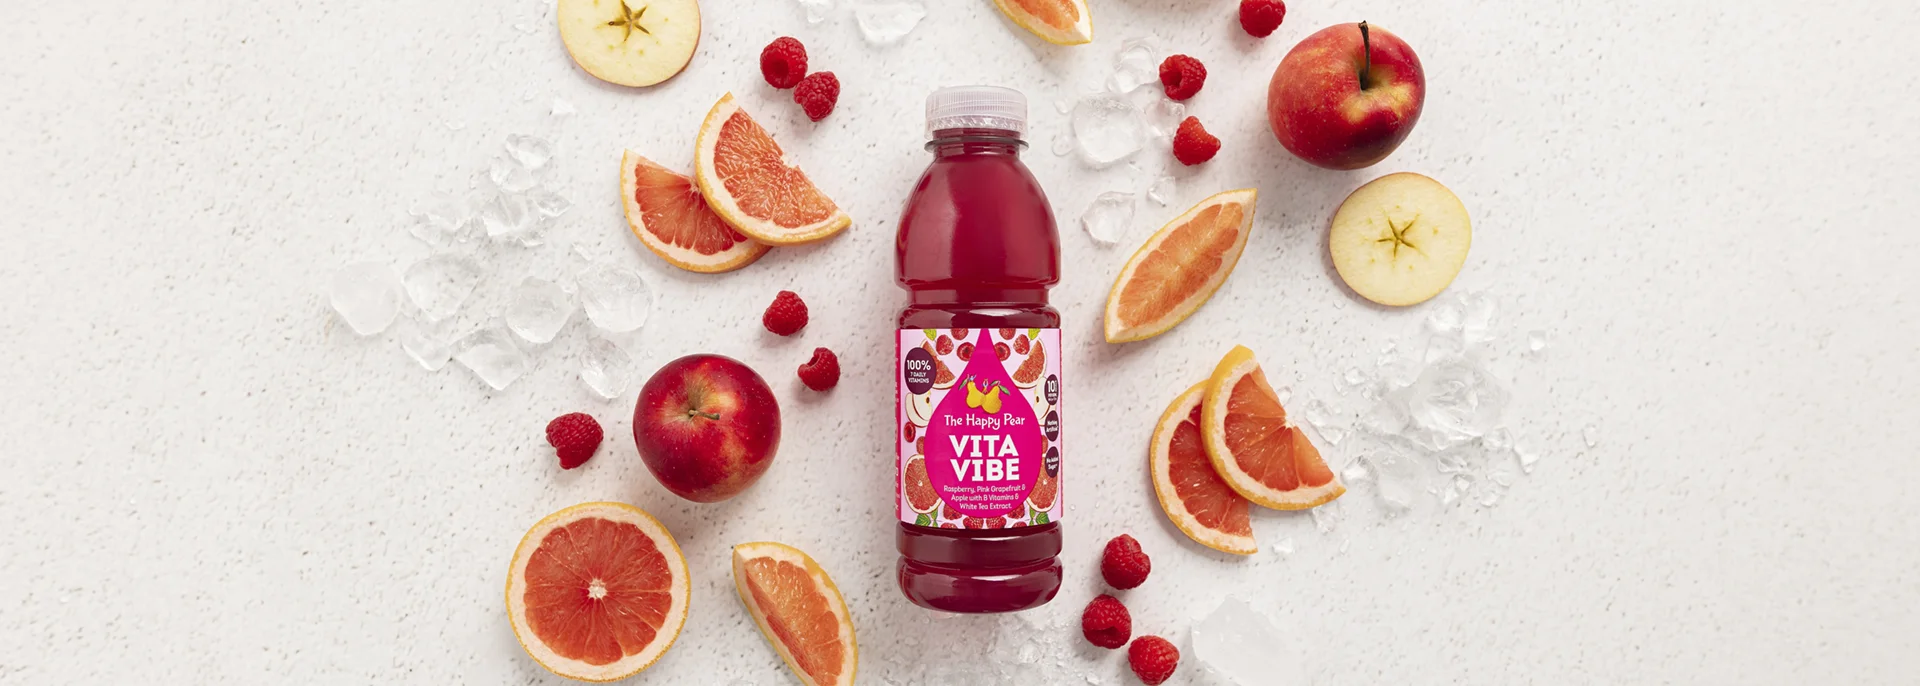
This delicious tasting Raspberry, Pink Grapefruit & Apple drink is not only packed with 100% of 7 daily B vitamins and you can enjoy it knowing that there is no added sugar and nothing artificial within. What makes it more unique is that these beauties are sweetened with natural compounds from stevia leaves rather than the more common sucralose.
INGREDIENTS
Irish Spring Water, Apple Juice from Concentrate (12%), Raspberry Juice from Concentrate (4%), Stabiliser (Gum Arabic), Natural Flavouring – Steviol Glycosides, Acid (Malic Acid), Natural Raspberry Flavouring, Fruit and Vegetable Concentrates (Sweet Potato, Apple, Radish, Cherry), White Tea Extract, Natural Pink Grapefruit Flavouring, Natural Apple Flavouring, Antioxidant (Ascorbic Acid), Niacin, Pantothenic Acid, Vitamin B6, Vitamin B1 (Thiamin), Folic Acid, Biotin, Vitamin B12.
ALLERGEN INFORMATION
There are no allergens associated with this product
NUTRITIONAL INFORMATION
| Typical | per 100ml |
|---|---|
| Energy | 41kJ |
| 10kcal | |
| Fat | 0g |
| of which: Saturates | 0g |
| Carbohydrates | 1.9g |
| of which: Sugars | 1.4g |
| Fibre | 0g |
| Protein | 0g |
| Salt | 0g |
| Vitamin B6 | 0.28mg |
| Vitamin B12 | 0.5μg |
| Folic Acid | 40μg |
| Niacin | 3.2mg |
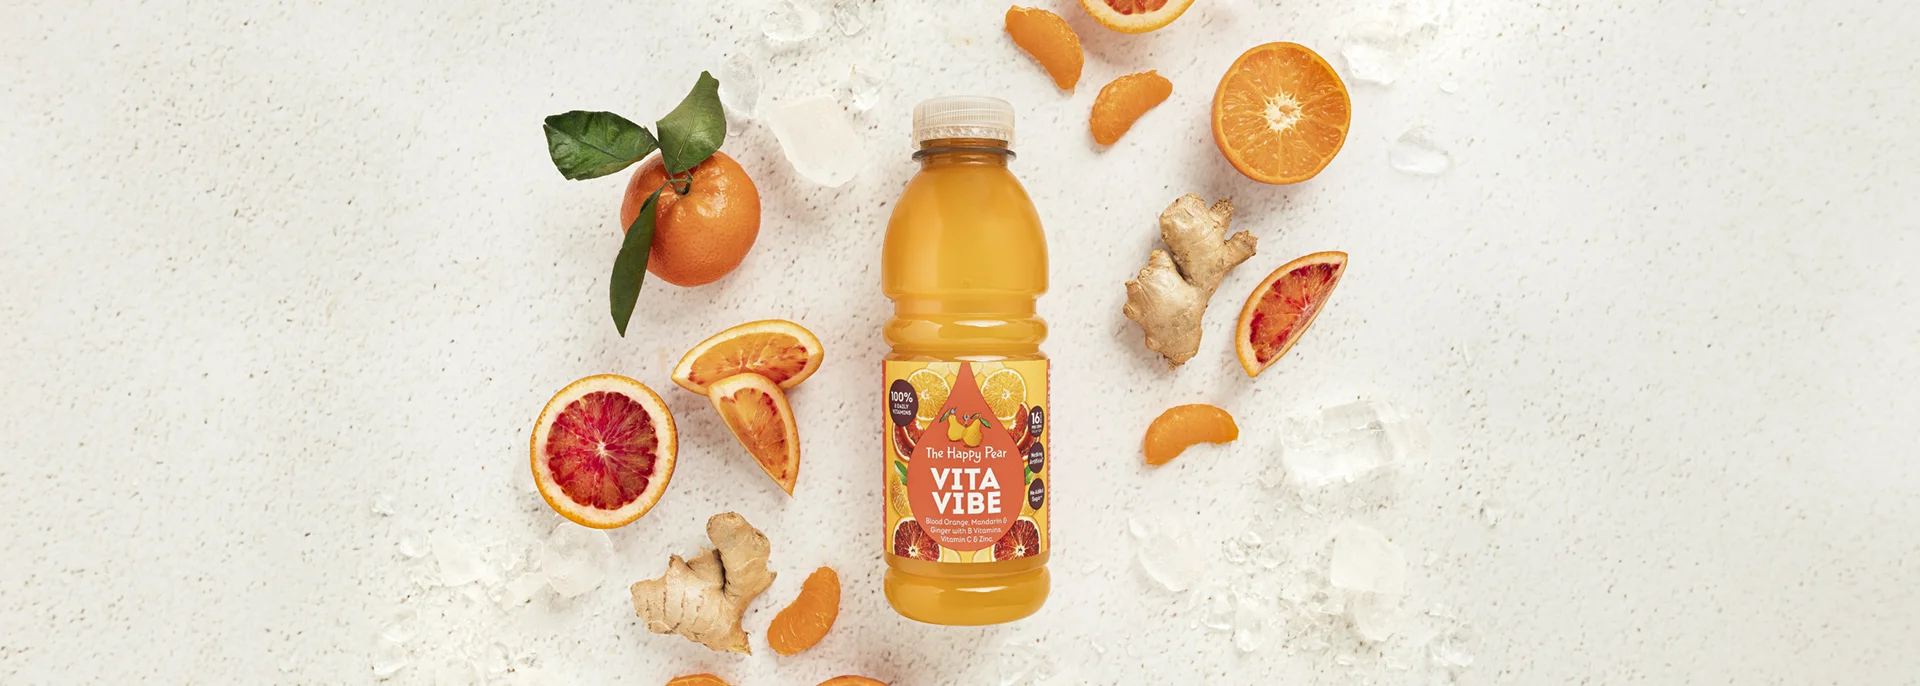
This fab tasting Blood Orange, Mandarin and Ginger drink is not only packed with 100% of 7 daily B vitamins and you can enjoy it knowing that there is no added sugar and nothing artificial within. What makes it more unique is that these beauties are sweetened with natural compounds from stevia leaves rather than the more common sucralose.
INGREDIENTS
Irish Spring Water, Orange Juice from Concentrate (20%), Mandarin Juice from Concentrate (11%), Ginger Juice (2%), Natural Blood Orange Flavouring, Natural Flavouring – Steviol Glycosides, Vitamin C, Acid (Malic Acid), Stabiliser (Gum Arabic), Colour (Carotenes), Natural Ginger Flavouring, Natural Mandarin Flavouring, Niacin, Pantothenic Acid, Vitamin B6, Vitamin B1 (Thiamin), Folic Acid, Biotin, Vitamin B12, Zinc.
ALLERGEN INFORMATION
There are no allergens associated with this product
NUTRITIONAL INFORMATION
| Typical | per 100ml |
|---|---|
| Energy | 67kJ |
| 16kcal | |
| Fat | 0g |
| of which: Saturates | 0g |
| Carbohydrates | 3.5g |
| of which: Sugars | 2.5g |
| Fibre | 0g |
| Protein | 0g |
| Salt | 0g |
| Vitamin C | 16mg |
| Vitamin B6 | 0.28mg |
| Vitamin B12 | 0.5μg |
| Folic Acid | 40μg |
| Niacin | 3.2mg |
| Zinc | 2mg |
This genuinely delicious tasting Apple, Elderflower and Lime drink is not only packed with 100% of 7 daily B vitamins and you can enjoy it knowing that there is no added sugar and nothing artificial within. What makes it more unique is that these beauties are sweetened with natural compounds from stevia leaves rather than the more common sucralose.
INGREDIENTS
Irish Spring Water, Apple Juice From Concentrate (31%), Stabiliser (Gum Arabic), Acid (Malic Acid), Natural Flavouring, Steviol Glycosides, Natural Apple Flavouring, Maté Tea Extract, Antioxidant (Ascorbic Acid), Natural Lime Flavouring, Natural Elderflower Flavouring, Niacin, Pantothenic Acid, Vitamin B12, Vitamin B6, Vitamin B1 (Thiamin), Folic Acid, Biotin, Colours (Carotenes, Copper Chlorophyllin)
ALLERGEN INFORMATION
There are no allergens associated with this product
NUTRITIONAL INFORMATION
| Typical | per 100ml |
|---|---|
| Energy | 65kJ |
| 15kcal | |
| Fat | 0g |
| of which: Saturates | 0g |
| Carbohydrates | 3.4g |
| of which: Sugars | 3.1g |
| Fibre | 0g |
| Protein | 0g |
| Salt | 0g |
| Vitamin B6 | 0.28mg |
| Vitamin B12 | 0.0.5μg |
| Folic Acid | 40μg |
| Niacin | 3.2mg |
This fella’s a super tasty and convenient snack that will help power up your mid-morning or mid afternoon in not only a yummy but healthy way. We love snacking on them straight after exercise or bringing them on hikes. It’s size makes it super handy for bringing in your bag, lunchbox or even coffee cup holder in the car.
INGREDIENTS
Hummus (60%) [Cooked Chickpeas (29%)(Chickpeas, Water), Rapeseed Oil, Tahini (8.8%) (Sesame Seeds), Water, Lemon Juice Concentrate, Garlic (0.7%), Sea Salt, Cumin, Cayenne],
Wholegrain Oat Crackers (40%) [Gluten Free Wholegrain Oats (34%), Sustainable Palm Fruit Oil, Maize Starch, Raising Agent (Ammonium Bicarbonate), Sea Salt, Brown Rice Syrup]
ALLERGEN INFORMATION
For allergens, see highlighted ingredients.
May also contain traces of Nuts and Milk.
NUTRITIONAL INFORMATION
| Typical | per 100g |
|---|---|
| Energy | 1577kJ |
| 379kcal | |
| Fat | 24g |
| of which: Saturates | 4.5g |
| Carbohydrates | 29g |
| of which: Sugars | 2.3g |
| Fibre | 6.2g |
| Protein | 8.6g |
| Salt | 1g |

This fella’s a super tasty and convenient snack that will help power up your mid-morning or mid afternoon in not only a yummy but healthy way. We love snacking on them straight after exercise or bringing them on hikes. It’s size makes it super handy for bringing in your bag, lunchbox or even coffee cup holder in the car.
INGREDIENTS
Hummus (60%) [Cooked Chickpeas (29%)(Chickpeas, Water), Rapeseed Oil, Tahini (8.8%) (Sesame Seeds), Water, Lemon Juice Concentrate, Garlic (0.7%), Sea Salt, Cumin, Cayenne],
Wholegrain Oat Crackers (40%) [Gluten Free Wholegrain Oats (34%), Sustainable Palm Fruit Oil, Maize Starch, Raising Agent (Ammonium Bicarbonate), Sea Salt, Brown Rice Syrup]
ALLERGEN INFORMATION
For allergens, see highlighted ingredients.
May also contain traces of Nuts and Milk.
NUTRITIONAL INFORMATION
| Typical | per 100g |
|---|---|
| Energy | 1615kJ |
| 388kcal | |
| Fat | 25g |
| of which: Saturates | 4.5g |
| Carbohydrates | 30g |
| of which: Sugars | 1g |
| Fibre | 4.7g |
| Protein | 8.4g |
| Salt | 1.3g |
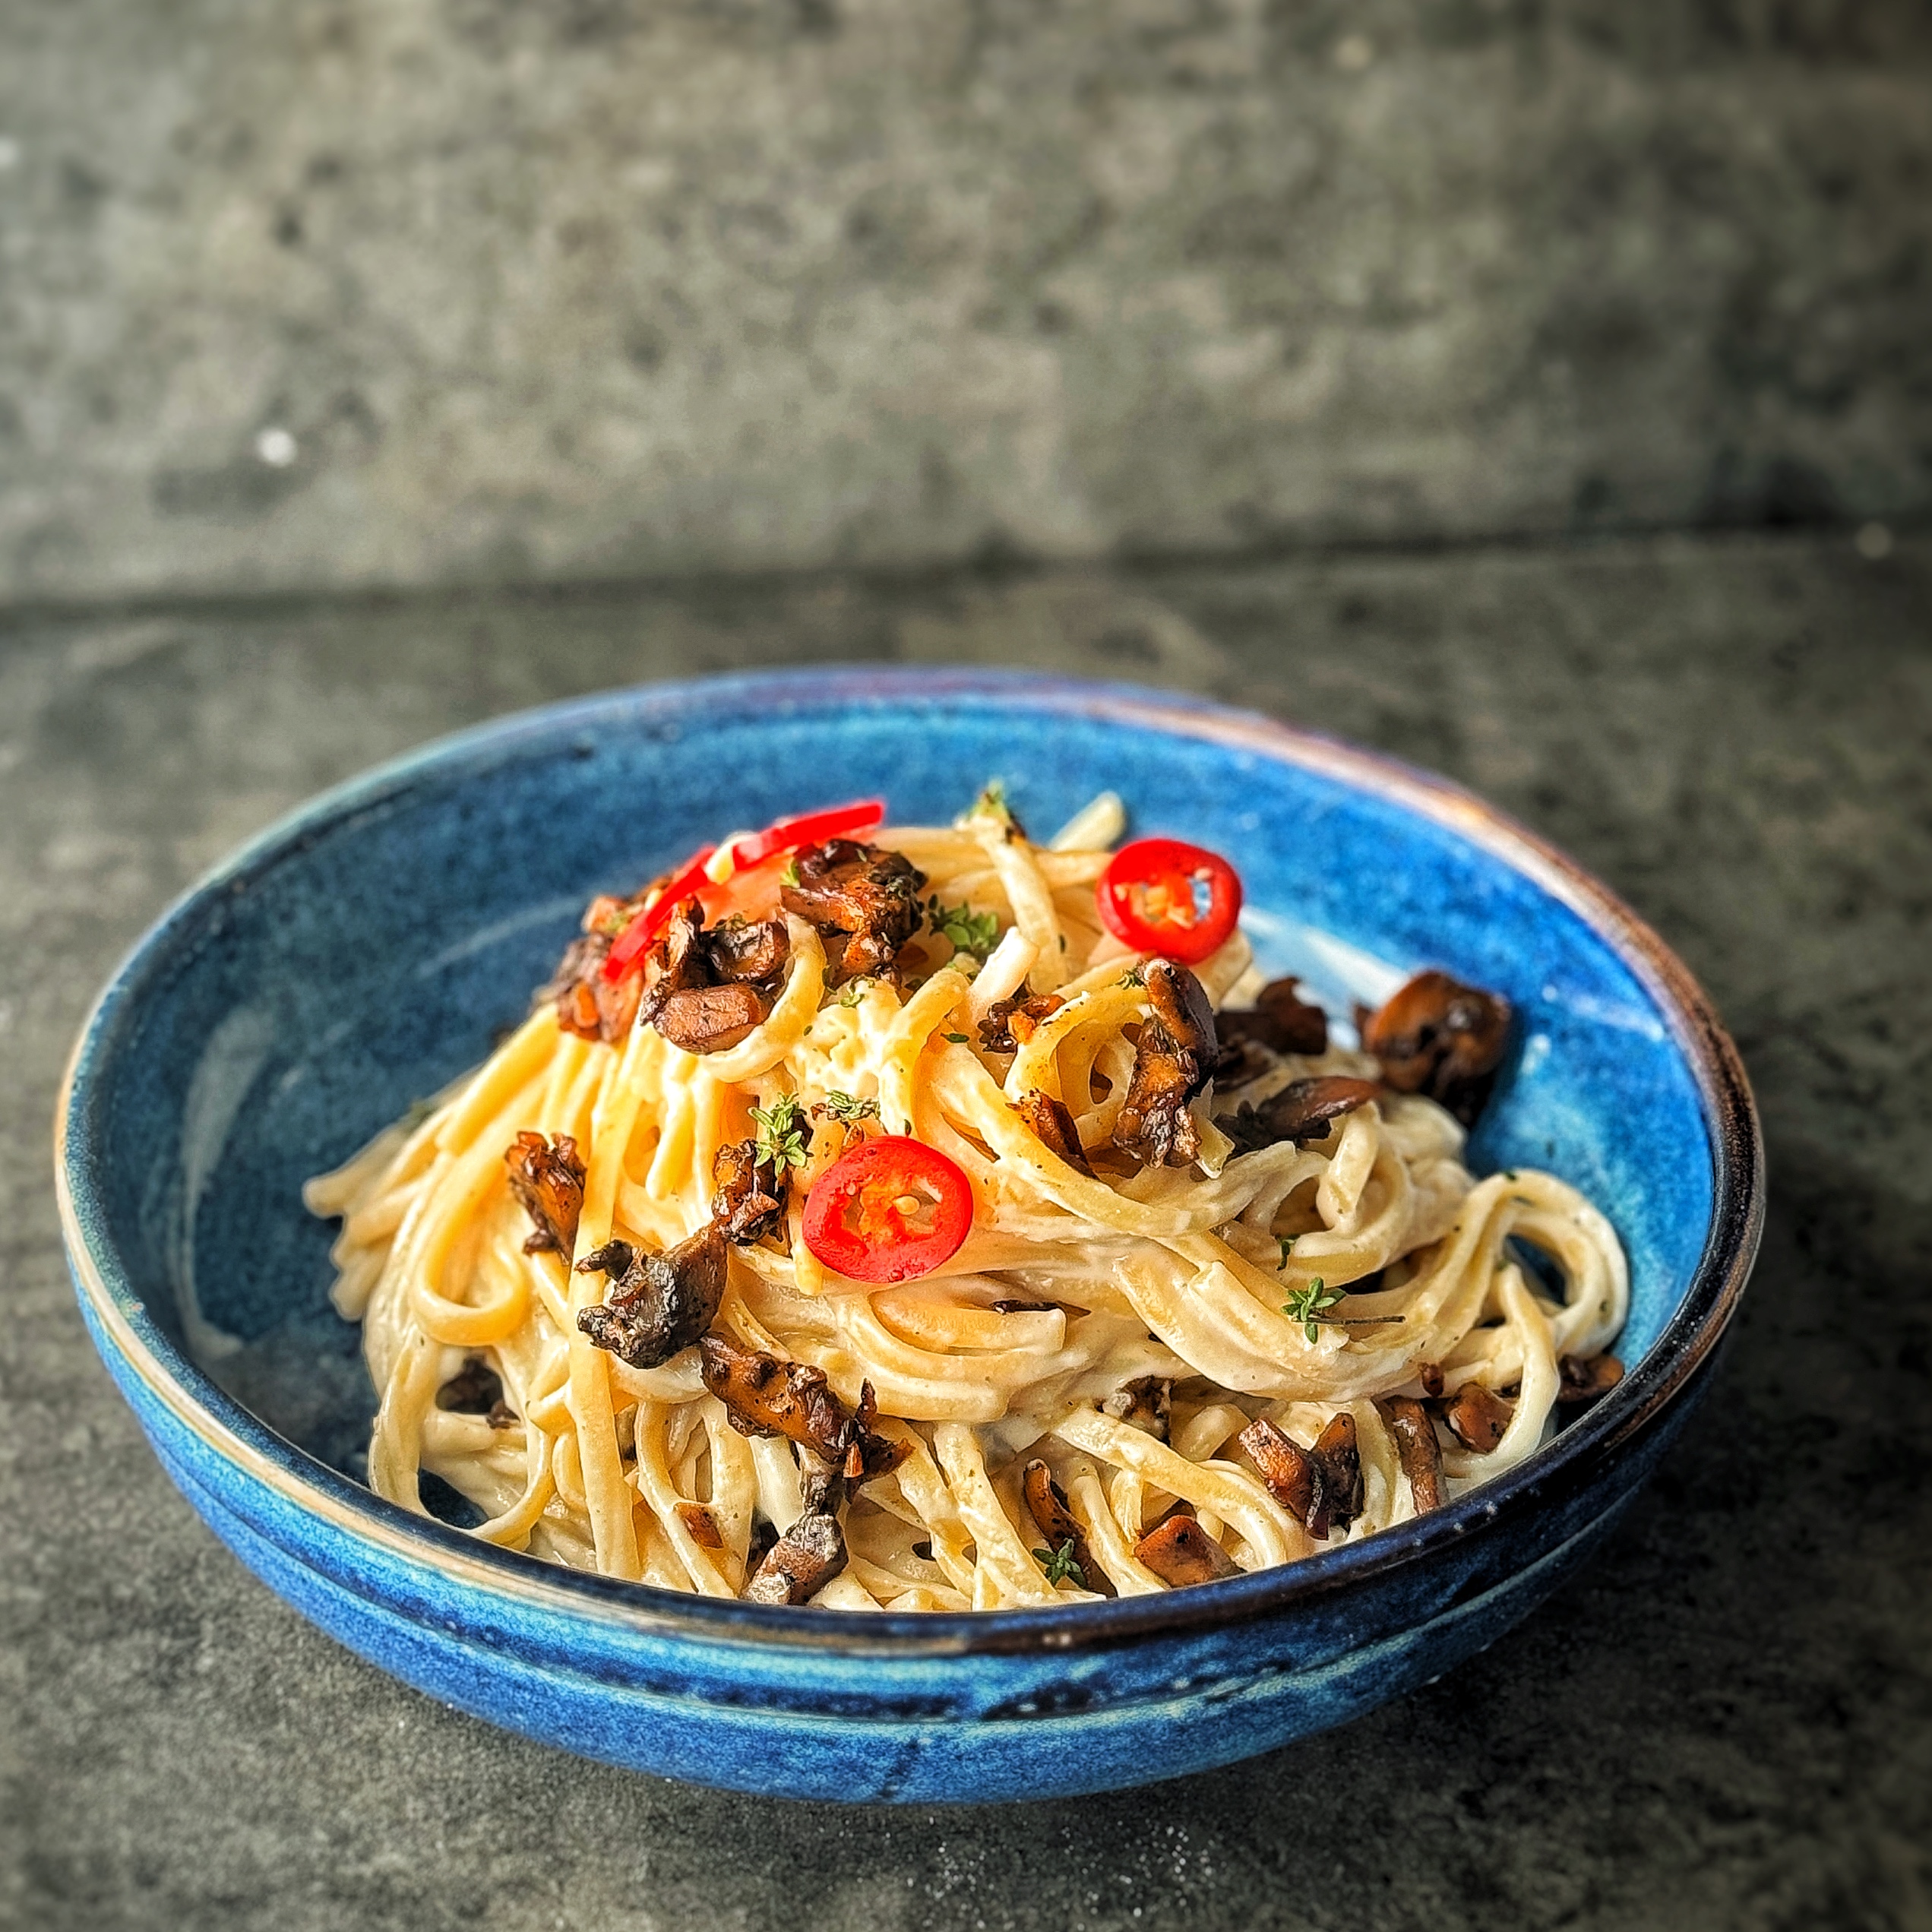
Creamy Mushroom Linguine
Takes 10 minutes
Serves 3
Ingredients
Ingredients:
For the Pasta:
- 250 g linguine pasta
- 250 g mushrooms of choice oyster, shiitake, chestnut suggested
- 1 large red onion about 200 g
- 2 cloves of garlic
- 2 tbsp tamari
For the Creamy Cashew Sauce:
- 100 g cashew nuts
- 500 ml plant milk of choice
- Juice of ½ a lemon
- 1 tsp garlic powder
- 2 tbsp nutritional yeast
- Salt and black pepper to taste
Optional Garnish:
- 1 fresh chilli seeds removed and sliced finely
- 3 sprigs of fresh oregano or thyme leaves removed from the stalk
Instructions
- Instructions:
- Prepare the Cashews: Place the cashew nuts in a small pot and cover with boiling water. Simmer gently for 5-10 minutes, then drain and rinse.
- Cook the Pasta: Fill a large saucepan with boiling water and add 1 tbsp of salt. Add your pasta and cook according to package instructions.
- Prepare the Vegetables: Peel and finely slice the onion and garlic. Finely chop the mushrooms.
- Cook the Onion and Mushrooms: Heat a large wide bottom pan over high heat. Add 1 tbsp of oil (or a few sprays of oil), followed by the onions and ½ tsp of salt. Reduce the heat to medium and cook for 4-5 minutes stirring until the onions brown slightly. Stir occasionally. Add the chopped mushrooms and garlic and cook for another 4-5 minutes. Stir in the tamari, cook for an additional minute, then turn off the heat.
- Prepare the Cashew Sauce: While the mushrooms are cooking, make the cashew sauce. Add the drained and rinsed cashew nuts and the rest of the sauce ingredients to a blender or food processor. Blend at high speed until smooth. Add the creamy cashew sauce to the pan, then turn the heat to medium. Cook for 1-2 minutes, stirring continuously, to allow the sauce to thicken.
- Combine the Pasta, Sauce & Mushrooms: Drain the cooked pasta, reserving some pasta water. Mix the pasta into the sauce, making sure the pasta is well coated. If the sauce is too thick, add reserved pasta water until you reach your desired creamy texture. If it is too watery, cook for a few minutes stirring constantly to avoid sticking. Taste and adjust seasoning with salt and black pepper as needed. Add the mushrooms and mix through.
- Garnish and Serve: Optionally, garnish with finely sliced fresh red chilli and/or fresh oregano or thyme. Serve hot and enjoy your creamy, comforting pasta!

‘Happier’ With Dave Flynn
‘Happier’
Feeling Enough

As I watch Fia, my 7-month-old daughter, contentedly exploring a simple wooden toy in the soft glow of the morning sun that filters through her nursery window, a thought dawns on me. She exists in a state of pure contentment, feeling ‘enough’ without any effort. This makes me question: at what point do we adults lose that sense of intrinsic value and start believing we must achieve something to be ‘enough’? And what does enough mean – to you, to me and to the world?
These reflections about ‘feeling enough’ have been niggling me for weeks, probing at the notion of ‘feeling enough.’ Am I trying to prove my worthiness in order to feel enough? Is this what is driving me? Is it a deep-rooted insecurity, a need to prove I’m worthy of love? Perhaps it’s tied to my own personal experience, especially the unique dynamic of competing for my mother’s attention as an identical twin.
In this weeks Happier Column, I want to invite you on an inner journey with me, together exploring
- Worthiness
- Being enough is not something we earn but something we are
- Comparisons
- Making our worth more intrinsic
Unpacking our drive for worthiness
The notion of ‘enough’ is something that often seems just out of reach, a destination we arrive at only after ticking off a list of achievements. We often see worthiness as an award for success, thinking, ‘Once I’m successful, then I’ll be enough.’ Despite an inner awareness that our worth isn’t dependent on external achievements, we’re still driven by something. Why do we fall victim to the notion that we must accomplish certain goals, whether it’s a fit body, a certain income, or luxury possessions?
Rationally I know that feeling ‘enough’ isn’t about ticking off boxes on a checklist of societal expectations. I know it has much more to do with my internal world and so much less about the external. Yet here I am, a 44 year old man, reflecting on this ever-present conflict inside me.

Being enough is not something we earn, it is something we are.
How do we seed the idea into society that being enough is not something we earn but something we are? How do you and I embody this and start to live more from this point of view? In my experience, adult life seems to be fueled by striving to feel enough via achievements and accolades. I reflect upon getting older, my hair greying and getting thinner, my skin getting more lines and I have threads of worry about the effects this will have, will I be enough as these continue?
In some moments, I also have doubts about my work and generating financial stability for my family, and the list goes on.. I don’t think I am alone in this? I believe these types of insecurities are not unique to me; they are likely just part of the shared human experience. I think this realisation brings an awareness that we all have to deal with not feeling good enough at times, and overcoming this feeling likely starts with remembering that you are enough – just the way you are. A feeling that is not dependent on what you do or how you look, it is fundamentally a part of who you are.
Comparison, the thief of joy
Sometimes I think it might have been simpler to feel ‘enough’ a century ago, before the internet and the age of social media, where success wasn’t gauged by Instagram likes or TikTok views. While comparison isn’t new to human culture, social media amplifies it immensely. It’s all too easy to compare our inner world to someone else’s curated external world, leading to envy and eroding our sense of self-worth.
Speaking from experience, as part of The Happy Pear’s significant online presence, I’ve felt both the perks and pressures of social visibility, which often go unnoticed by others.
A few years back, I decided to take control of my relationship with social media. Instead of mindless scrolling and battling feelings of inadequacy, I now approach social platforms with intention. I don’t scroll on my phone, I post when I need to. When I choose to engage, I do so from my laptop, which I find much less enticing than my phone. This small change has made a big difference in preserving my sense of ‘enoughness.’
Reprogramming our worth to make it more intrinsic
I’m convinced that to shift our sense of worth from external accolades to our inner qualities, we need to embrace mindfulness. Being present helps me discern whether my decisions stem from fear or confidence. It’s about pausing to question, “Is this choice driven by fear, or is it rooted in self-trust and trust in life?” I’ve frequently caught myself in the ‘busy fool’ cycle, tirelessly toiling in the name of efficiency, only to later realise I was focused on the wrong tasks!
As kids, we naturally felt secure and didn’t worry about our worth, just like baby Fia. But as we grow up, we start to think our value comes from what we do, what we have, and what others think of us. To find that deep, unshakable sense of self-worth again, I believe that we need to learn to trust life’s flow and have faith in ourselves, just like when we were young and the world seemed so much simpler.
In life, learning to trust and have faith can make all the difference. I’ve found that the more I try to control everything around me, the more stressed I become. Real worth and happiness come from feeling content on the inside, no matter what’s happening outside. It’s a personal journey that starts with letting go. When I trust that things will work out and have faith in my own ability to handle whatever comes my way, I feel a sense of inner peace. Last week, while preparing to photograph a new book, I faced an overwhelming array of dishes that needed to be cooked for the shoot. On Monday morning, I felt swamped, my mind echoing doubts that it was impossible to finish in time. However, I soon made a conscious decision to accept the situation. I surrendered to the moment, focusing on cooking one dish at a time and not surprisingly, we managed to get through it all!
To me, this isn’t about giving up; it’s about accepting that I am enough as I am, and that’s where my true strength lies.

Reflecting on our intrinsic worth is a journey we all share, and I’ve opened up about mine in hopes of sparking a wider dialogue. Now, it’s your turn to add to this collective exploration. In the comments, I’d love to hear your thoughts and stories. How do you resist the pull of external validation to find contentment within? What daily practices keep you grounded in the belief that you are already enough? Your contributions are not just welcome—they’re essential. Let’s start a conversation that reminds us all of the beauty and strength that come from simply being ourselves. Share your voice, your insights, and let’s navigate this path together.
Next week’s column will be about self worth and the practices that I do to cultivate this. Have a lovely week 🙂


